MANAGE QUOTE CATEGORIES & QUOTES
Add popular quotes under multiple categories to let the customers easily find and use quotes in their designs.
Backend Configuration
Manage Quote Categories
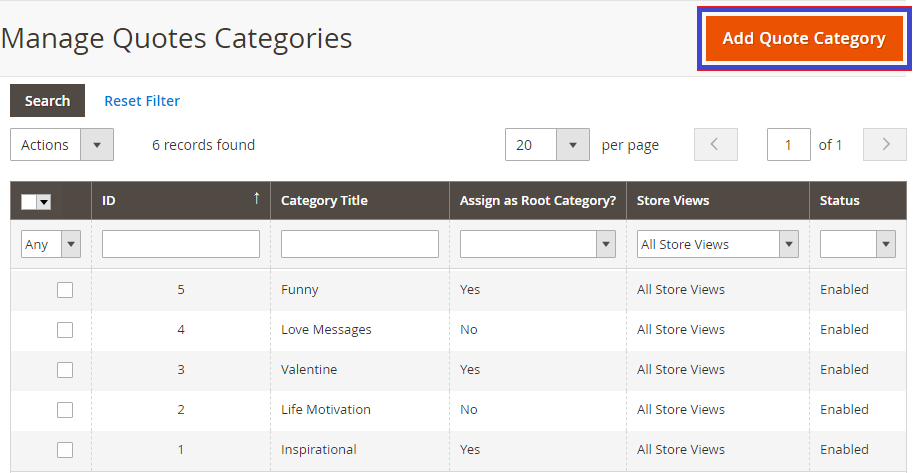
First, insert and manage the Quote Categories from the Magento backend: Product Designer -> Manage Quote Categories.
By clicking on it, you can view a list of “Quote Categories” along with its details like quote category id, category title, whether it is a root category or not, on which stores it will be displayed and default status of quote category.
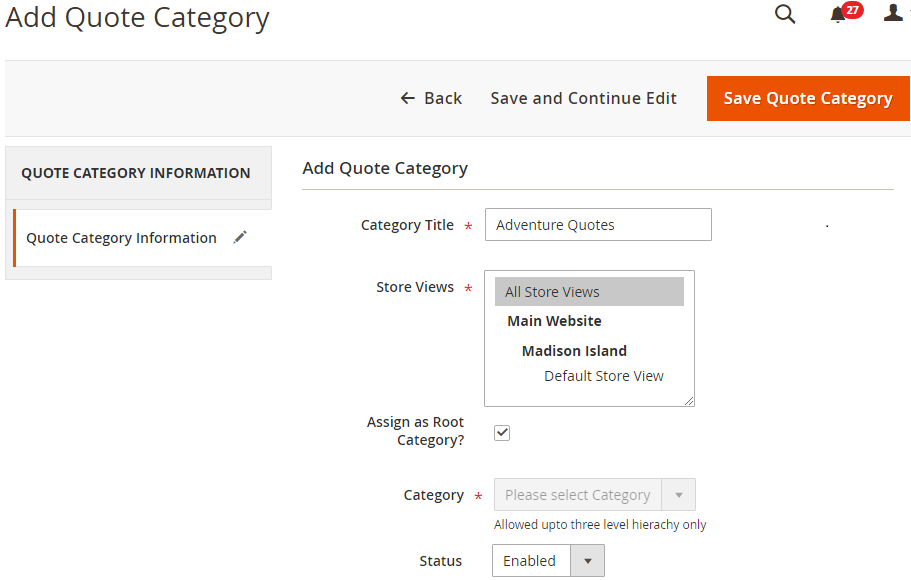
Clicking on Add Quote Category button, you will be redirected to the ‘Add Quote Category’ page.
Add the following details to configure a ‘Quote Categories’:
Category Title: Enter the title for the quote’s category.
Store Views: Select the stores in which the categories will be displayed from the Store Views list.
Assign as Root Category? : To assign the category as the Root Category (Main Category) ‘tick’ the Assign as Root Category checkbox.
Note: By checking this option, you won’t be able to select any parent category for it as it will be the root category. And if you haven’t checked the ‘assign as root category’, you can select a root category from the Category dropdown option.
Status: Select the status of category from the Status dropdown: Enable or Disable.
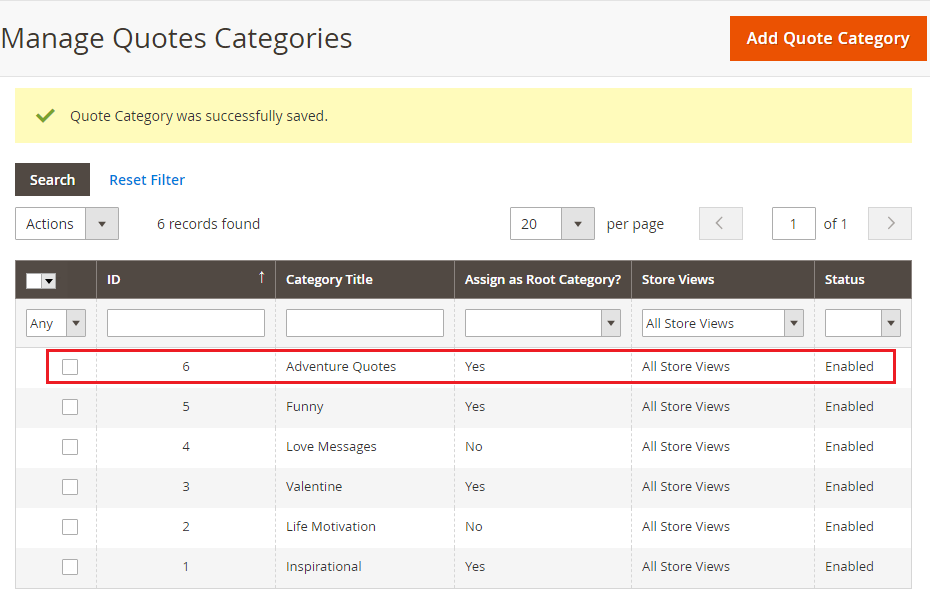
After configuring the details, click on the Save Quote Category button. Thereafter new Quote Category will be added in the list of categories.
Later, you can edit any Category by clicking on it and to delete any category, select the category first and then select the Delete from ‘Actions’ dropdown and click on the ‘Submit’ button.
Manage Quotes
Now after inserting and configuring the Quote Category, you can add Quotes by selecting relevant Categories.
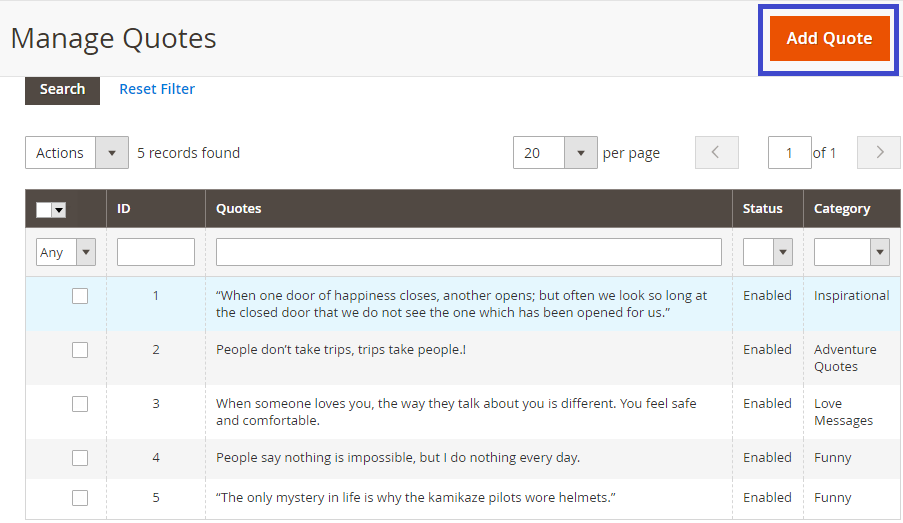
To manage quotes, go to Product Designer -> Manage Quotes.
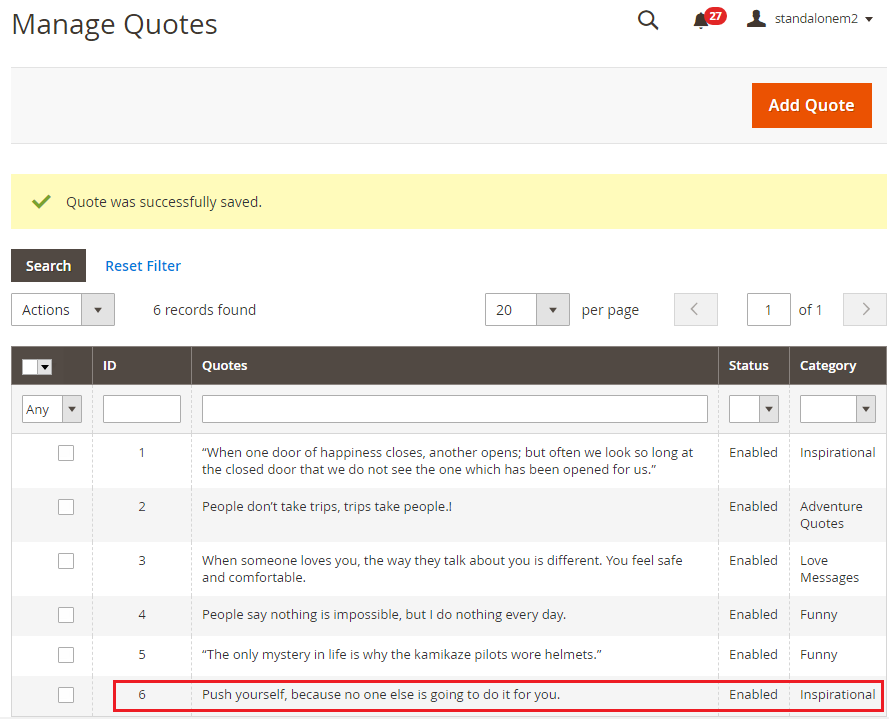
By clicking on it you can view a list of quotes along with details like ID, quotes, default status and quote category.
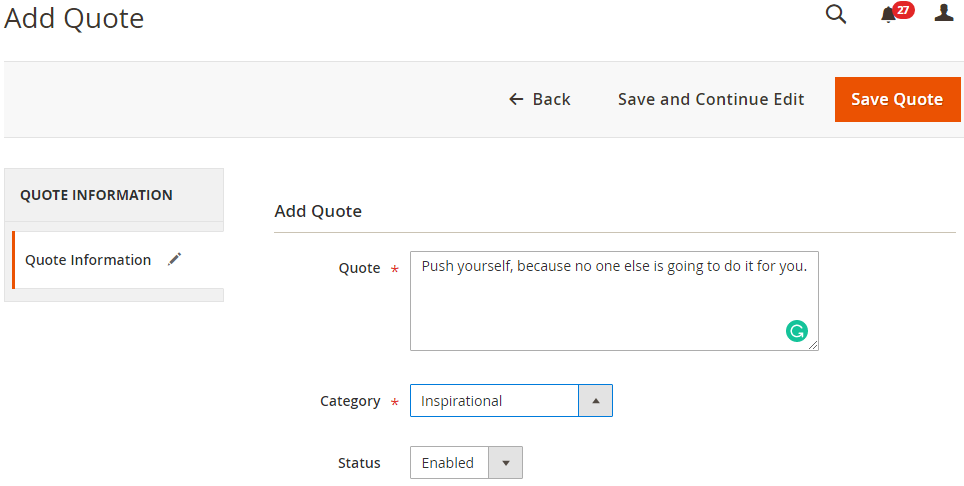
Click on Add Quote button, you will be redirected to the ‘Add Quote’ page.
Now, Add the following details:
Quote: Enter the text of quote in the ‘Quote’ text field.
Category: Select the category under which quote is to be added from the ‘Category’ dropdown list.
Status: Select the status of Quote from ‘Status’ dropdown: Enable or Disable.
After inserting the text of the quote, click on the Save Quote button. Thereafter new Quote will be added in the list of Quotes.
Later, you can edit any Quote by clicking on it and to delete any Quote, select that Quote first and then select the Delete from ‘Actions’ dropdown and click on ‘Submit’ button.
Product Level Configurations
You can select the ‘Default Category’ as per the product level also.
For that:
-> Click on the product for which you want to select the default category.
-> Scroll down to the ‘Product Designer’ option.
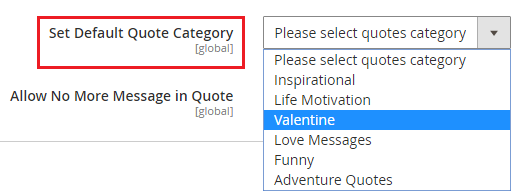
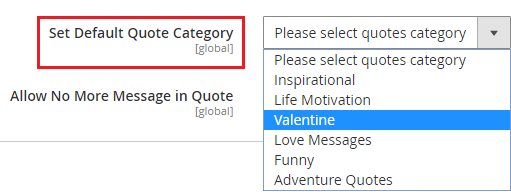
-> Select your default category from the ‘Set Default Quote Category’ dropdown option.
If you select the default category from the Product option, it will be appeared as per that selection else as per the selection in Stores -> Configuration
Enable the Quotes tab: You must enable the Quotes tab to display on the Designer Tool.
For that:
CATALOG -> Products -> Edit the Product
-> Scroll down and find the Product Designer option.
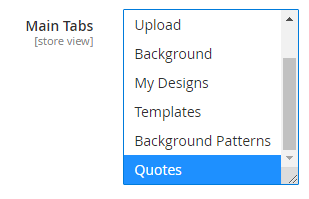
-> Select the ‘Quotes’ tab in Main Tabs option.
The Quotes will appear on the Product Designer Explorer tab (left panel).
Enable No Message option
To remove the selected Quotes from the Design Area, enable the “Allow No More Message in Quote” option:
CATALOG -> Products
-> Edit that Product for which you want to provide the ‘No Message’ option.
-> Find the ‘Product Designer’ option by scrolling down.
-> Enable the Allow No More Message in Quote option.
Frontend View
Once quote categories and quotes have been configured and managed from the backend, it can easily be viewed from the product designer page in the frontend.
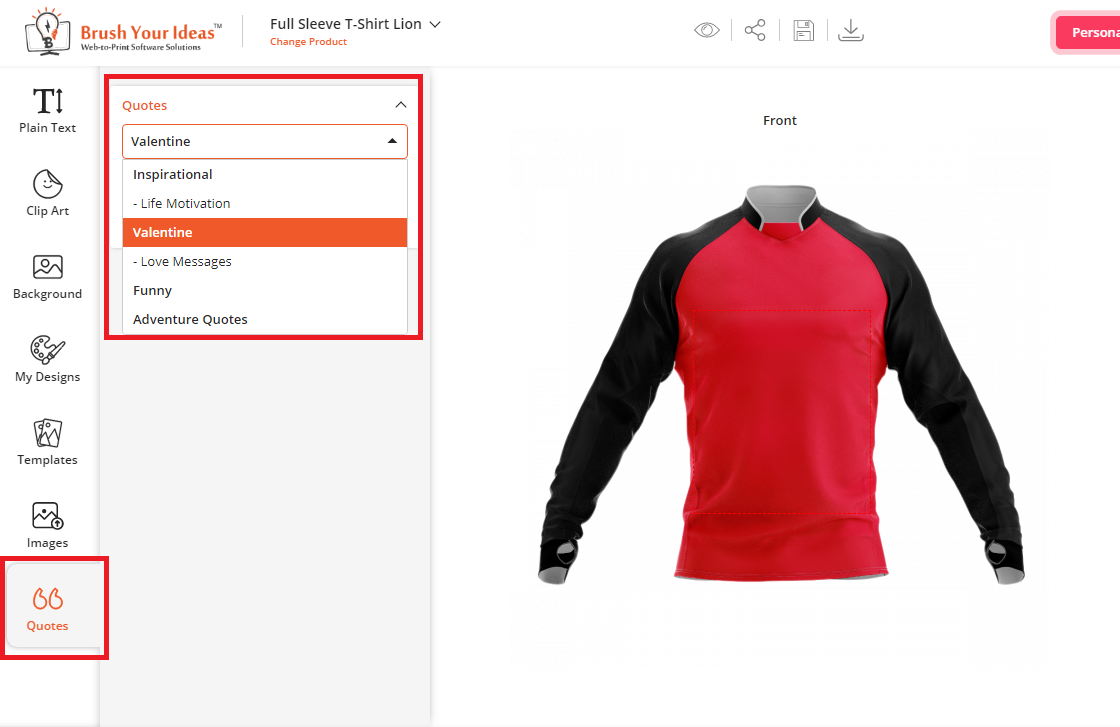
“Quotes” tab will appear in the Designer Explorer (left panel), by clicking on it, the Quotes sub-tab will be displayed as per the selection of ‘Default Quote Category’ from Stores -> Configuration.
As per the selection of the Category, the list of quotes will be displayed belong to that category.
As you clicked on the dropdown of the ‘Category’ name, the list of Quotes Categories with their subcategory will appear.
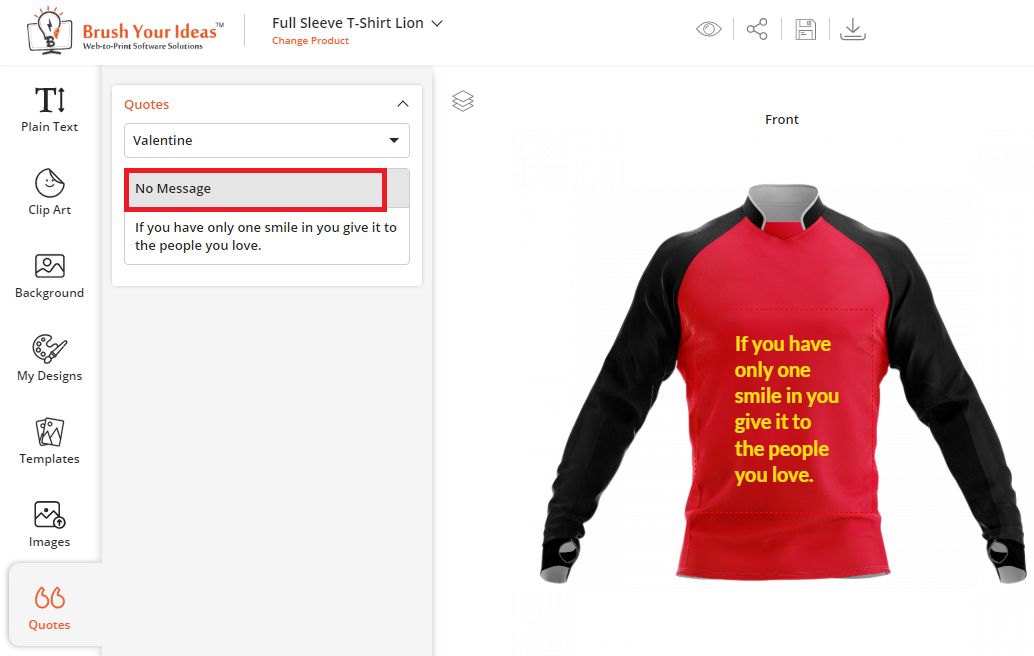
Thereafter by clicking on the predefined quote, it will be added on the product design and Quote will be placed in the ‘Plain Text’ sub-tab. Customers can also edit the quote as per their design.
Customers can remove the added Quotes from the designing area by clicking on No Message caption from the “Quotes” tab.
This can be configured from the backend at the product level.
Note: Customer can add only one quote per single design area (canvas). Adding more than one Quote on a single canvas will replace the current quote.
