


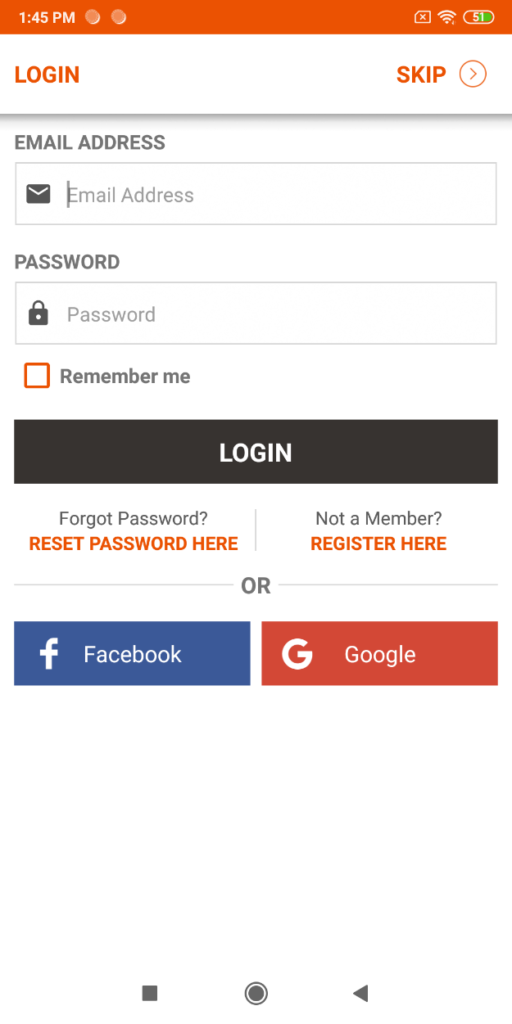
Login
Mobile to Print App (Magemob App Builder) allows you to login with a registered email id and password. The other way is to log in with social media accounts like Facebook and Google. On that page, you need to enter the credentials of an existing social media account.
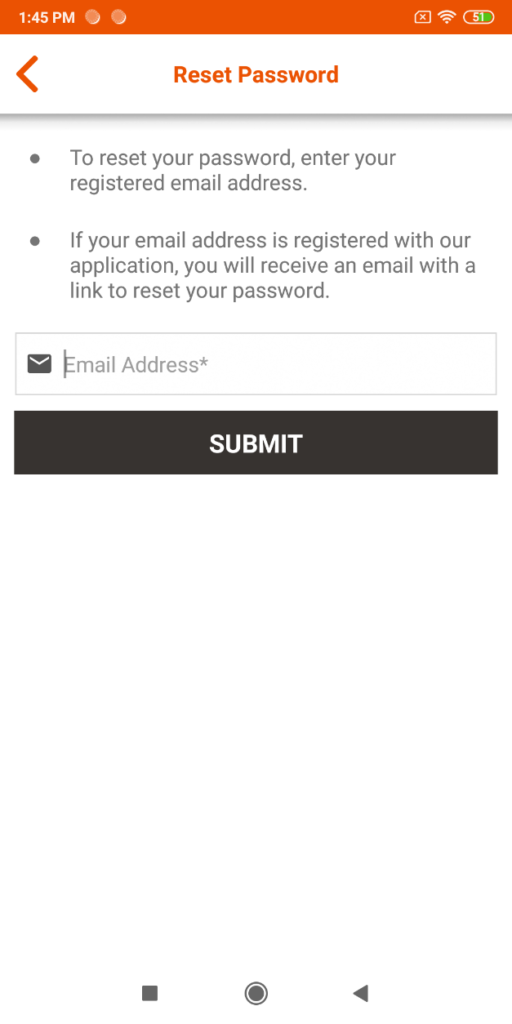
If you misplace or forget your password, click on the “Reset Password Here” link, and thus you can change your password.
It also offers the guest user’s feature without registering themselves by clicking on the “Skip” button.
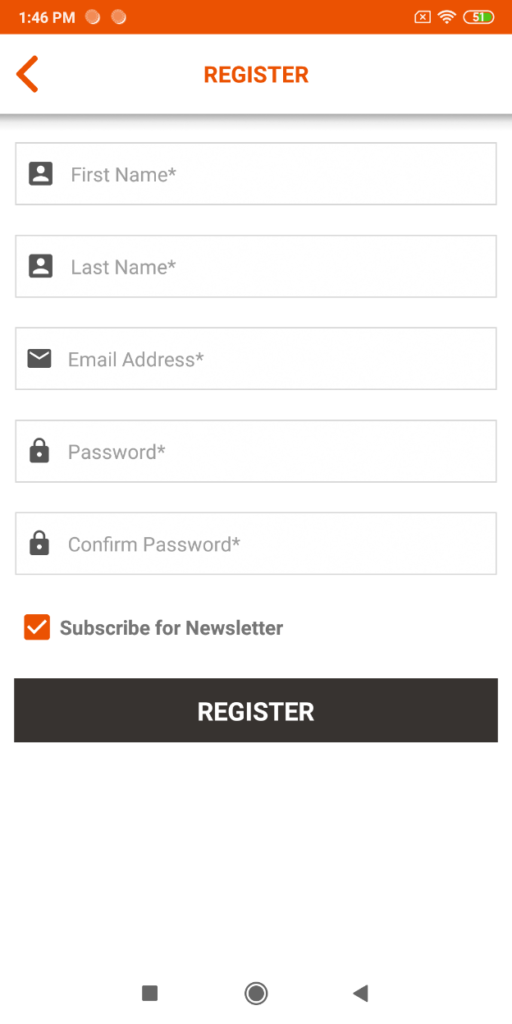
Registration
If your account is not registered, you can directly register yourself on the store by clicking on the “Register Here” link. You need to enter the primary details like First Name, Last Name, Email address, and Password for successful registration.
You can also subscribe to the newsletter; by clicking, you will get notifications of upcoming offers via mail or receive any critical news on the registered email ID.
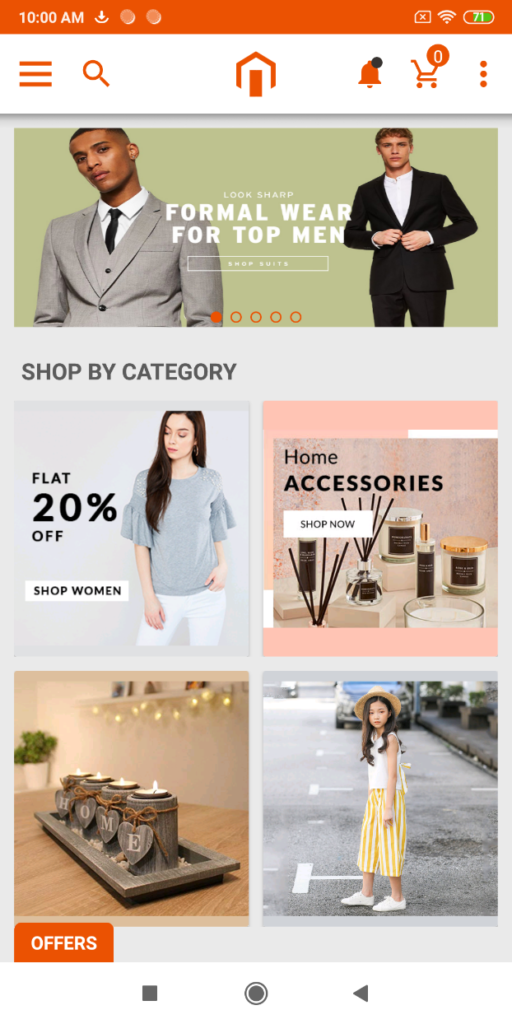
Home
Access all critical shortcuts from the home screen like offers, shop by category, Bestseller Products, etc. To view the cart’s added items and view the notifications by clicking on the notification icon. Admins can easily manage the banner slider, offer slider, best seller product, and category block from the backend.
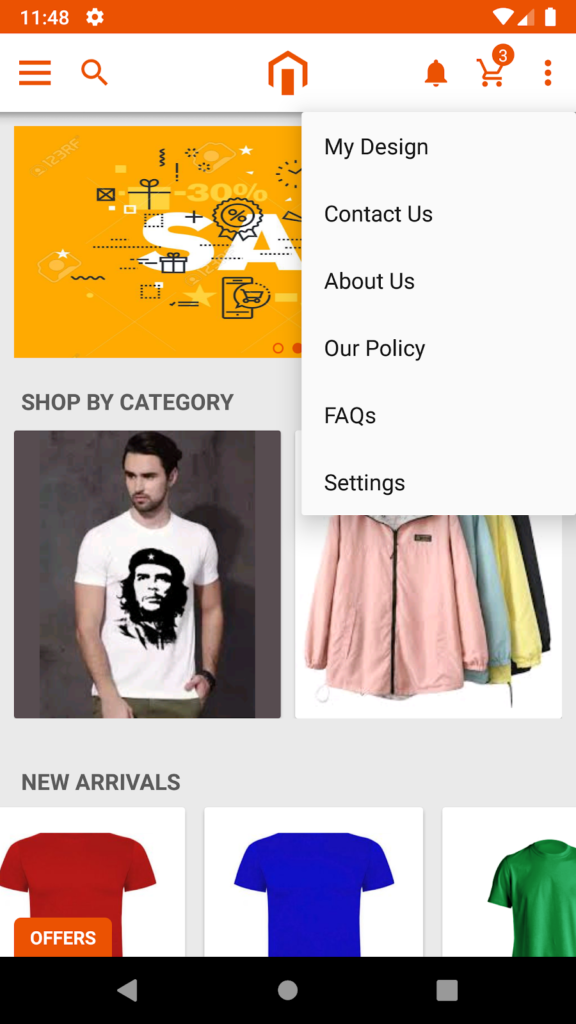
You can also find informative pages like about us, Contact Us, FAQs, Our Policy, and settings page as configured from the backend.
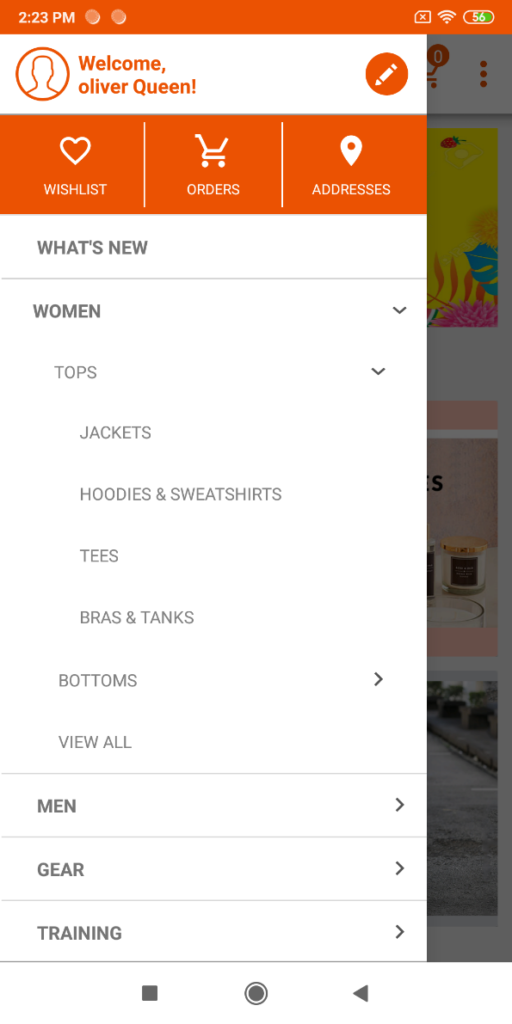
Category Memory
Get easy access to different product categories as configured from the backend.
Logged-in users can also have easy access to the wishlist, saved addresses, and created orders.
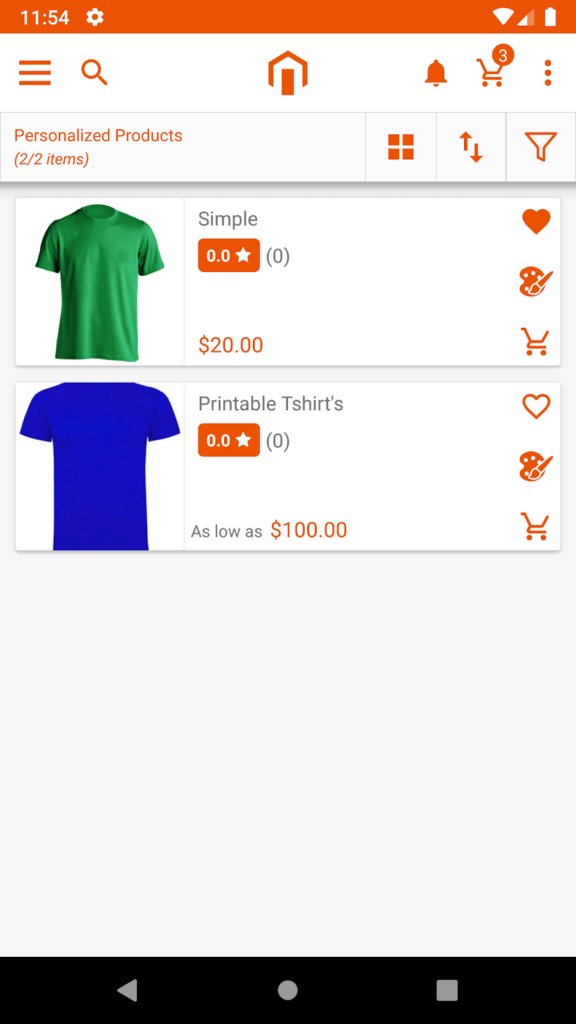
Products Listing Page
The products listing page consists of a product list with product name, price, description, and ratings. By applying filters, you can sort the product with low to high prices and various options like category, color, size, etc.
To view the product, tap on the product. With the icons on the right side, the user can move on to design the product or add the product to the wishlist or cart.
The products can be shown in the list as well as the grid view. Admins can manage the product details as per the requirement.
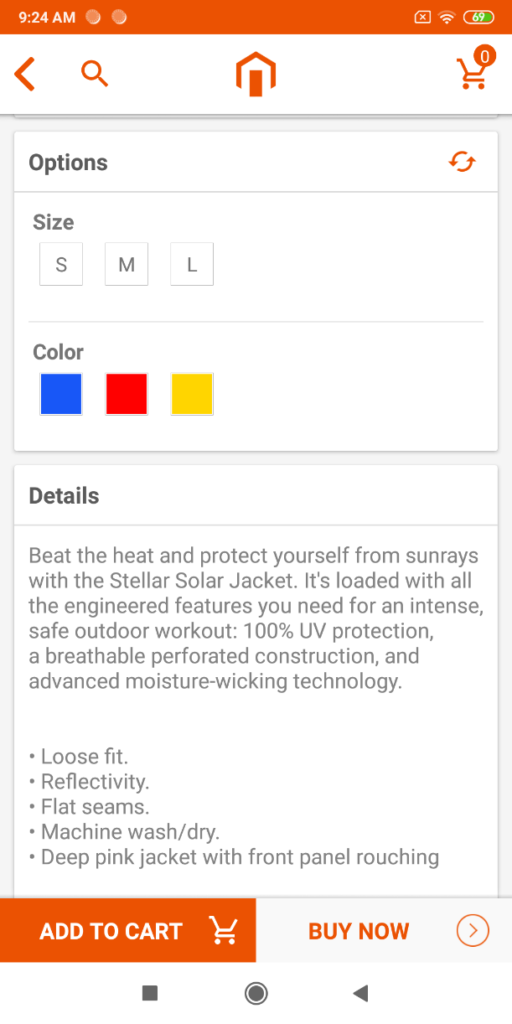
Products Details Page
As someone taps on the product from the product listing page, it will redirect the user to the product details page. The user will get a detailed description of the product, color, size, available quantity, reviews, ratings, and buttons to add the product to the cart or buy now to proceed checkout.
The user can also add the product to the wishlist and share it via different social media platforms. The user can also navigate to the PrintXpand designer tool to design the product.
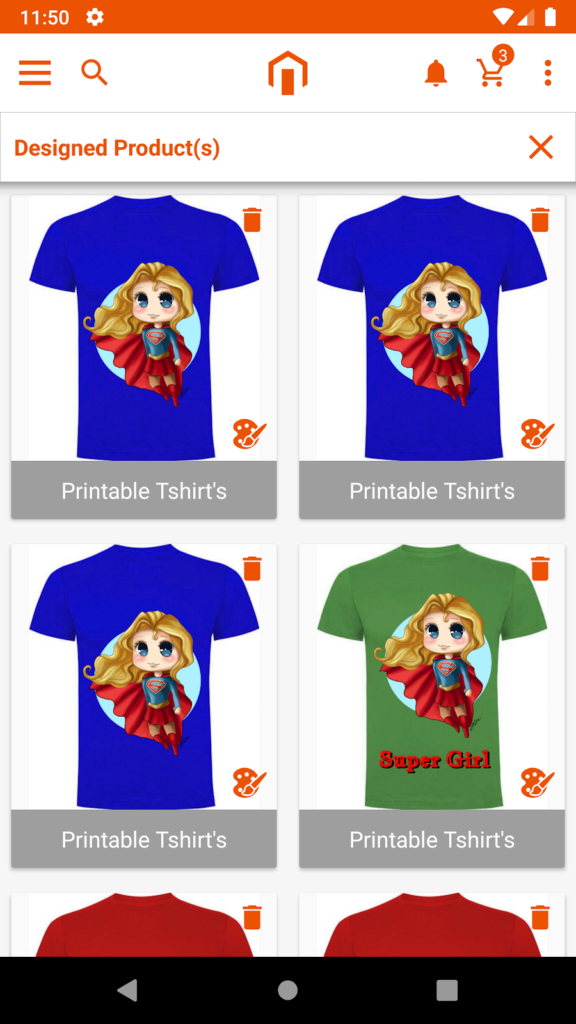
Product Designer Tool
As you click on the product designer icon, it will redirect you to the product designer tool. The user can use all the functionality and design the product that the admin has set for the back-end products.
Even the user can re-design the previously ordered products by selecting the “My Design” option from the dropdown in the top right corner of the app.

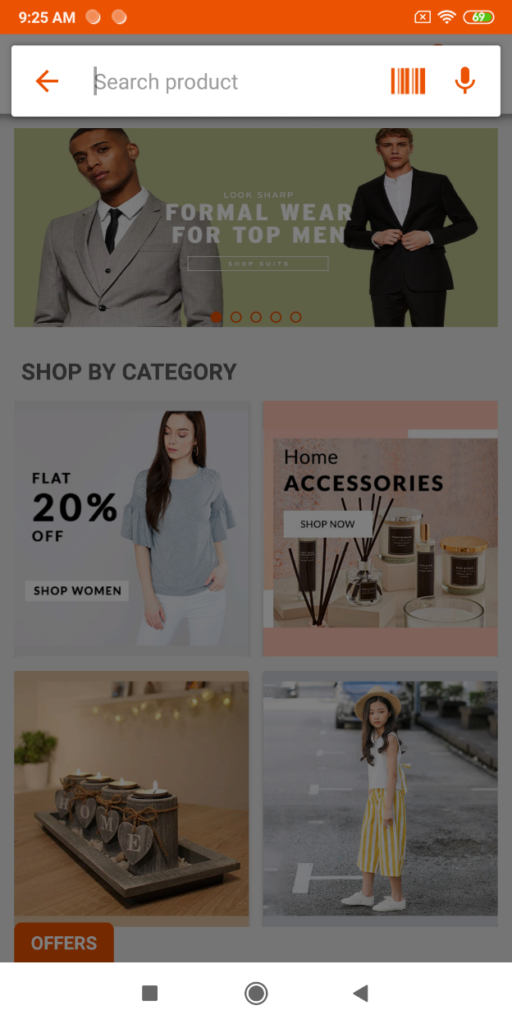
Search Page
The search page lets you find any product through product name or product SKU (Stock Keeping Unit) with the barcode. And the user even has the facility of voice search. (Android Users).
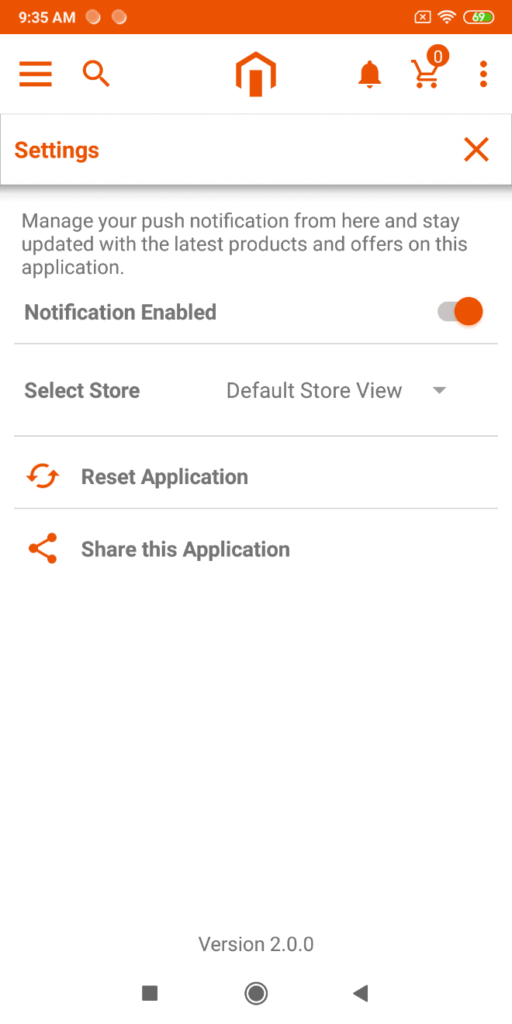
App Settings
The User can manage the Magento 2 store mobile application from here, switch between multiple stores, enable/disable notification and reset or shape application links.
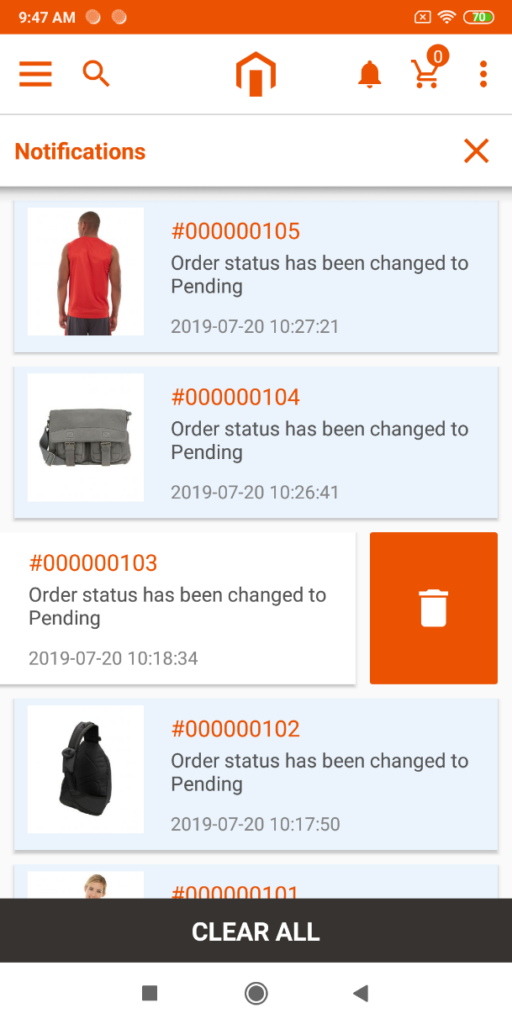
Notification Page
The user can view all the notifications as well from the notification bell. It can also be removed by the clear all button. On this page, the messages with the blue color are unread messages, and the user already opens the others.
By swiping left, it will show you the delete button to remove that particular notification.
Shopping Cart Page
This section of the page lets the user manage their items added in the cart to proceed with checkout. The user can manage the quantity, remove the product from the cart, and add the product to the wishlist to proceed with checkout.
Note: Note by adding the product to the wishlist, it will be removed from the cart.

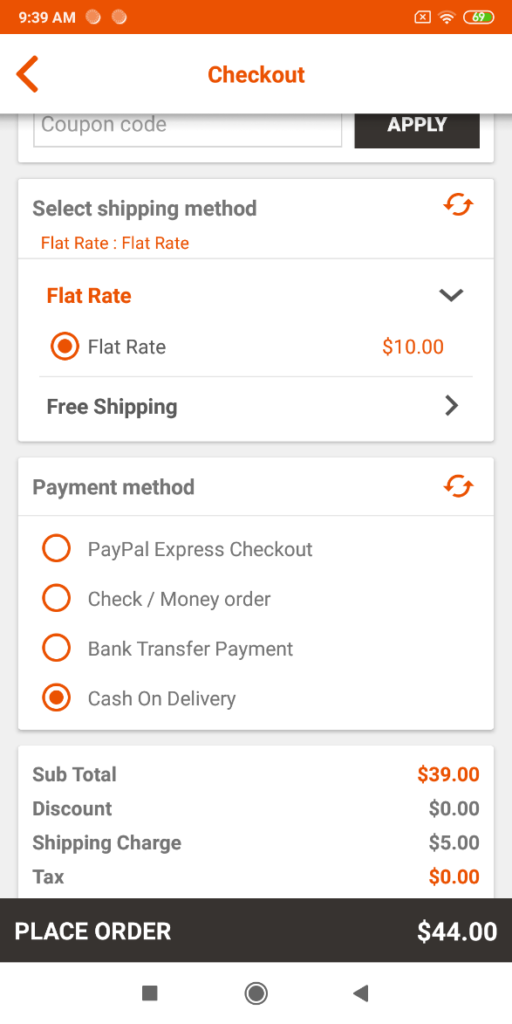
Checkout Page
Users can check out in just a couple of steps by adding the address if not previously added, apply coupon code, choose shipping methods, and payment methods.
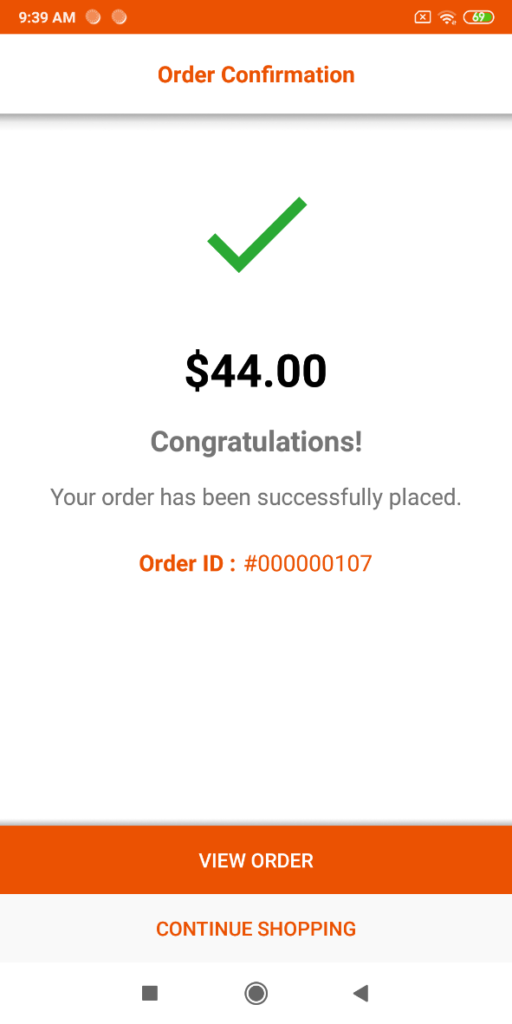
Order Confirmation Page
This page confirms the placed orders and provides an order ID number to track the order at the delivery time.
It also has the button to view the placed order and continue the shopping from the store.
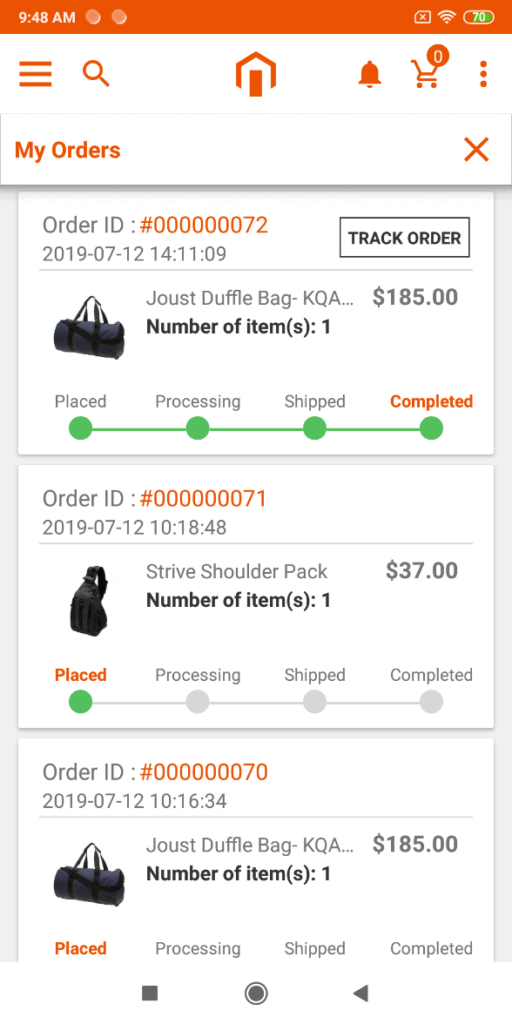
Track Order Listing
By clicking on the “View Order” button, the user will be redirected to the orders listing page, which displays the list of orders the user has placed and shipping status.
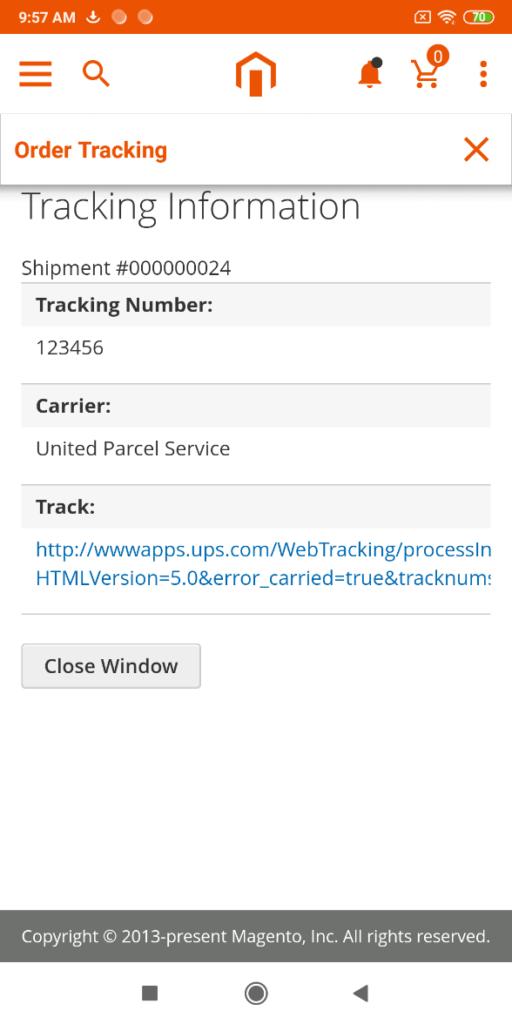
The user has the facility to track the orders; by tapping on the order, it will show details about the delivery and other information.
By tapping on the “Track Order” button, it will show the current status of the order.
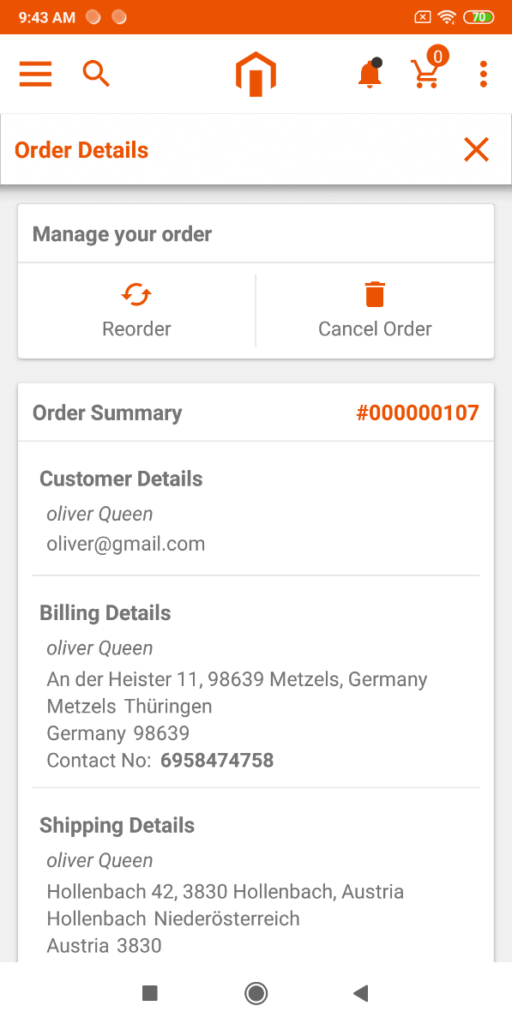
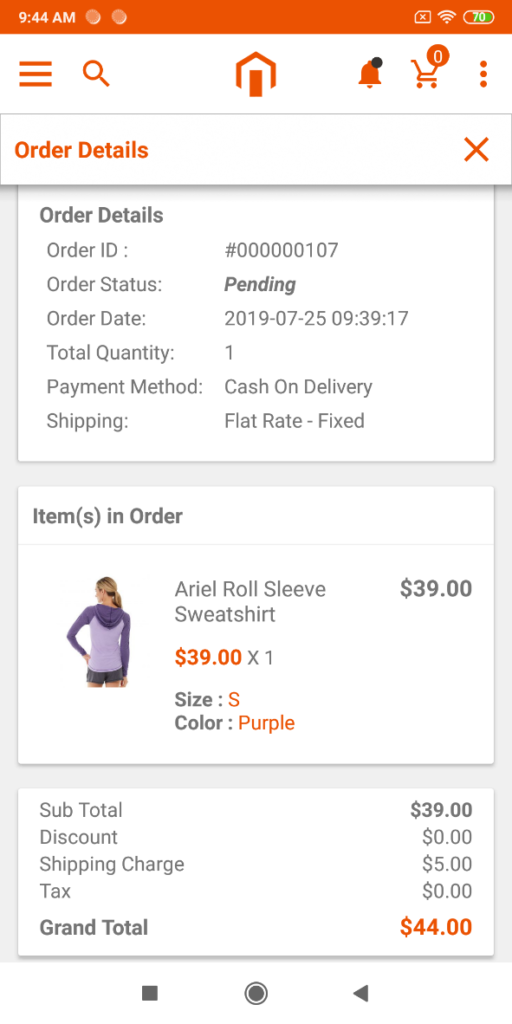
Order Details Page
By pressing any order on the order list page it will show details about that order like shopper details, billing address, order status, date, price, payment method, and much more.
It also lets the user cancel that order or reorder that order.
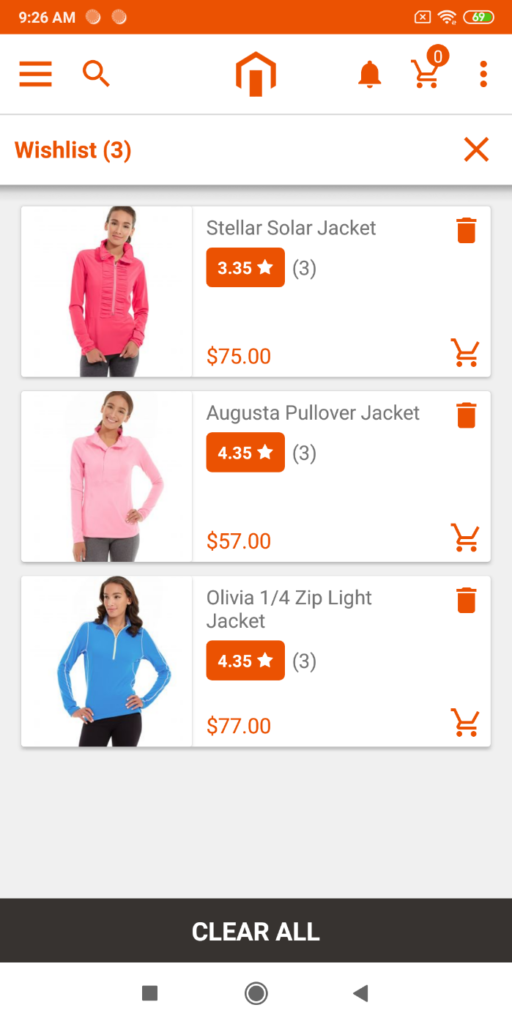
Wishlist Listing Screen
The user can easily manage a wishlist by adding or removing the product from it. It also comes up with the “Clear All” button to remove all products from the wishlist.
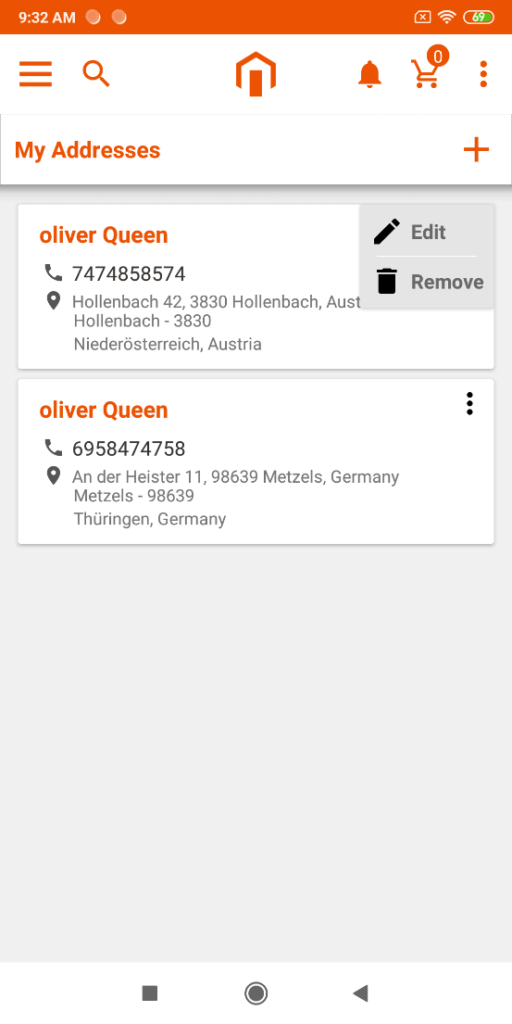
Address Page
The user has the ability to add the address to ship the order by clicking on the add button on the top right corner. Here you need to add address details like street, city, postal code, etc. The user can also manage the address by editing and removing the saved address.
The users can also find the address which you want to save on google map by placing a photo to that address. It will summon directly to the defined address.
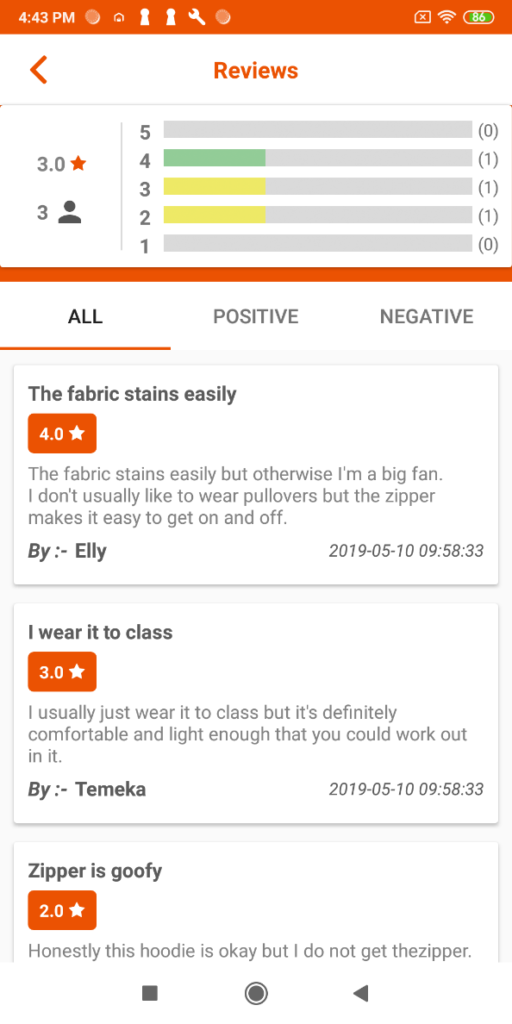
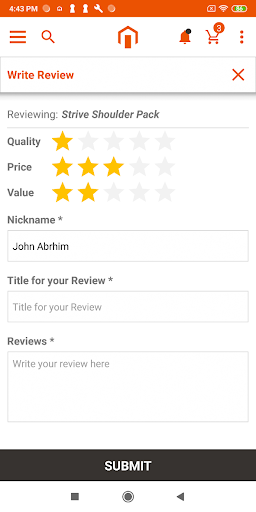
Review Page
This page will give the admin insights into the review of various customers for the product. It can be filtered by positive and negative options.
Users can give a review of the product for the price, value, and quantity of their received products.
Note: Products in all the modules of the Mobile to Print App will only be visible if they are assigned to the website selected while purchasing the extension.


