HOT FOLDER
Hot Folder is a cross-platform desktop application. You can download the Product design Images and details of placed orders through PrintXpand Designer tool. It is easy to create special folders on your system as per the destination folder of your choice. Once you configure the app it automatically fetches the new Product design Images from the e-store.
Prerequisites
It is important to enable PrintXpand tool in your e-store so that, customers can design the products as per the requirements.
To download and synchronize the product images with HotFolder, it is important that to make product designs with the PrintXpand Designer Tool only.
To synchronize or run the HotFolder application in your e-store, you must have an internet connection with higher bandwidth.
Store Configuration
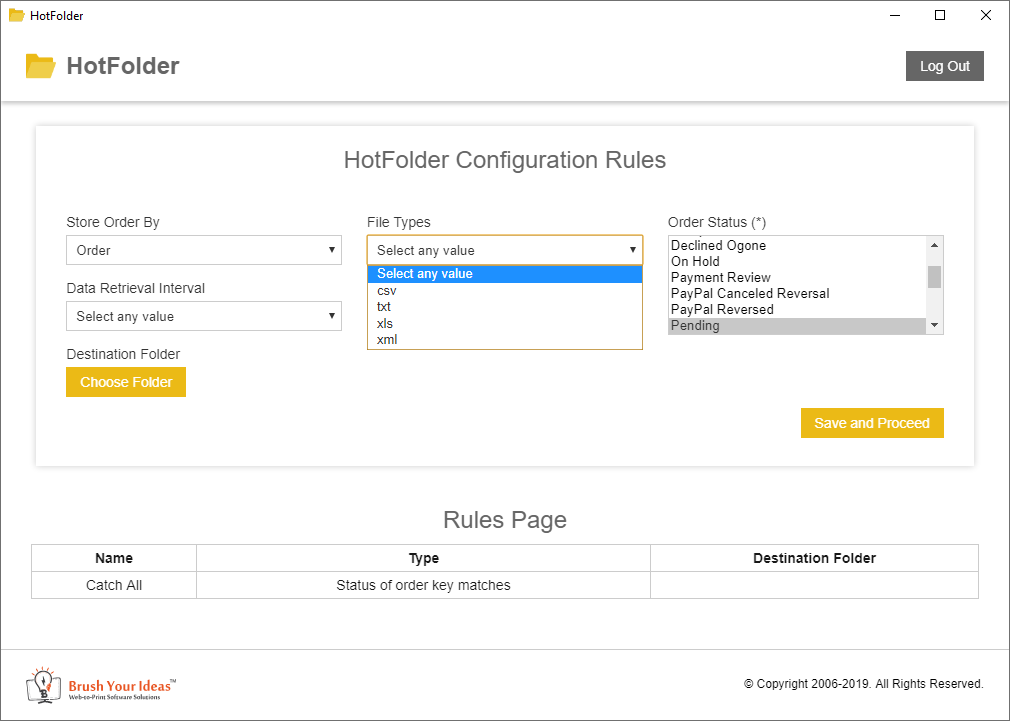
You need to select the specific file extensions to allow the users to download files from the HotFolder.
The users can download only those files that are selected here. After selecting the files, click on the Save Config button.
Note: If you have not selected any format, then the output will be generated in all the file types.
Authentication Module
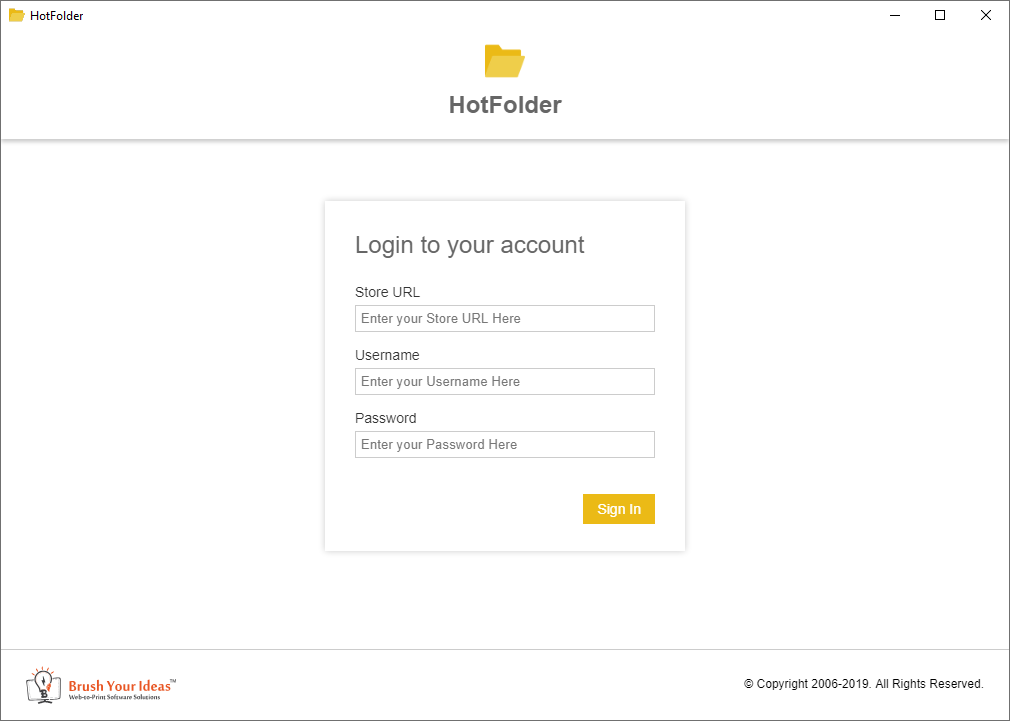
You can log in to your HotFolder account by filling in the required information.
To log in to your account, provide the following information:
– Store URL: Enter the URL of your e-store (e.g. https://www.PrintXpand.com).
– Username: Enter the Username of your Store Admin Panel.
– Password: Enter the Password of your Store Admin Panel.
Configuration Module
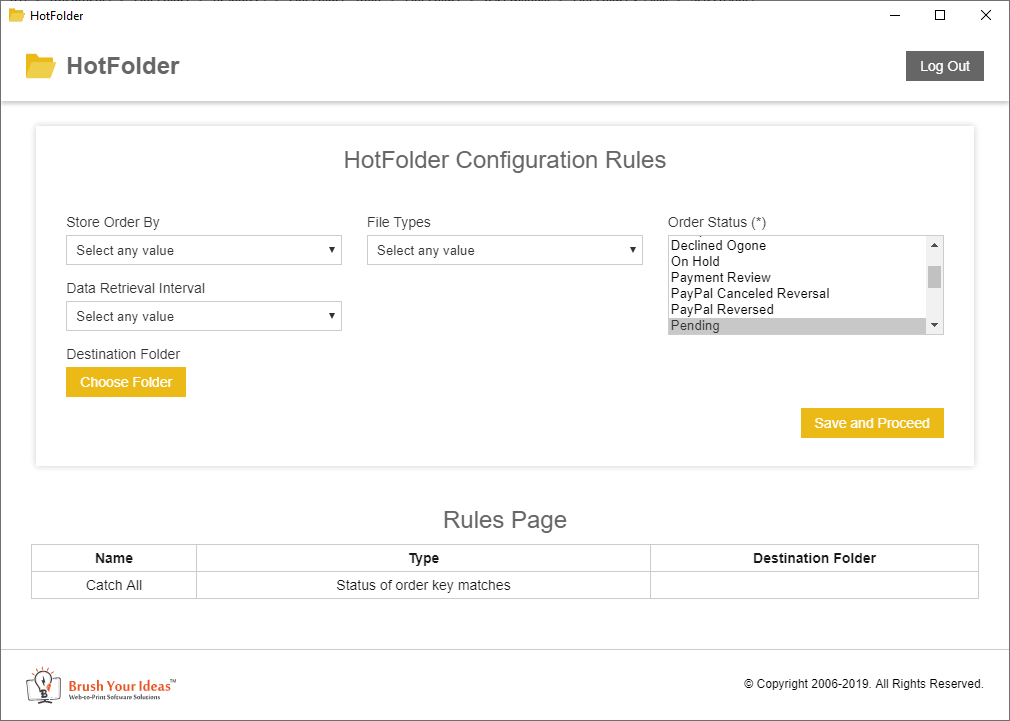
Once you have successfully authenticated/logged into your account, you will be navigated to the “HotFolder Configuration Module”.
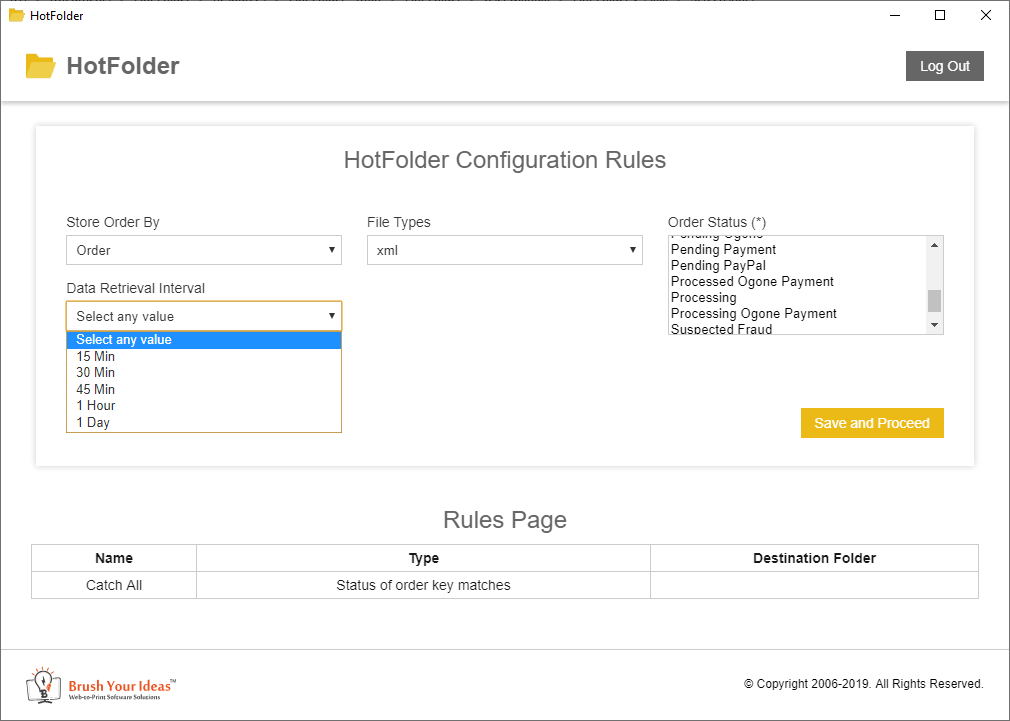
From here you can manage the following fields:
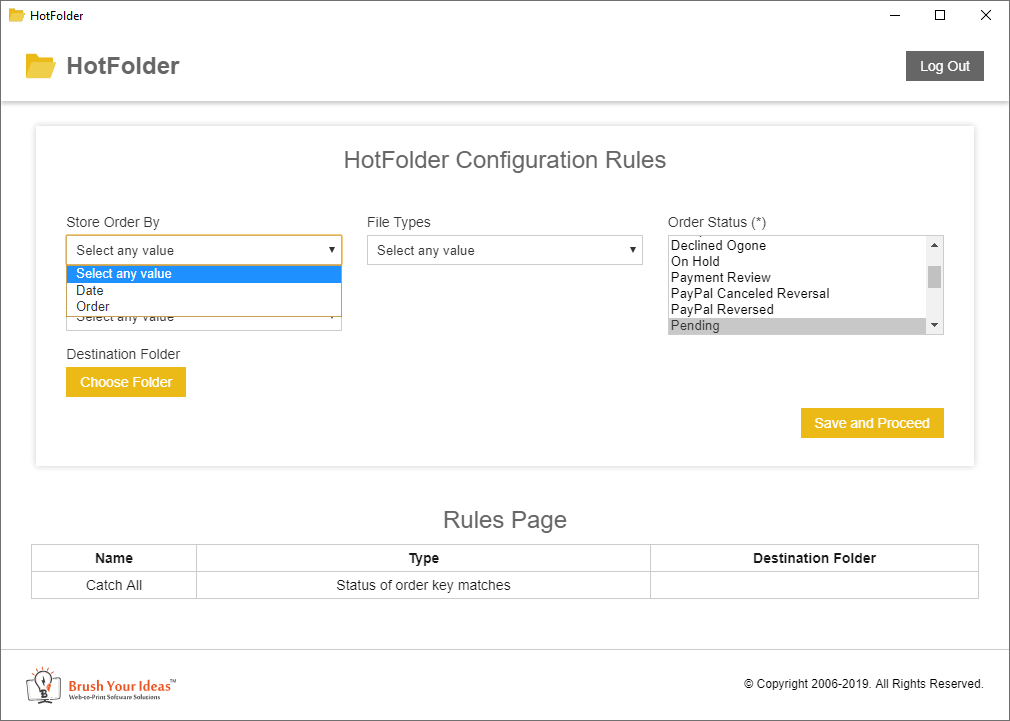
Store Order By: Choose the option by which you want to set the file structure in your system after you download the files from the e-store. You can store orders in two ways:
– Date Wise: To store the orders as per their Order Dates.
– Order Wise: To store the orders as per their Order Number.
– File Types: Choose the type of file in which you want to download the order configuration files. The users will get only those file types that are enabled from the PrintXpand designer tool configuration at the store level.
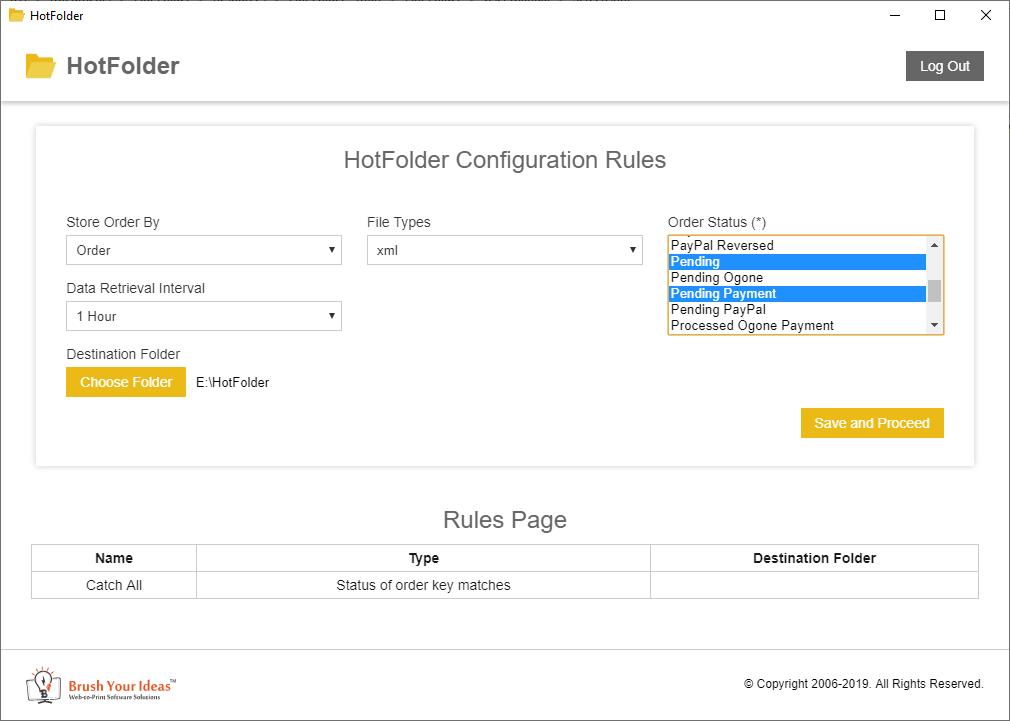
Order Status: Choose the Order Status for which you want to download order files from the e-store. It will contain all the existing order statuses from the e-store.
Note: By default, you would have ‘Pending’ order status selected.
– Data Retrieval Interval: Choose the time interval to fetch and interval check the new orders from the store. It has the following options: 15 Minutes | 30 Minutes | 45 Minutes | 1 Hour | 1 Day
– Order ID(s): Insert the Order Id(s) that you want to download. You can insert the multiple orders ids by comma-separated.
To download the orders of selected file type between the dates, you can select “Start & End Date”
– Start Date: Select the Start Date from the date you want to download the order(s).
– End Date: Select the End Date till the date you want to download the order(s) when you.
To choose the Start Date & End Date, you will get the tiny calendar view.
Destination Folder: Choose the folder / specific location in which you want to download all files from the e-store.
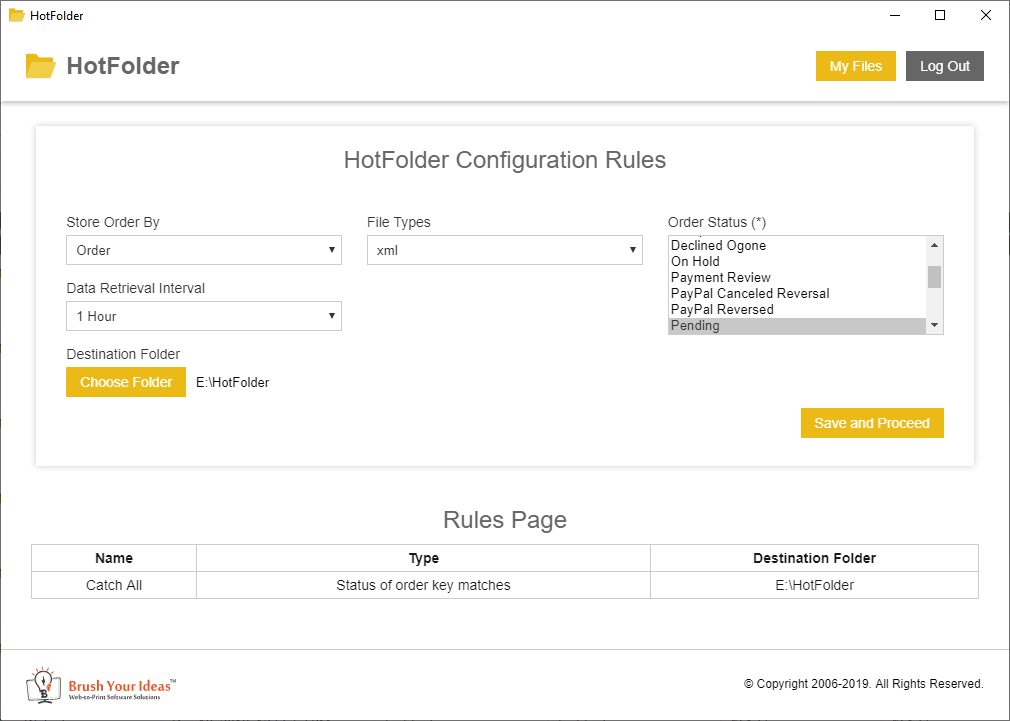
Click on the ‘Save and Proceed’ button to save the changes and proceed further. By clicking, it will start the file downloading process as per the configurations. And you will be navigated on the “Record Listing Page”.
By navigating back to “HotFolder Configuration Module”, you will find a “My Files” button to access the “Record Listing Page” again.
Filter Records
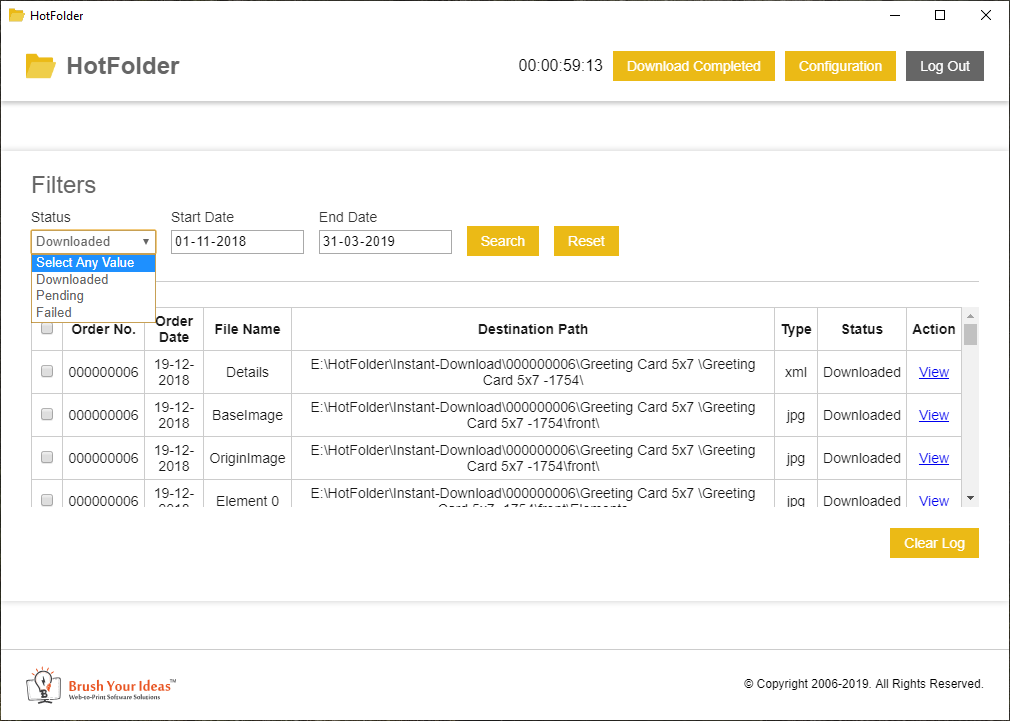
To filter the records, navigate to the ‘Filters’ section above the records table. You can filter records in the following ways:
– Status: Select the status value by which you want to filter the record from the ‘Status’ dropdown list. After selecting the status value, click on the ‘Search’ button to apply the filter.
– Start Date and End Date: Choose the start date and end date for the time interval for which you want to filter the records. You can choose the initial date from ‘Start Date’ and the last date of the time interval from ‘End Date’. Thereafter, click on the ‘Search’ button to apply the filter.
– Reset: Click on the ‘Reset’ button to reset the applied filter criteria.
To logout from the HotFolder app, click on the ‘Log Out’ button. By doing so, it will clear all the records and saved configurations from the HotFolder. Downloaded files will not be deleted from the destination folder.
Record Listing
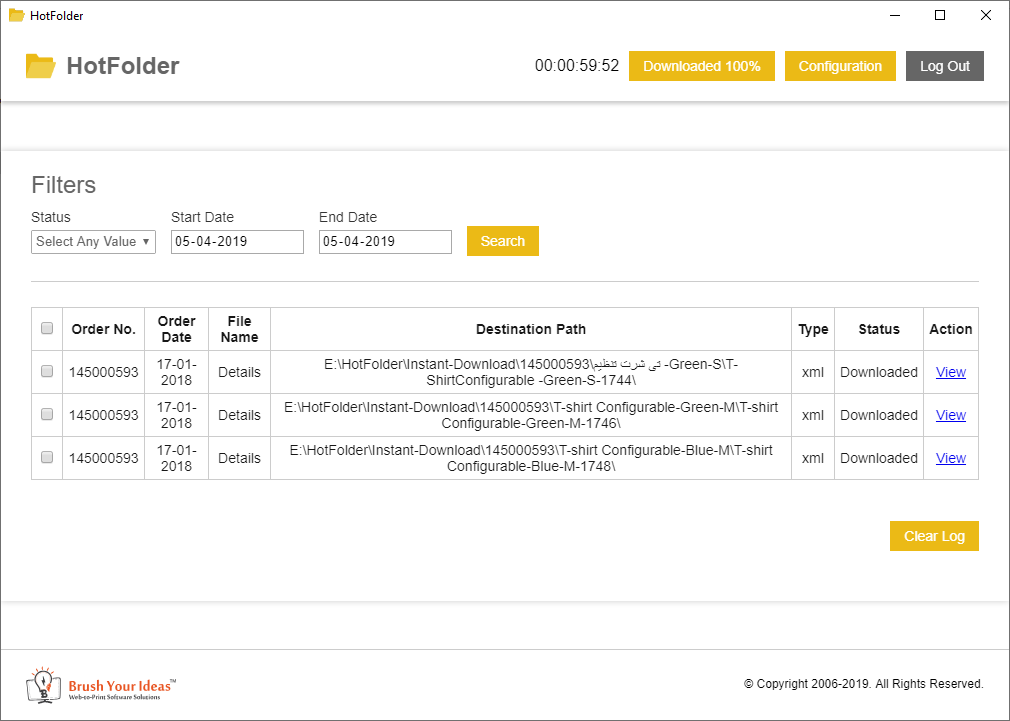
Once you fetch the files from the Store Backend, you can view a complete list of available files in the table as per the previous configurations. The table will contain the following order details:
Order Number: The unique number assigned to the order.
Order Date: The date on which the order was created.
File Name: The name of the file by which it will be downloaded.
Destination Path: The destination path on which the order record file will be saved.
Type: The type of file in which the order configurations file is downloaded.
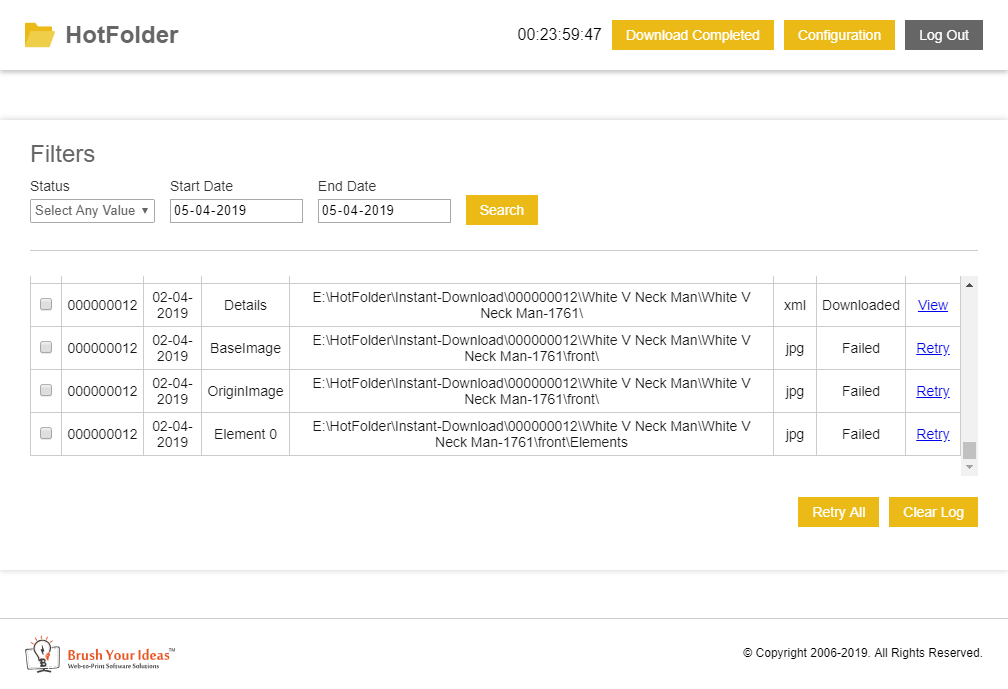
– Status: The download status of order file. There will be three types of status:
~ Pending – To download pending files.
~ Downloaded – To downloaded files.
~ Failed – To download failed files.
– Action: The actions column will consist of the following points:
~N / A: It is for the orders files which you are yet to download and have under ‘Pending’ status.
~Retry: It is for the order files which failed the downloads and have ‘Failed’ status.
~View: It is for the order files which are downloaded and have ‘Downloaded’ status.
To clear some of the records from the Records Listing page, select the records and click on ‘Clear Log’ button. It will clear the log records without affecting the downloaded files.
For `Failed` records, you can apply the `Retry` action on each record to download again. You can also select all the records you want to download and apply `Retry All`.
The timer at the top indicates the remaining time for the next call to the server. It checks and downloads new orders from the store.
You can use the button next to the timer to manually check and fetch new orders at any time.
To navigate back to the Configuration Module, click on the ‘Configuration’ button from the Records Listing Page.

