PRINTING METHODS
Our PrintXpand 3.0 Designer tool provides you a free hand to ‘Manage Printable Colors’ and different ‘Printing Methods’. You can enable/disable some printing options for your customers as per your convenience and printer compatibility.
Frontend View
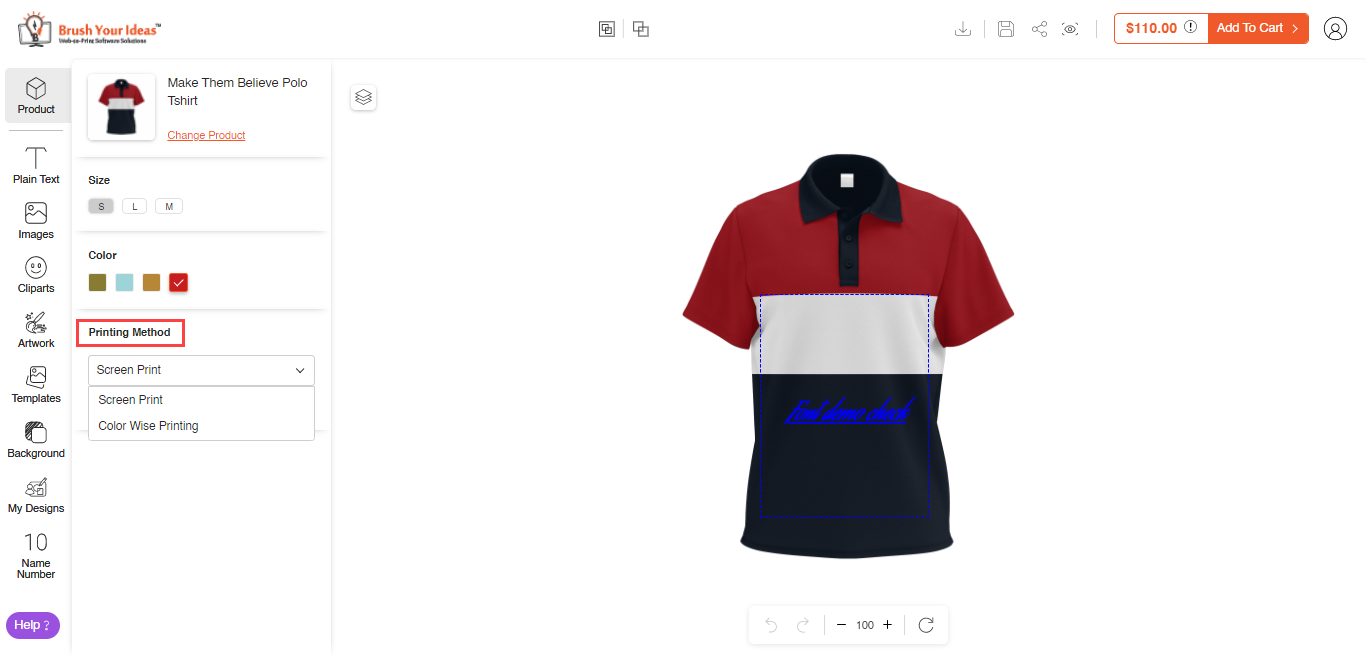
After configuring the Printing Methods, now customers can design their products and also has the option to select the printing option. The price of the products will be charged as per printing configurations.
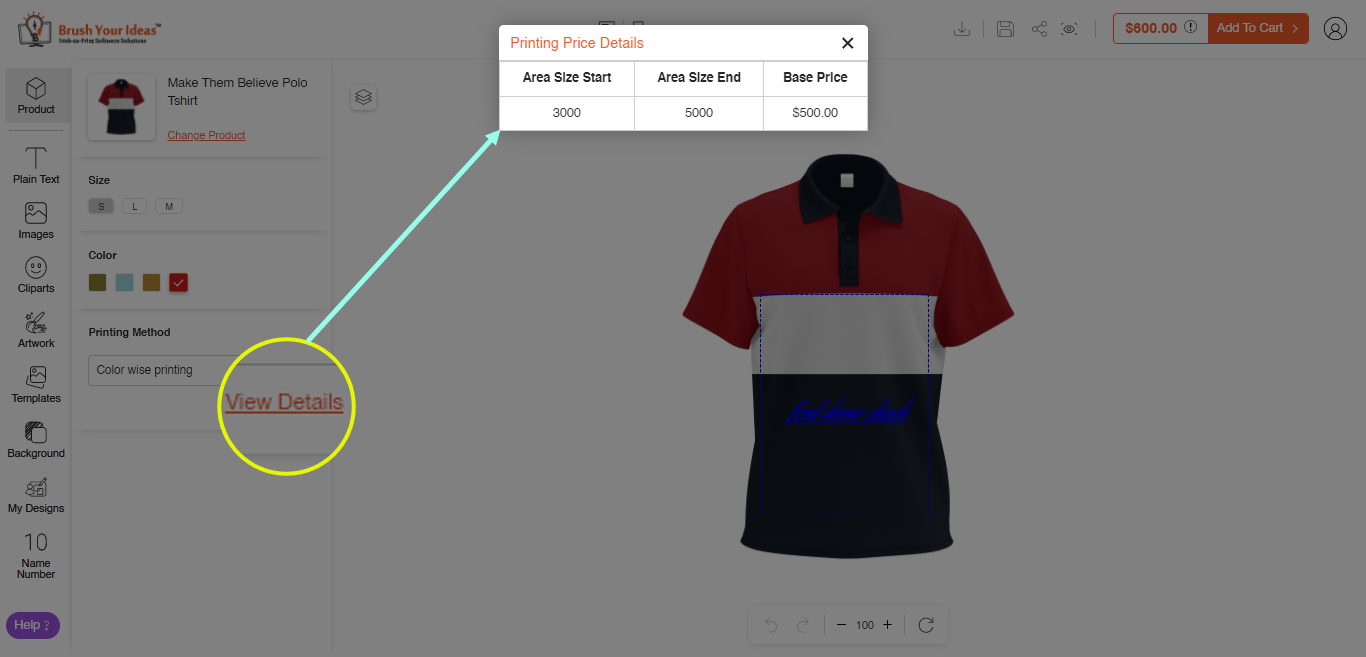
By clicking on the View Details you will get the Printing Price Details of the product.
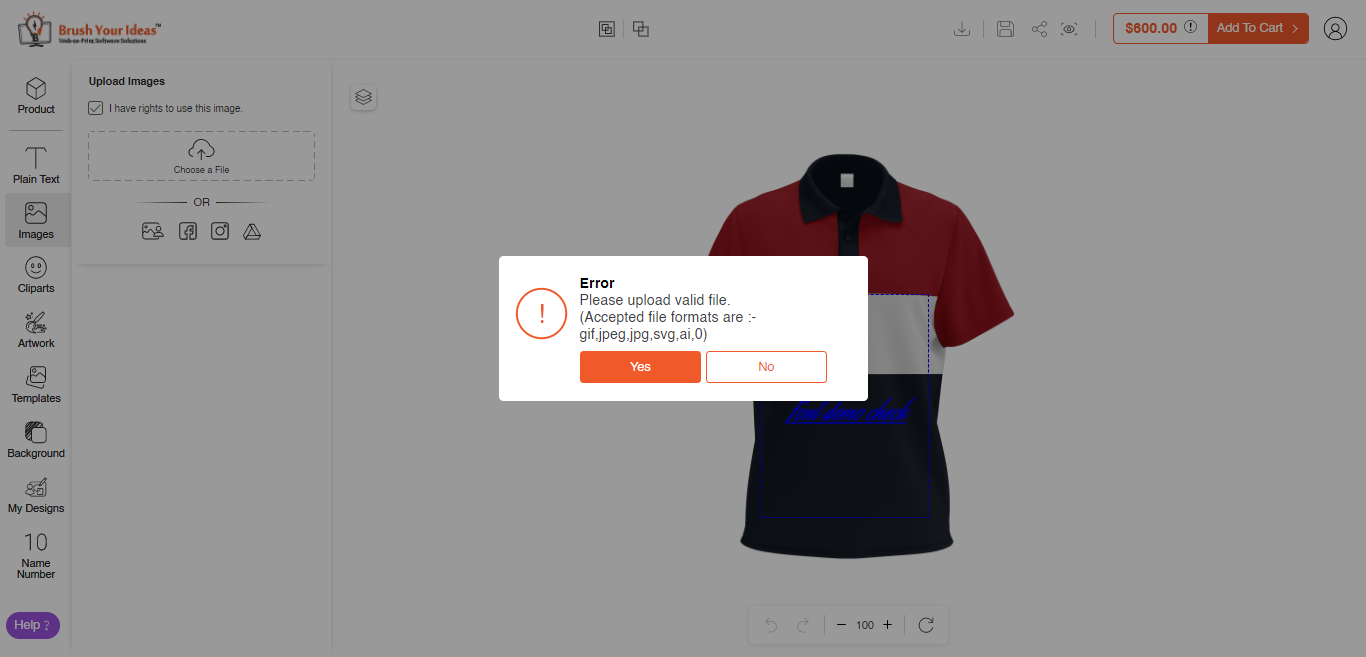
As we have disabled PNG format for the color-wise printing from the general settings of the printing methods, customers won’t be able to upload the image PNG format.
If they try to upload the images of non-allowed formats the Alert message will appear on the screen.
Let’s take your customer has designed the product by uploading an image. The designer tool will give a warning message if the image format is not allowed for other printing methods.
Based on the printing method, your customer will have to pay the price for the product.
Note: The Printing method will be asked when the customers are adding their designed product to the Cart.
Backend Configuration
Configure the printing methods, printing costs, and set the printing methods for the specific products.
First, you need to define the Printing Methods and then configure the Printing Cost as per two different print methods: “By Color” and “By Areas”.
Manage Printing Methods
To add and manage multiple methods of printing, go to Product Designer → Manage Printing Methods.
As you click on “Manage Printing Methods”, you will get the list of Printing Methods along with details like ID, Printing Methods Name, Printing Description, Methods Type, Store View, Printing Methods Execution, and Actions.
You can add a new ‘Printing Method’ by clicking on the “Add Printing Method” button. It will navigate you to the ‘Add Printing Method’ page.
Now, add the following details:
– Printing Method: Enter the name of the printing method.
– Abbreviations: Enter the abbreviation for the printing method.
– Description: Enter the description for the printing method.
– Minimum Product Qty: Specify a minimum quantity for using this particular printing method.
– Base Price: Enter the base price for the products.
– Store Views: Select the store view in which you want to display this printing method.
– Output File: Select the output file for the custom image upload for this printing method.
– Status: Select Enable to enable the printing method.
– General Settings
– Permitted Design Types: Select the design types you want to permit.
– Raster: Select the file format for the raster image type.
– Vector: Select the file format for the vector image type.
– EMB (For Embroidery): Select the file format for the Embroidery.
– Maximum Designer Colors Allowed: Enter the maximum designer colors allowed per printing method.
– Minimum Designer Colors Allowed: Enter the minimum designer colors allowed per printing method.
– Color Palate: Select Yes to enable the color palate.
Price Settings
– Settings: Select the price type for the printing method from these options:
– Standard: Enter the quantity and the price you want to apply. For example, Qty is 10 and Price is 20. If your customer order the product in 10 quantity then 20 price will be applied. If your customer orders less than 10 quantities then the base price will be applied.
– Area Wise Pricing: Select the Area Wise Pricing you want to apply to this printing method.
– Colors Counters Wise Pricing: Select the pricing based on the color counter that you want to apply to this printing method.
After adding all the configurations Save the configurations.
Printing Cost
There is always variation found in the Printing cost of any product design. It depends on the ‘Printing Method Execution’ set for a particular printing method.
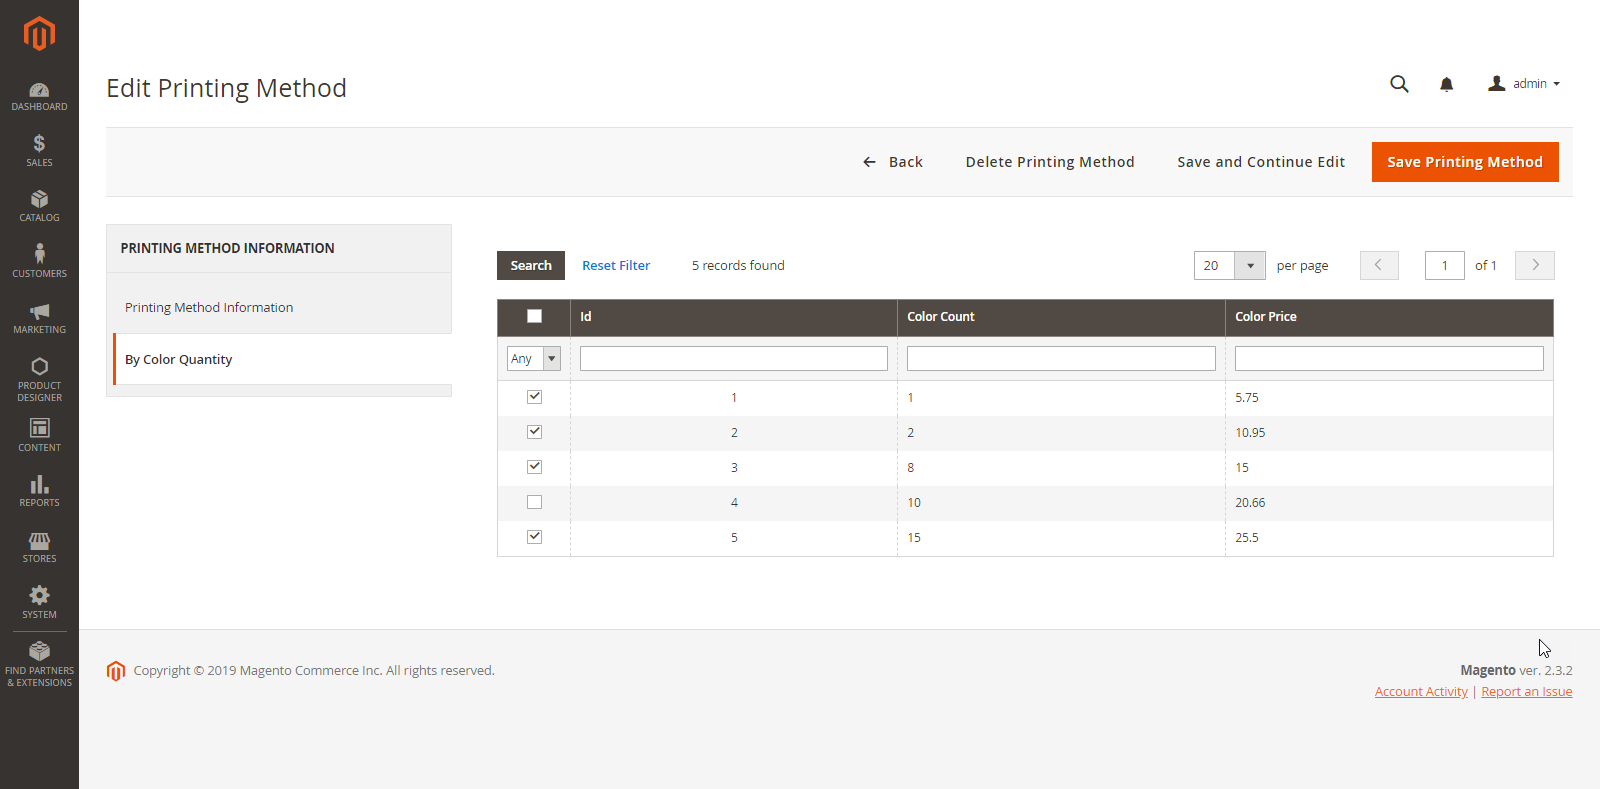
If By “Color Quantity” is selected, then the Printing cost of the product will be based on the Number of colors added in the product design. Whereas if By Area Range is selected, the Printing Cost count will be as per the Range of Area cover in the Product Design.
In PrintXpand 3.0 designer tool you can manage the Printing cost:
– By Color Counter
– By Area Range
By Color Counter
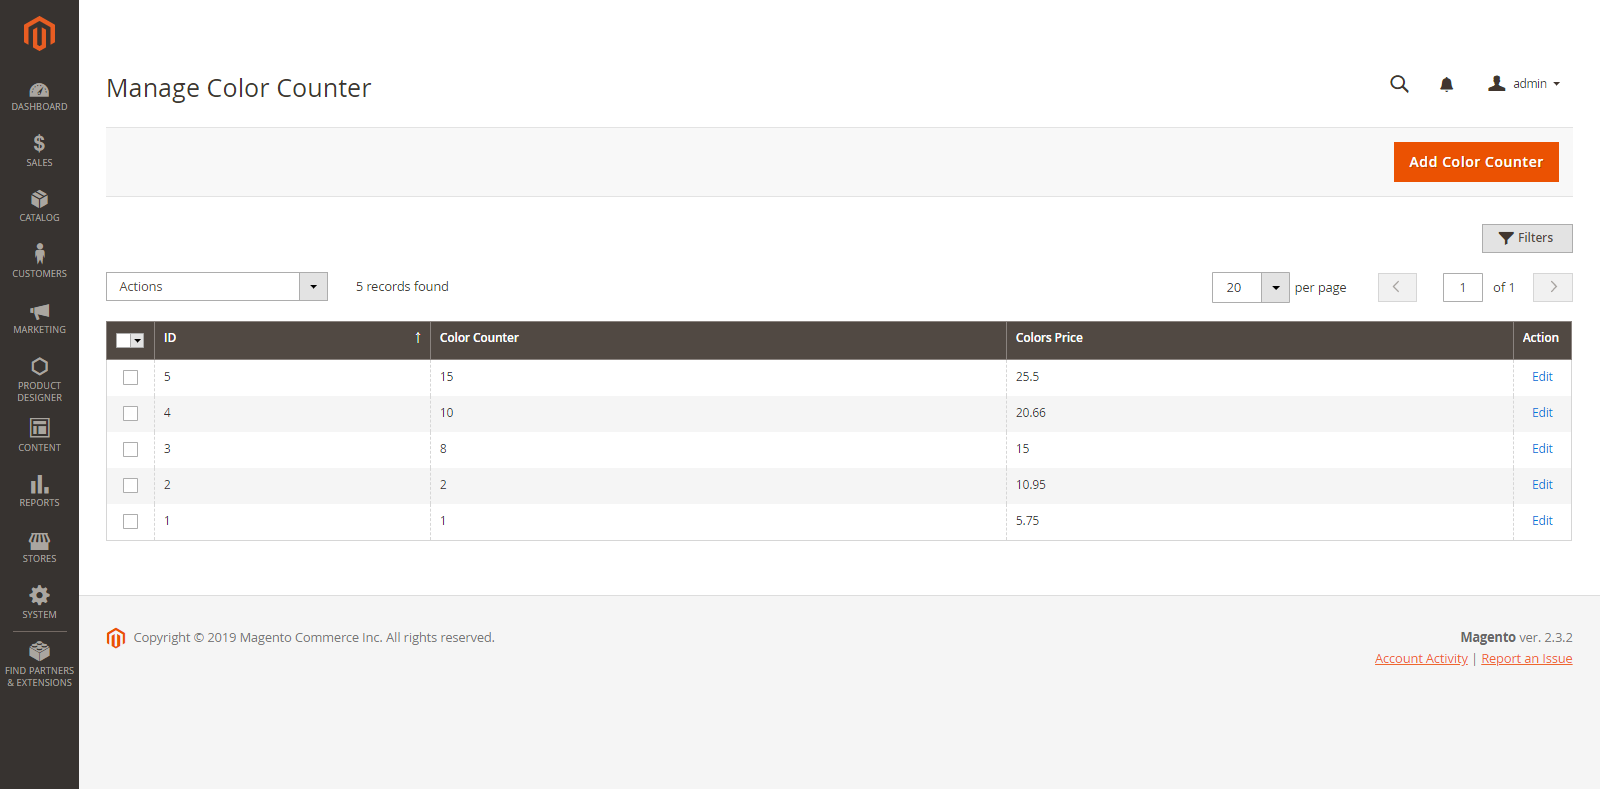
To manage the cost of colors based on Quantity (Counter) that will be used in the printing of the product design, go to Product Designer → Manage Color Counter.
By clicking on it, a complete list of color counts along with their respective costs can be seen.
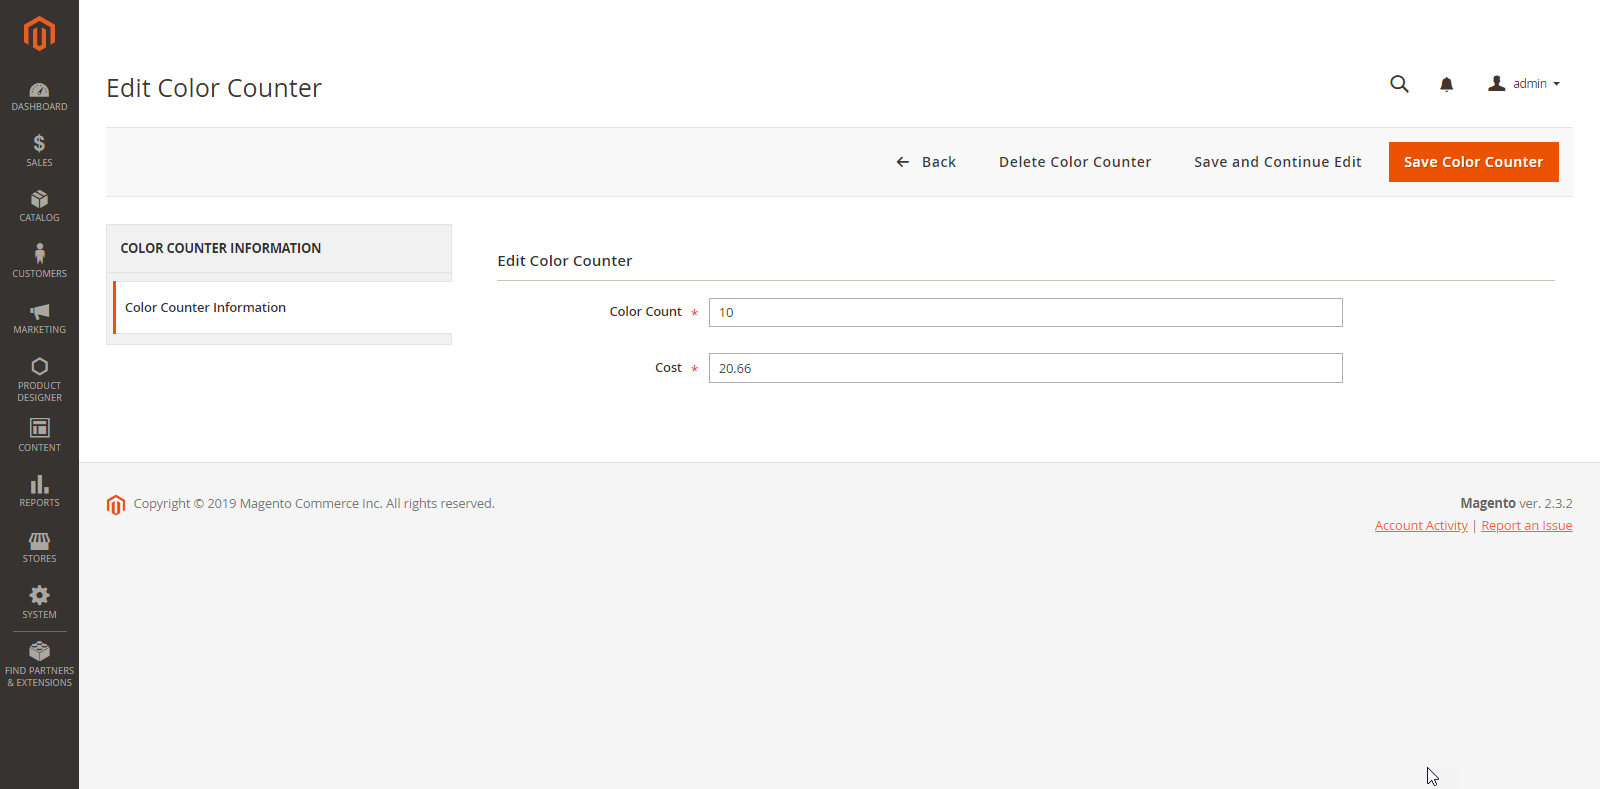
To add Color Counter, click on the “Add Color Counter” button. As you click on it, you will be redirected to the “Add Color Counter” page.
Now, enter the following Color Counter details:
– Color Count: Enter the ‘number of colors’ that can be used during printing.
– Cost: Enter the ‘cost’ of using a particular color count during printing.
Click on the “Save Color Counter” button after inserting all the details.
Later, we can Edit any Color Counter by clicking on the ‘Edit’ option from the ‘Action’ column and we can also delete Color Counter by clicking on ‘Delete’ from the ‘Actions’ dropdown.
By Area Size
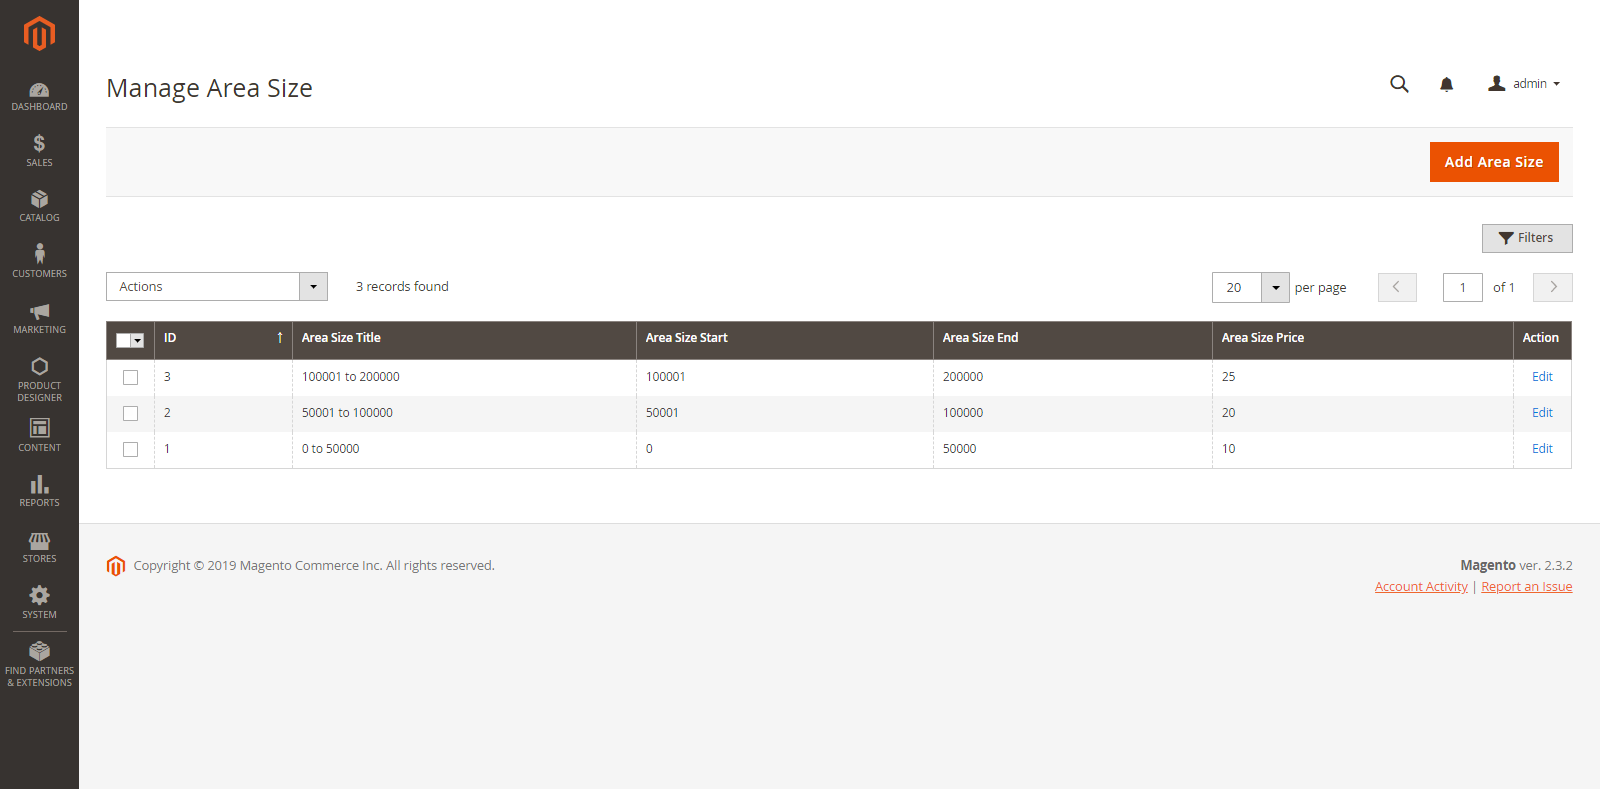
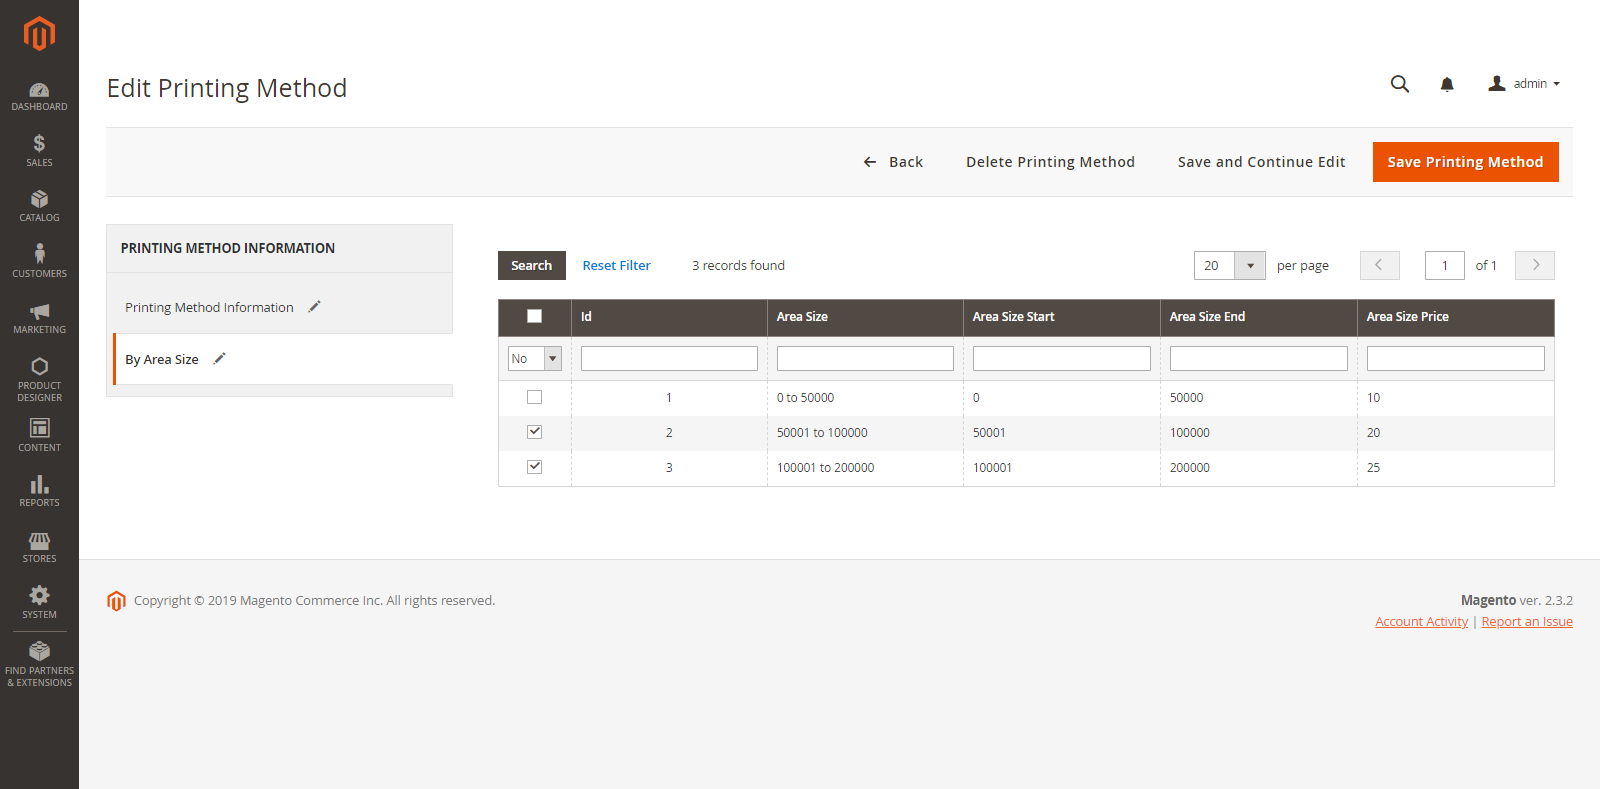
To manage the cost of printing based on the area size that will be used in the printing of the product design, go to Product Designer → Manage Area Size.
Click on the “Add Area Size” button to add or define a new area size. By clicking on it, you will be redirected to the “Add Area Size” page.
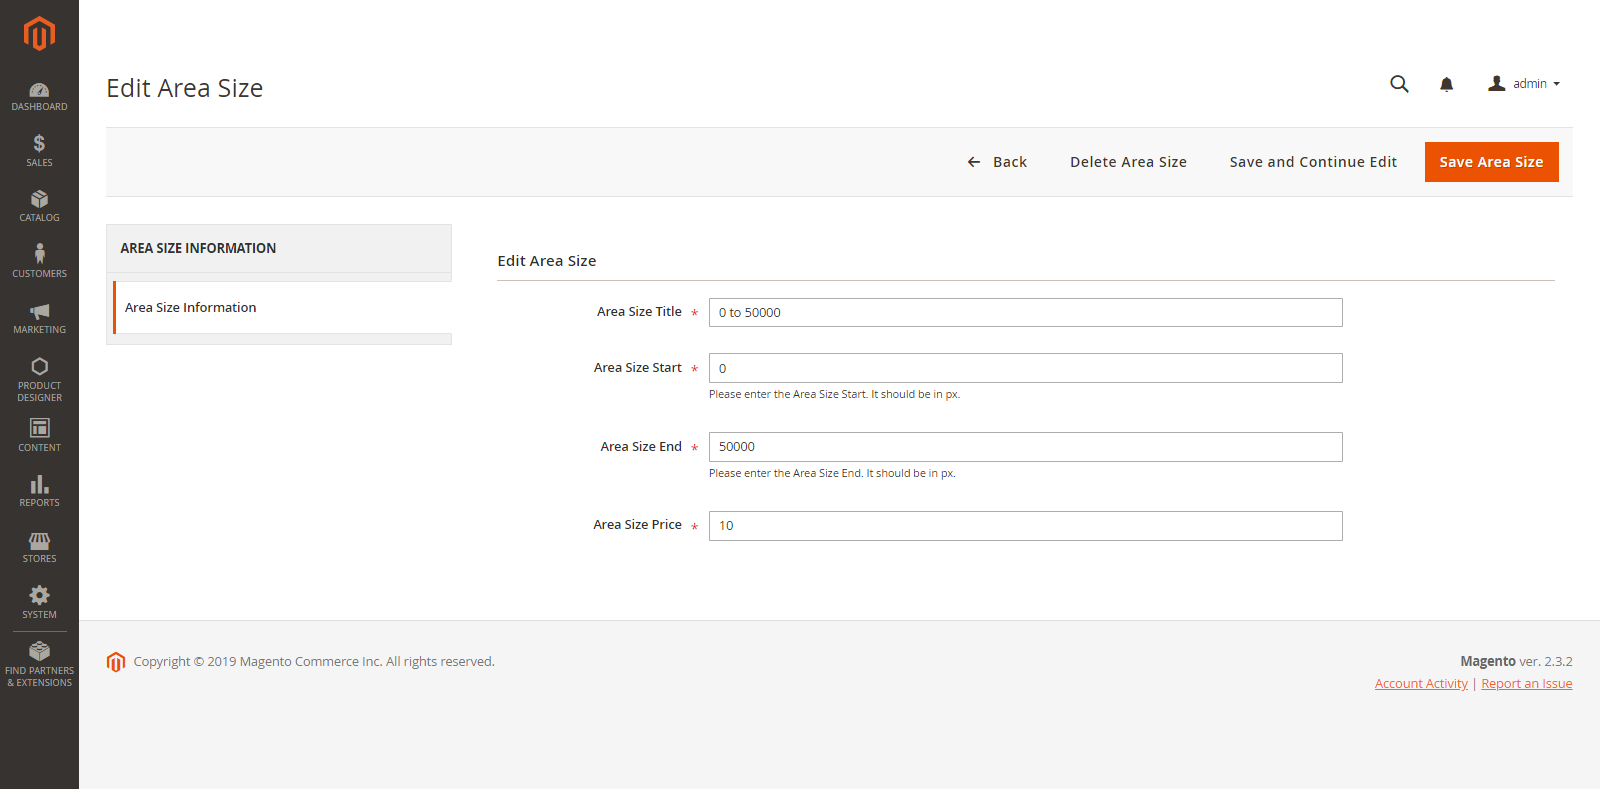
Now, enter the following details related to Area Size:
– Area Size Title: Enter the relevant ‘title’ of area size.
– Area Size Start: Enter the area size from where it begins or starts. It must be in px.
– Area Size End: Enter the area size where it ends. It must be in px.
– Area Size Cost: Enter the ‘cost’ of the defined area size.
Printing Method for Product
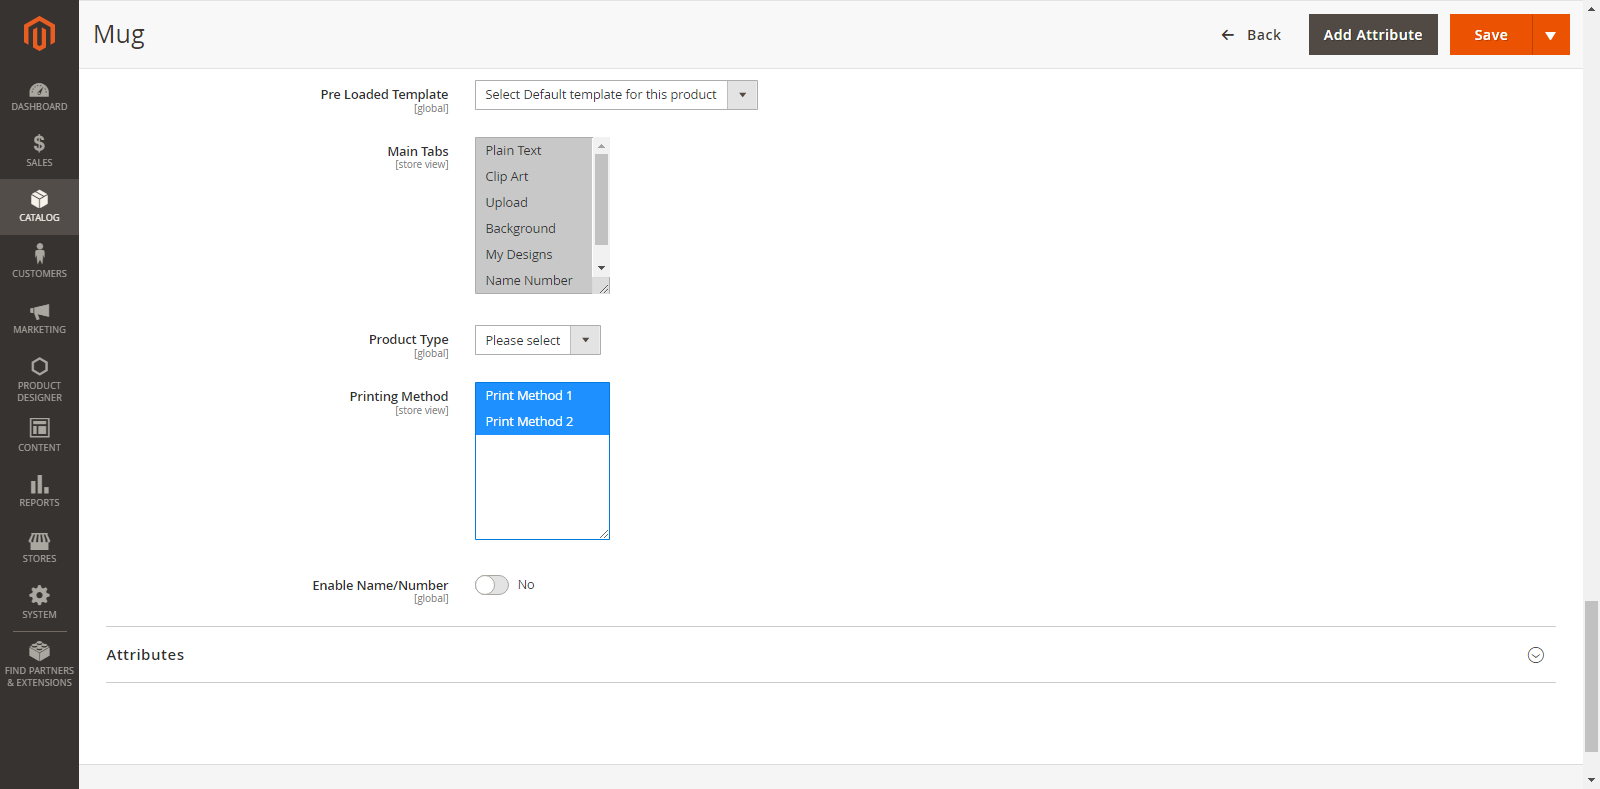
Select Printing Methods for Product
Now, after adding “Printing Methods”, the added methods will be displayed in the ‘Printing Method’ list in the ‘Product Designer’ option of any Product.
For that, navigate to Catalog → Products → Product Designer option.
In the “Product Designer” option, you will get the Printing Methods. Select multiple methods as per your printing compatibility. The methods which you will select will be displayed on the Product Designer page to the Customers.
