PrintXpand – Variable Data Printing
An ID card or a smart id card contains required details of an individual affiliated with a particular organization. These cards are distributed to all the individuals in the organization which results in the mass production.
This can sometimes become a challenging task but with the help of Variable Data Printing the process of customizing details of each employee will be simplified.
Manage Layout
Firstly, you need to enable the feature by navigating to Product Designer → Manage Layouts, you will get the list of various layouts. Open the layout in Edit mode. [1]
Now, enable the VDP field in the Data tab and click on the Save button to save the configuration. [2]
Now it’s time to assign the VDP field while creating the templates.
VDP Fields for Existing Templates
Navigate to Product Designer → Manage Templates, you will get the list of created templates. Now open the template in Design mode. [1]
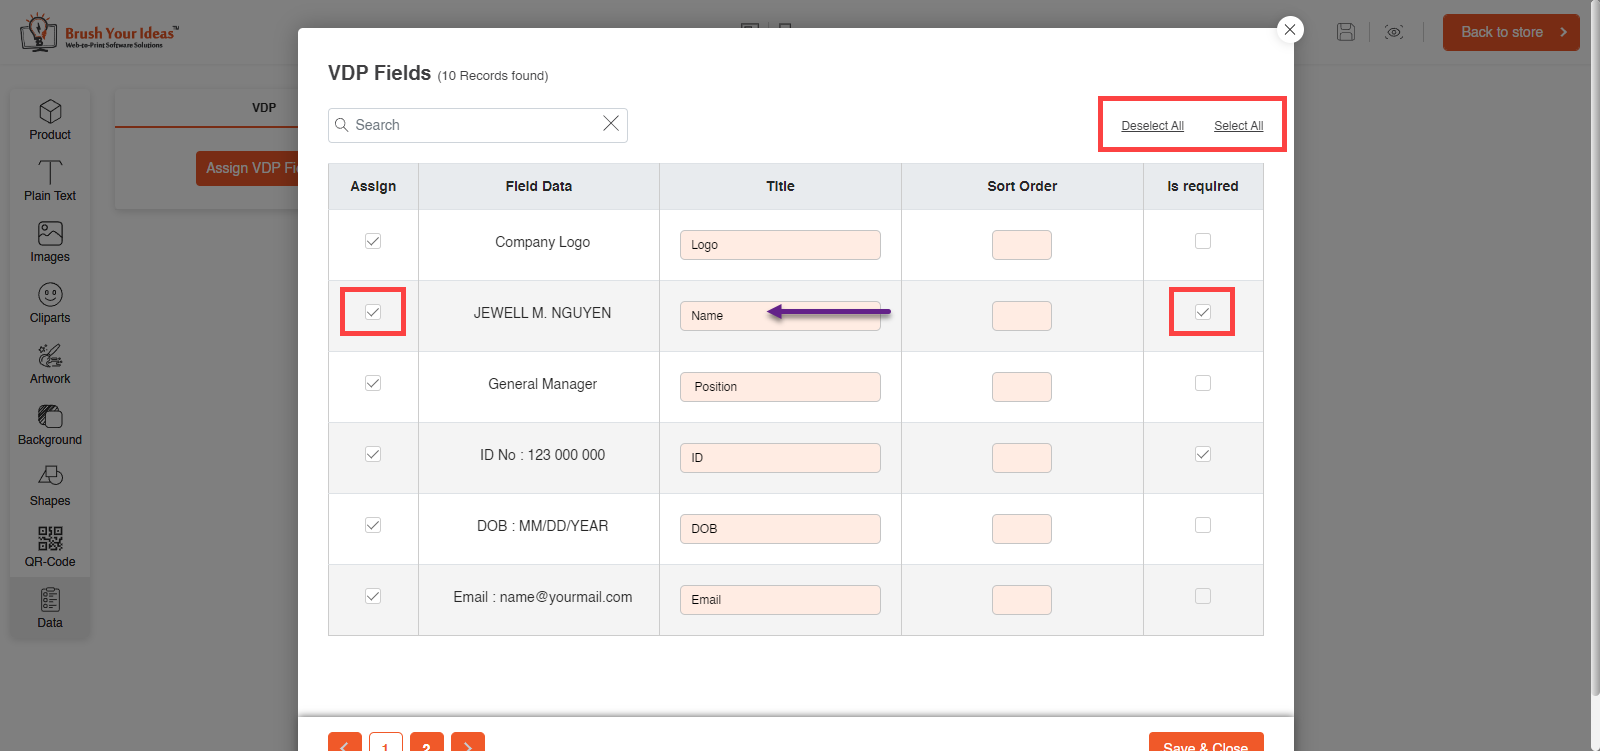
You will get the Assign VDP fields button, by clicking on the Data tab. Once you click on the button, you will get the Assign, Field Data, and Title fields. [2]
Enter the Title for the Field Data and assign it if you want to keep it customizable for your customers. For example, if the Name field data has be assigned as VDP fields, then your customers will be able to enter the respective name in the Name field. [3]
You can Select and Deselect all at once [3]. After assigning the VDP fields, click on the Save & Close button to save it.
Frontend
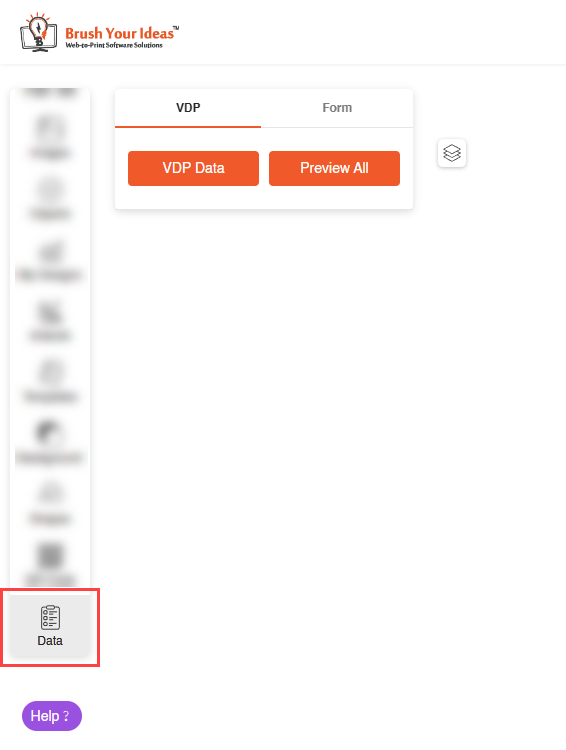
Now in the front store, once all the configurations are done, open the ID card product and navigate to the Data section in the left tab where the VDP section is available. [1]
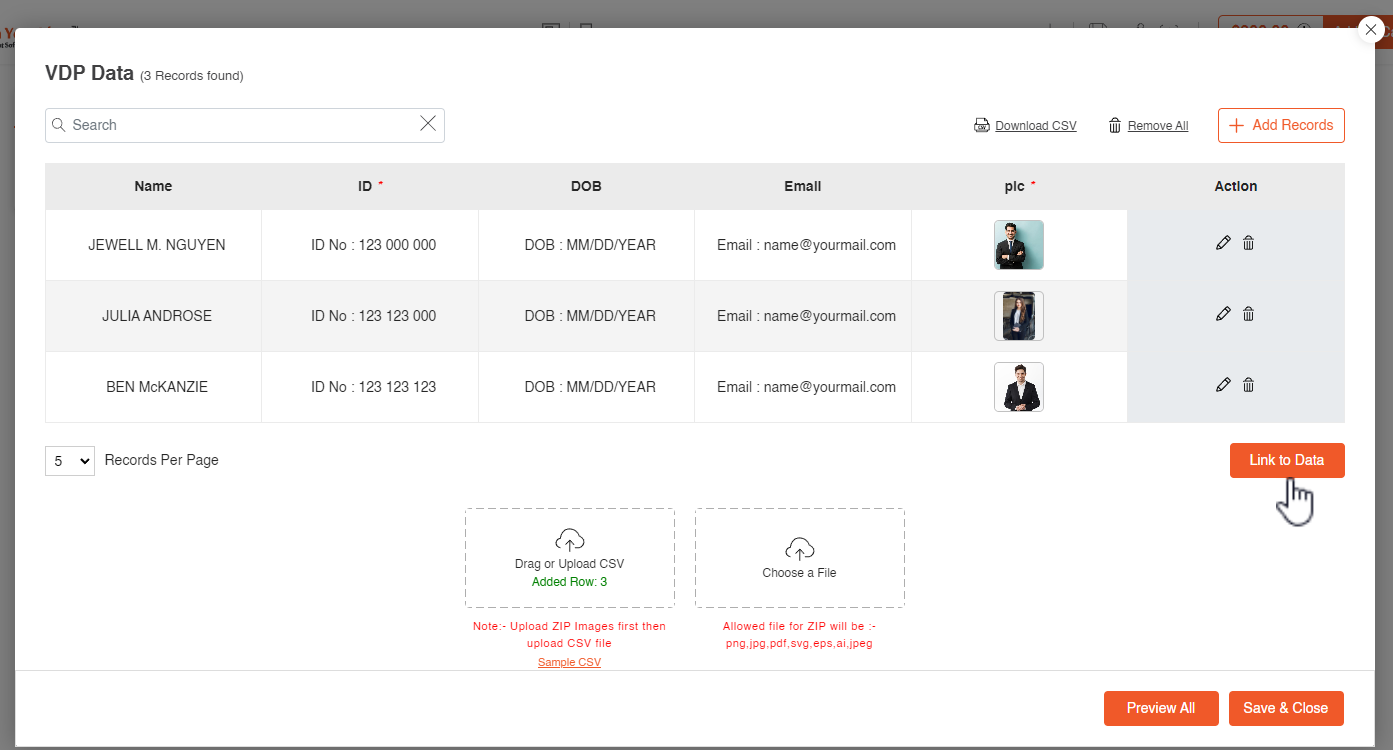
From the VDP section your customer can add records. By clicking on the button a VDP Data pop up will appear. [2]
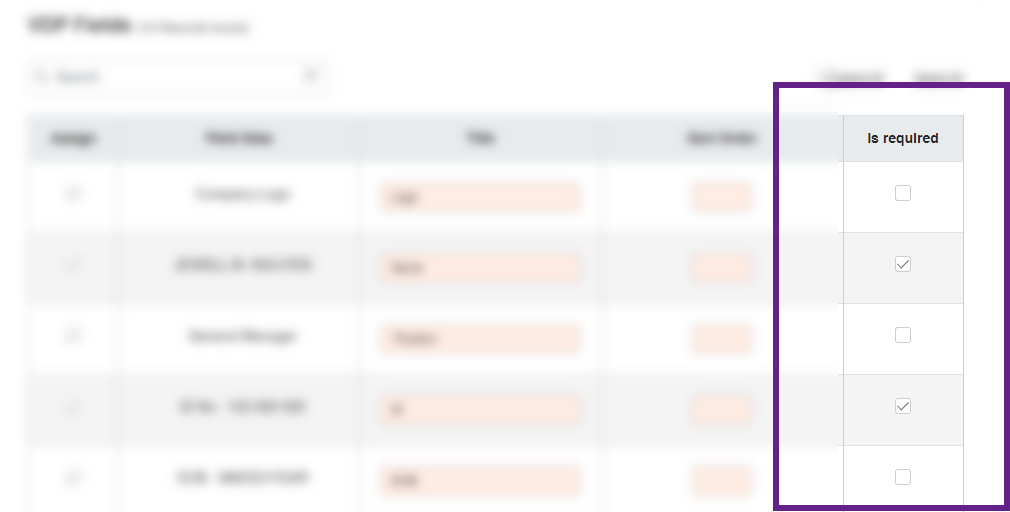
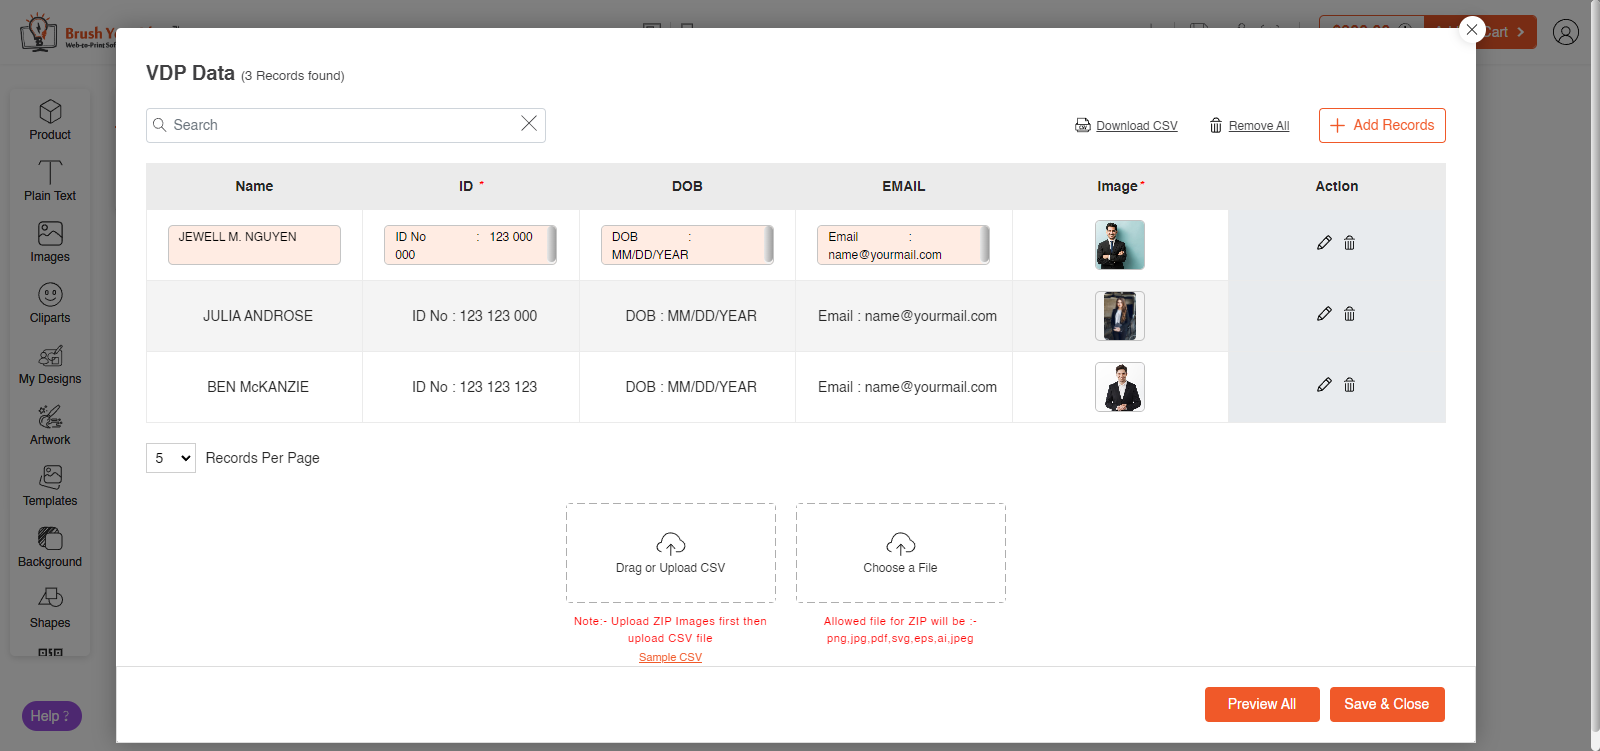
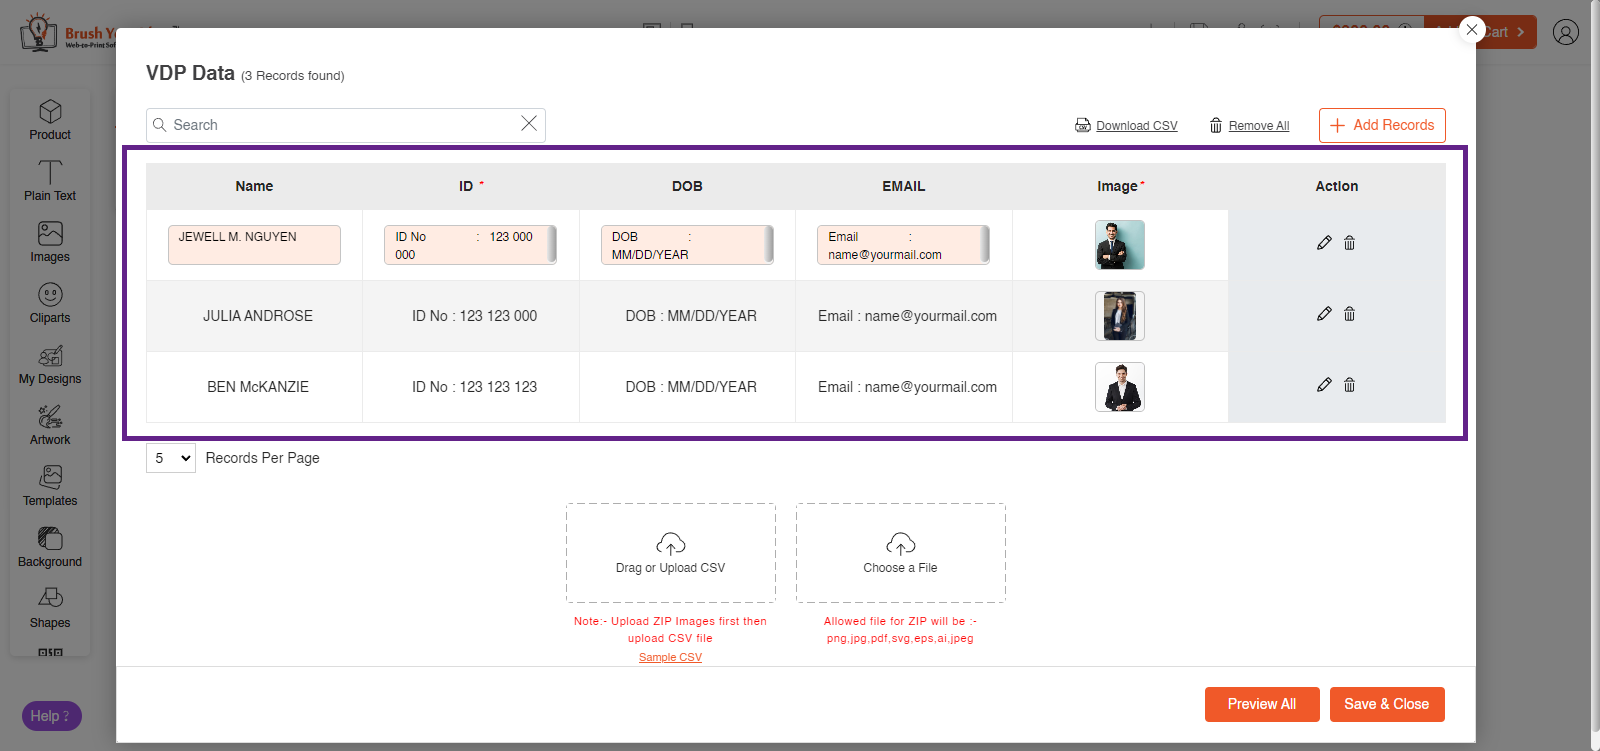
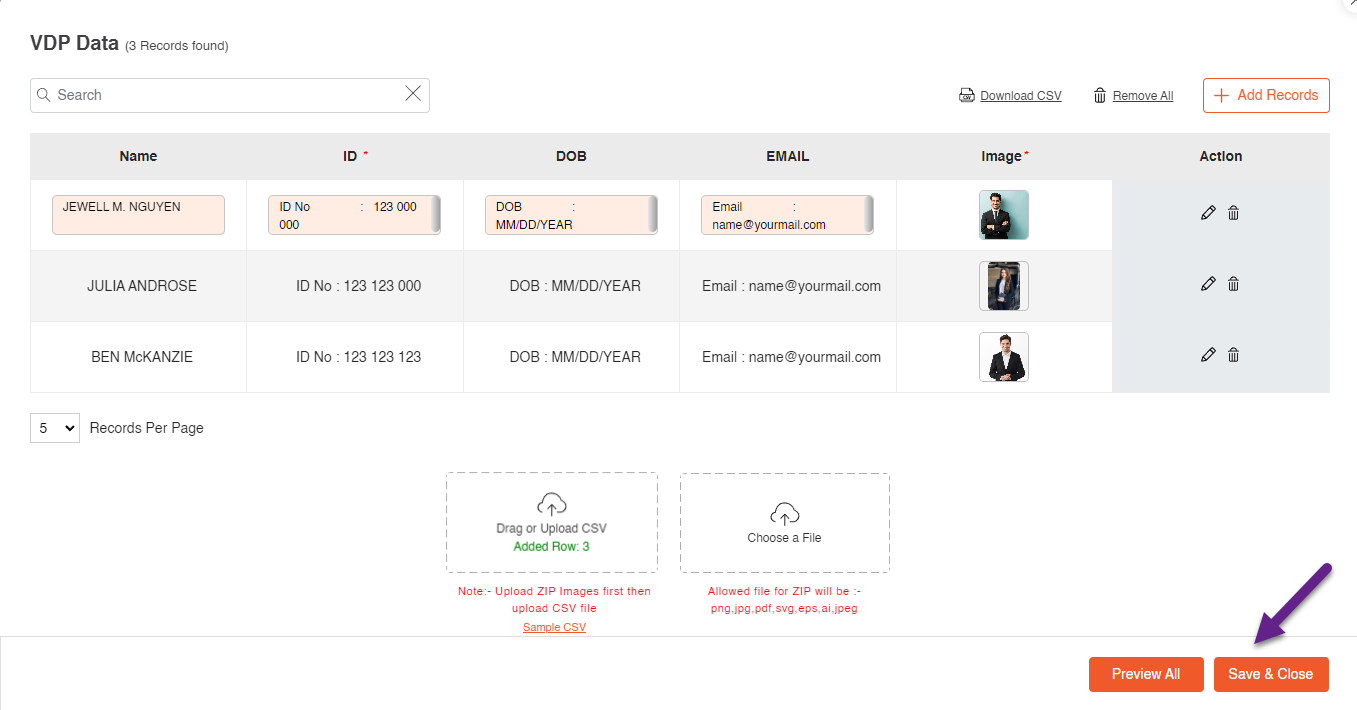
There are various fields in this pop-up where your customers can add the details by clicking on the Edit icon in the Action column. Certain fields that are set to be mandatory are represented with the red asterisk beside the title. [3]
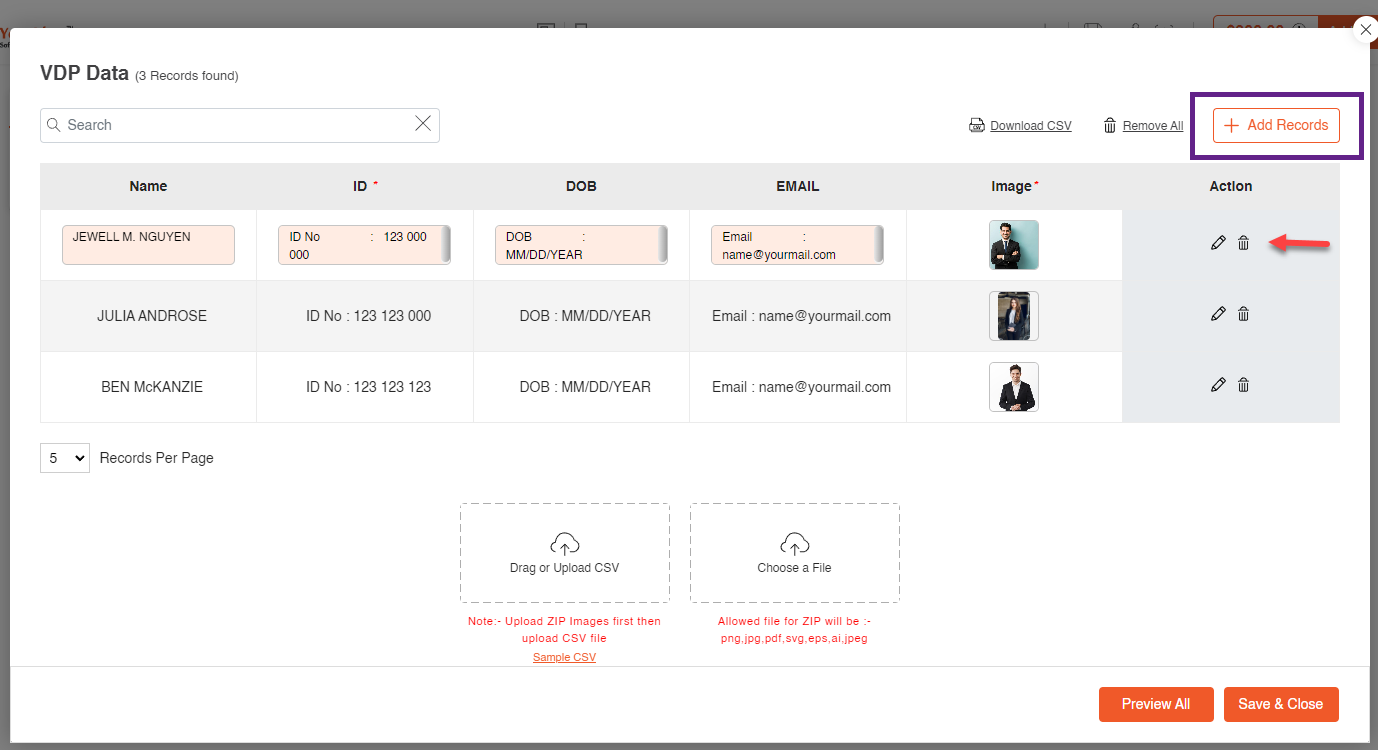
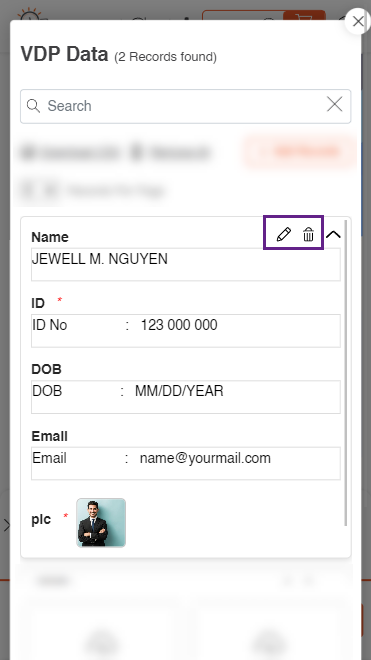
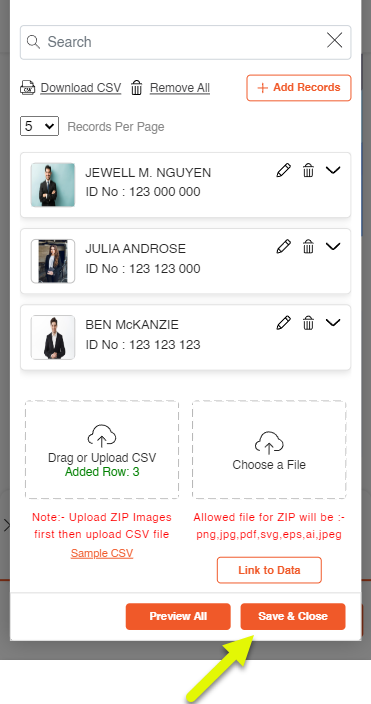
Here more records can be added through the Add Records button. Also, one can edit and delete these records by clicking on the Edit icon and Delete icon in the Action column. [4]
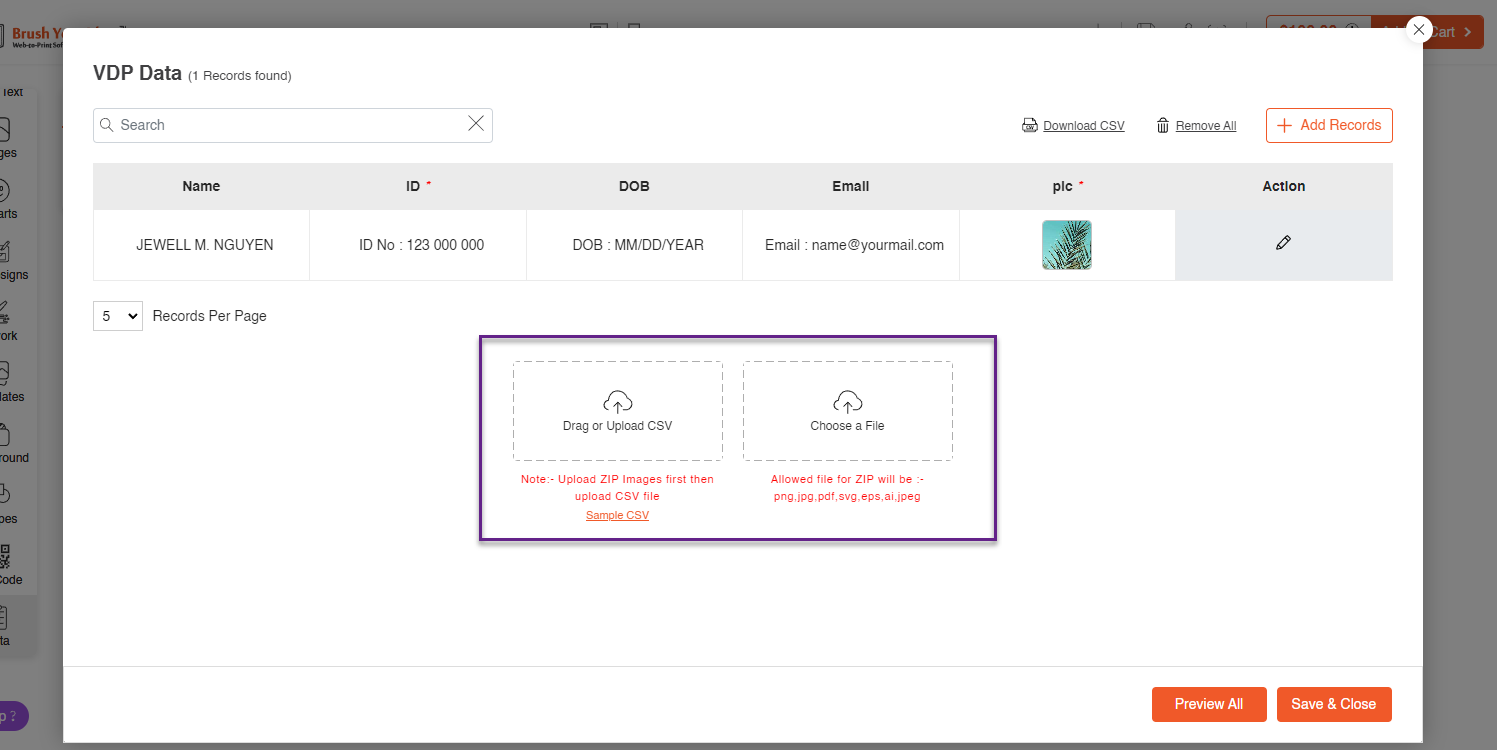
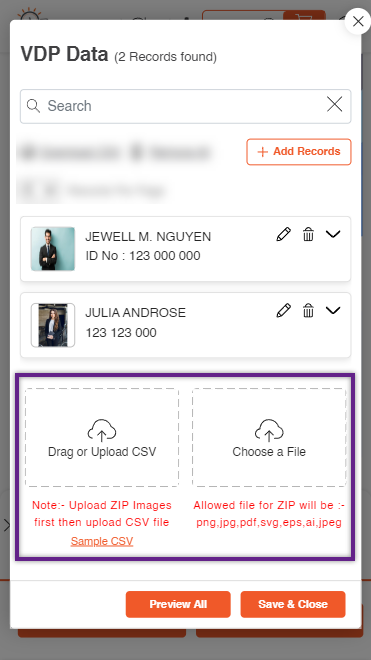
You can upload the ZIP and CSV files through the highlighted section. [5]
Note : Zip file should be uploaded before uploading CSV file.
Note : Those file types that are mentioned can only be uploaded.
There is Choose a File section, from where your customers will be able to upload a Zip file.
In order to upload a CSV file where all the details of the entries are present, click on the Drag or Upload CSV. If needed a sample CSV file can be downloaded by clicking on the Sample CSV. [6]
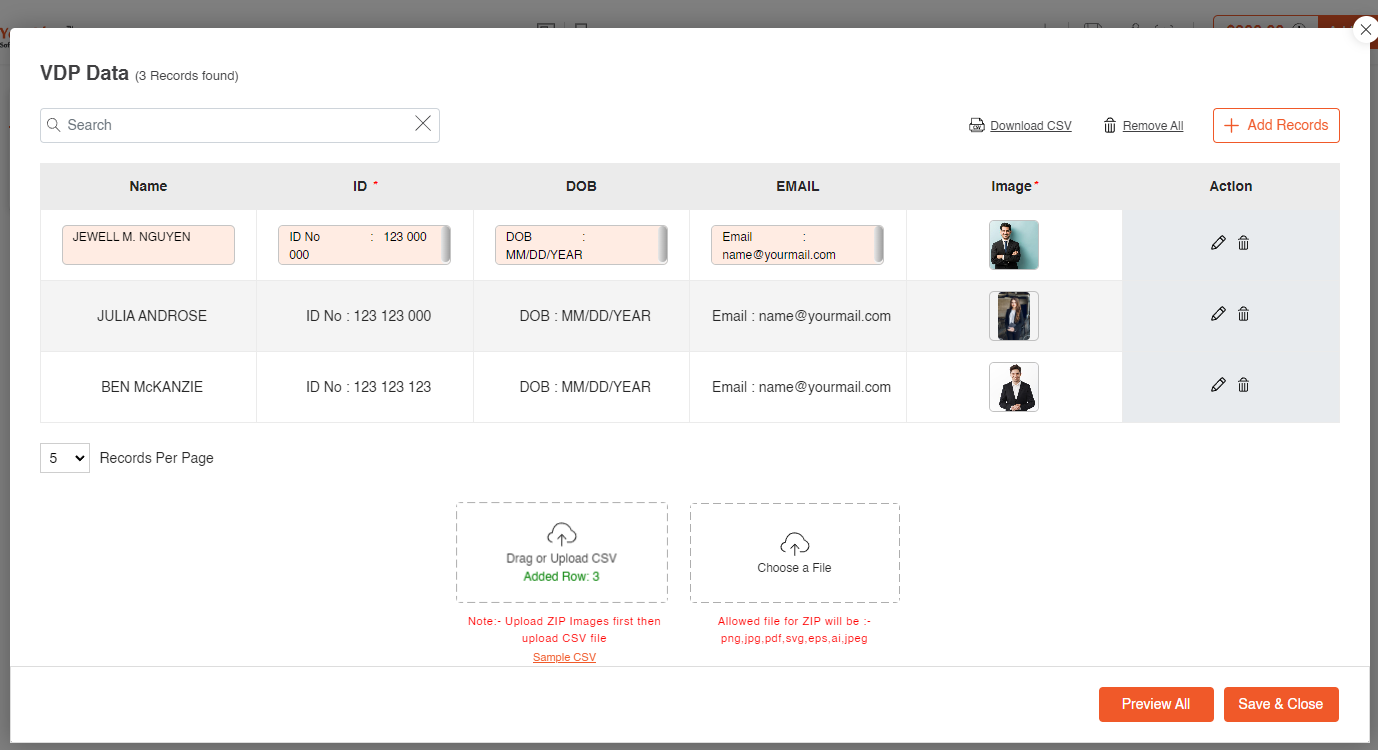
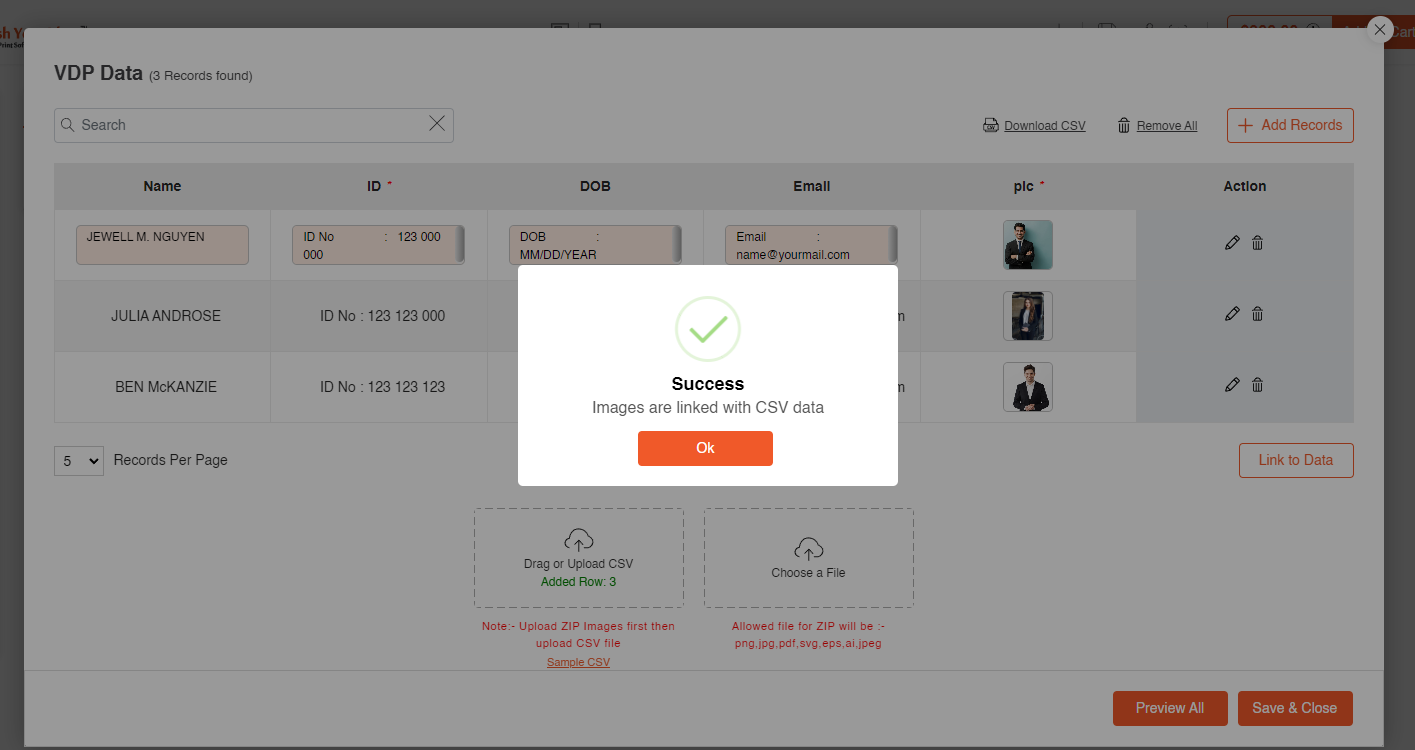
After the CSV files are uploaded, link them to the records, in order to display them in the ID Cards and by doing so, a pop-up will appear stating that the linking was successful. [7]
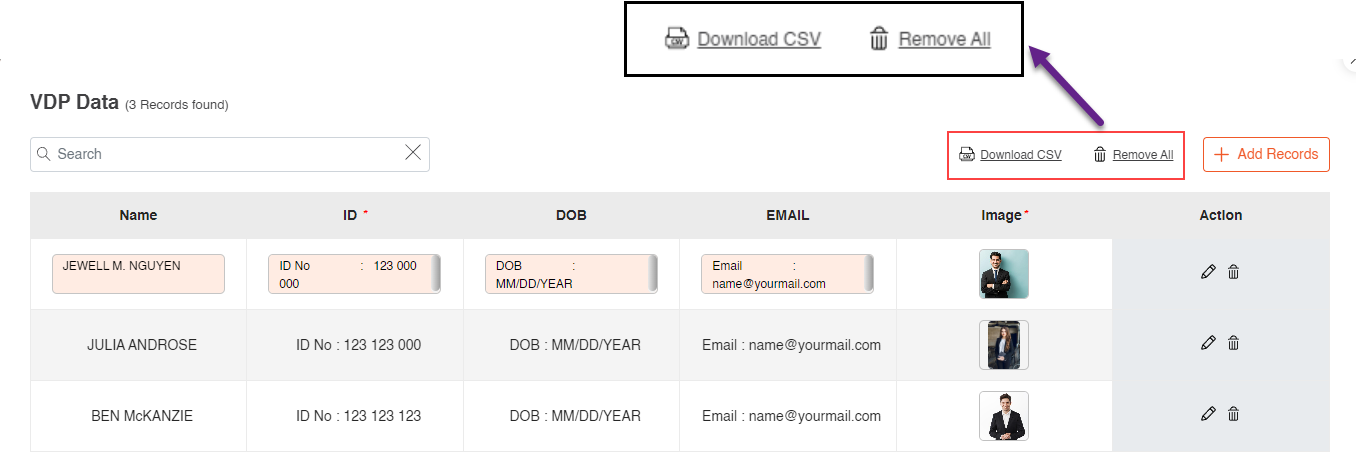
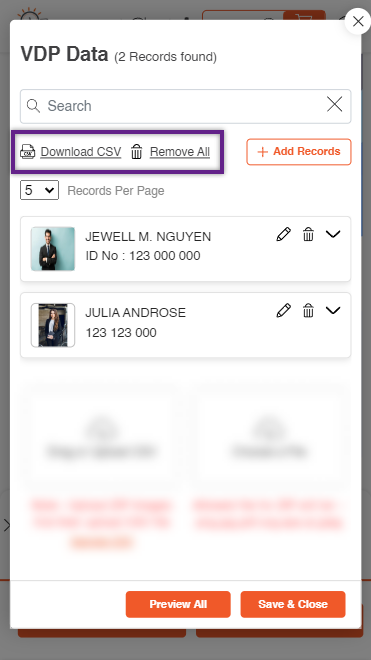
There is a Download CSV button on the top right corner which by clicking on, will download all the entered records. The Remove All button removes all the records. [8]
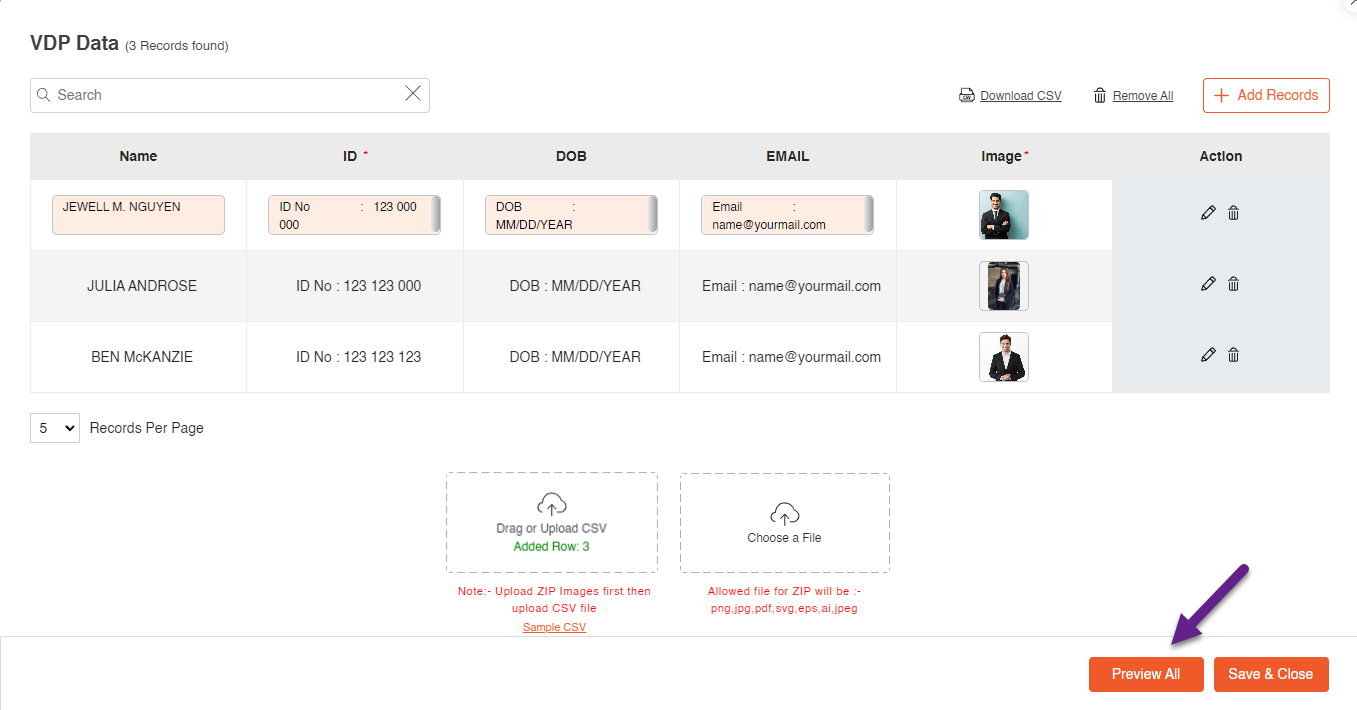
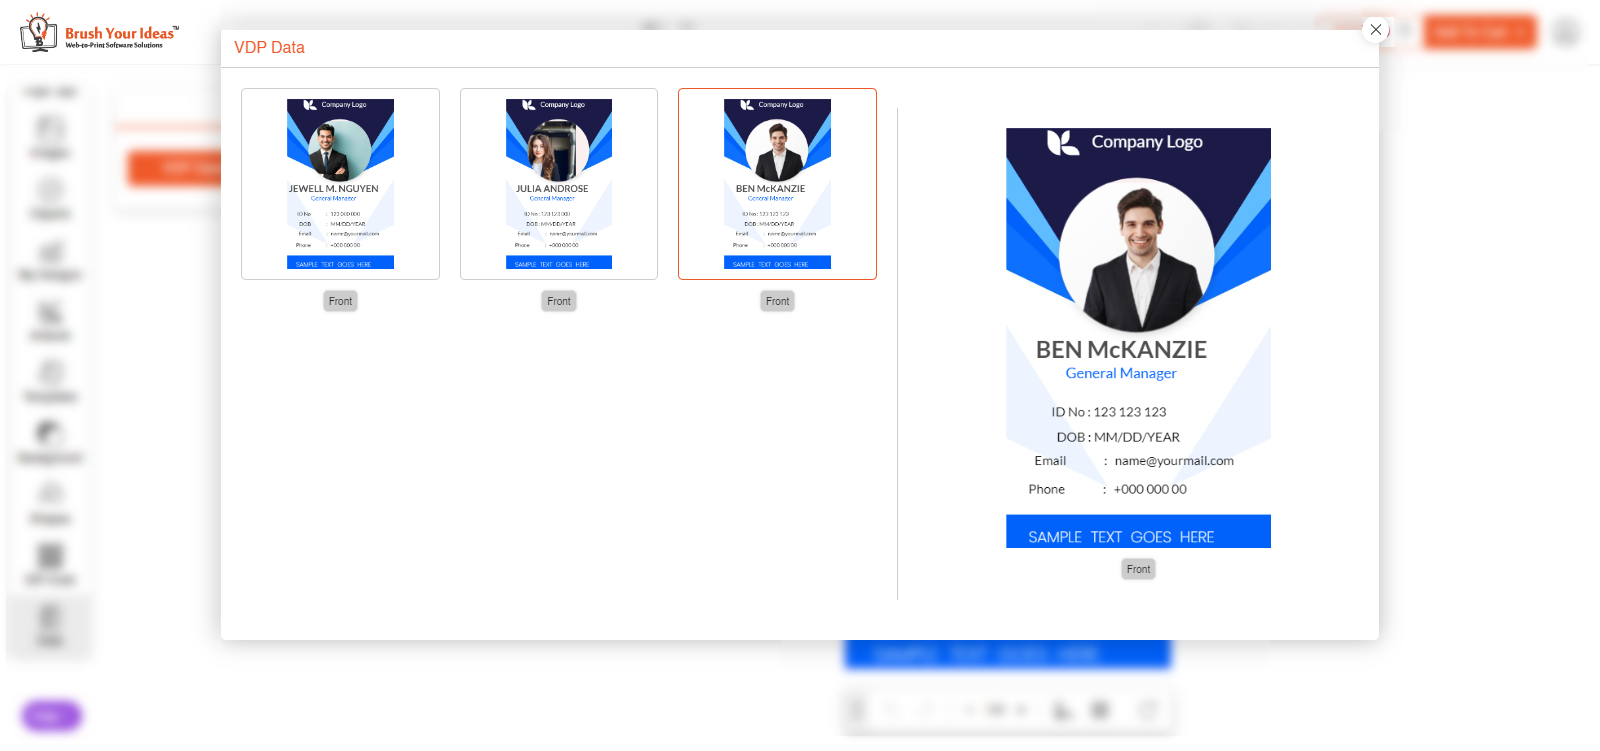
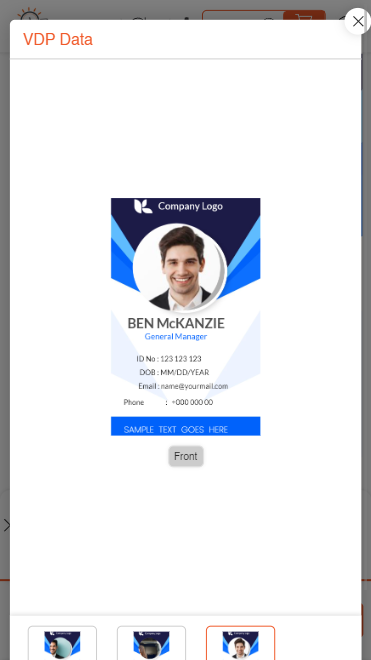
Preview All button provides your customer with the view of the ID Cards along with all the entered data. [9]
Now in order to save the records click on Save & Close. [10]
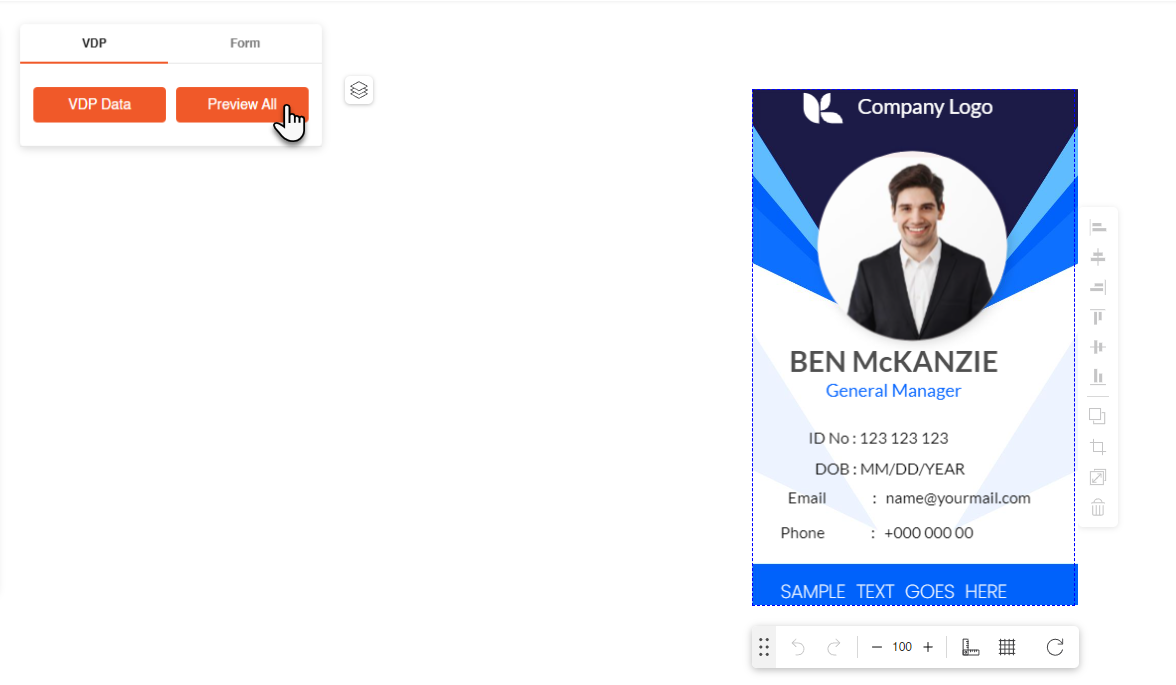
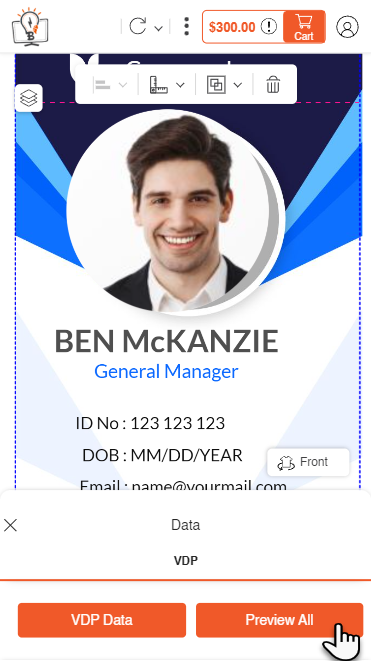
Your customers can also view the ID cards as per the records they have entered by clicking on the Preview All button beside the VDP data. [11]
Add To Cart
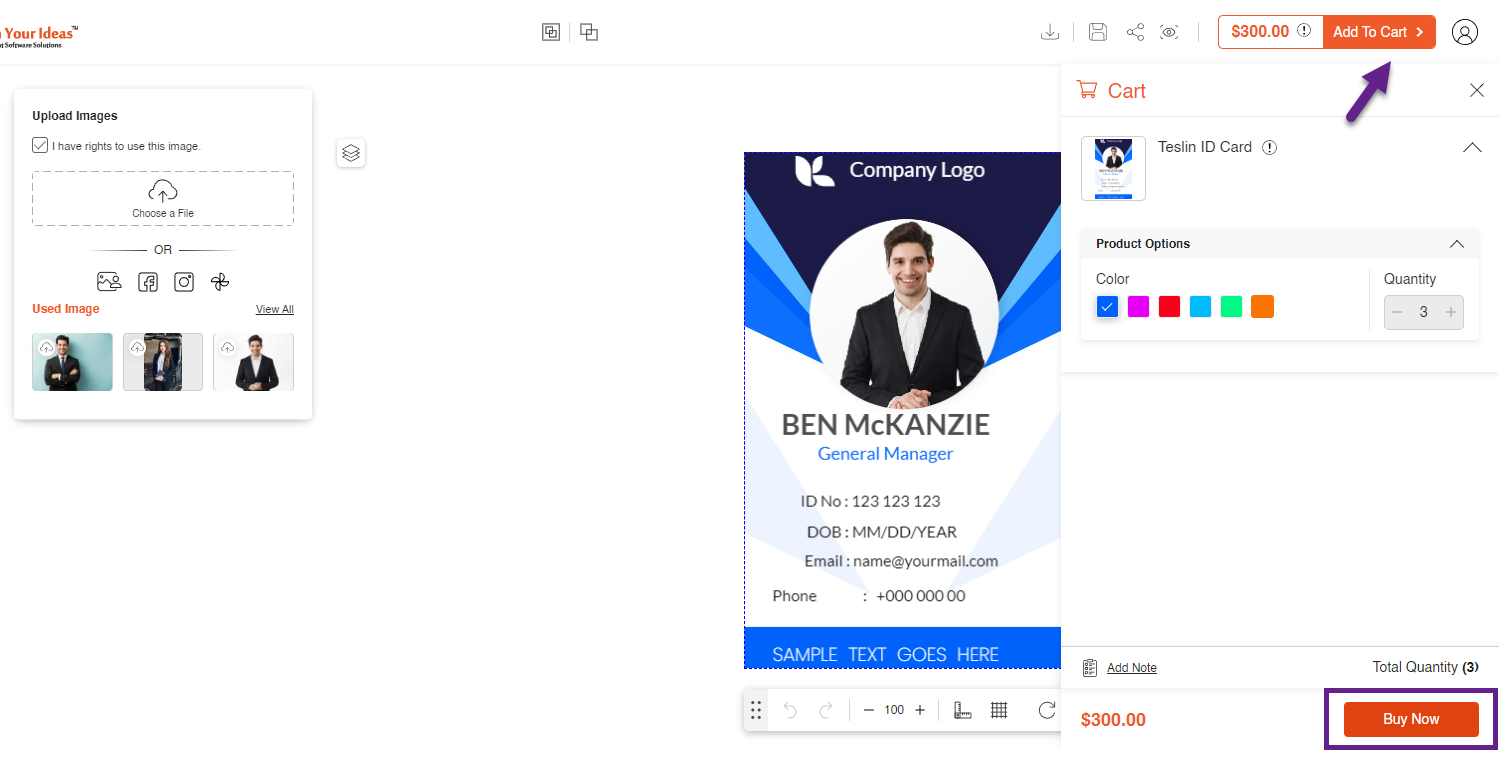
Once configurations are done, click on the Buy Now in the Add To Cart tab in order to proceed further with the order. In the Add to Cart tab all the details of the product such as the Color and Quantity will be displayed. [1]
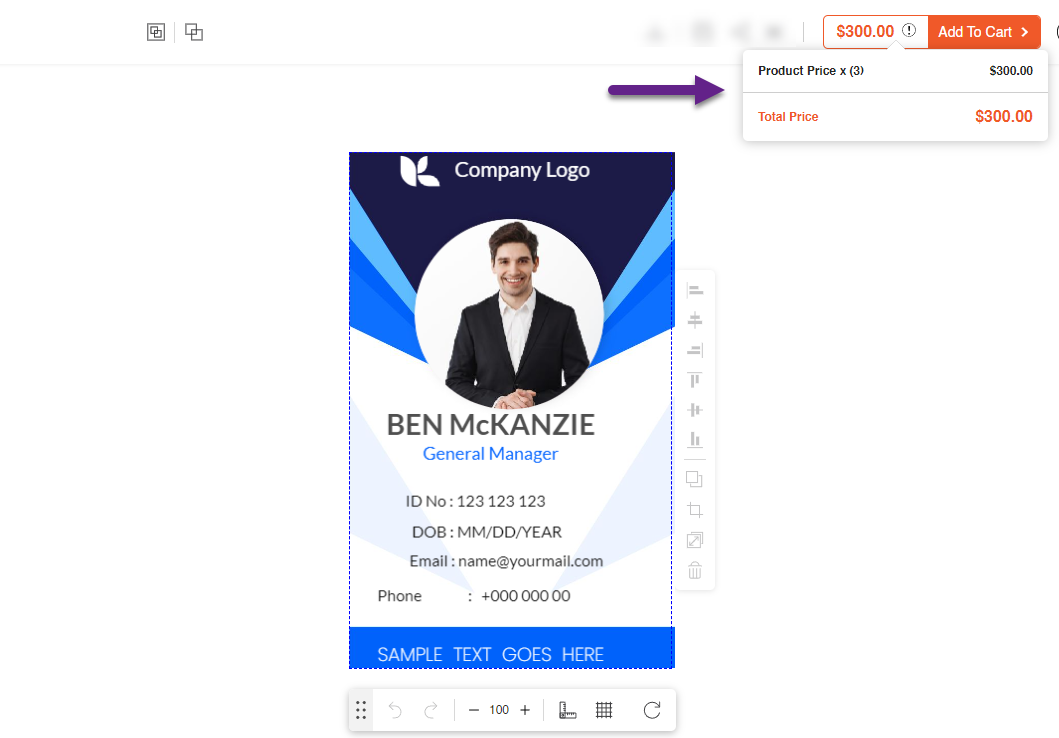
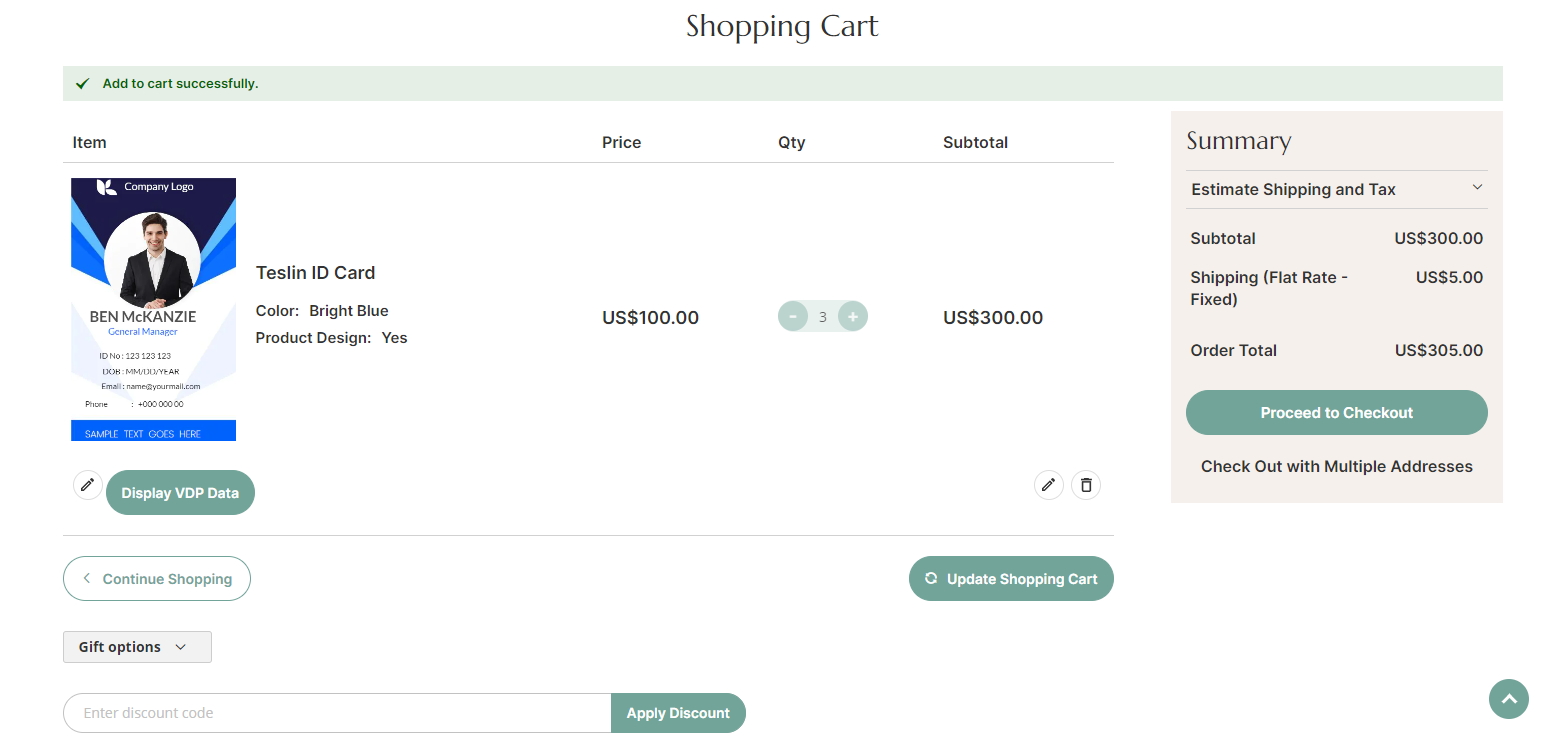
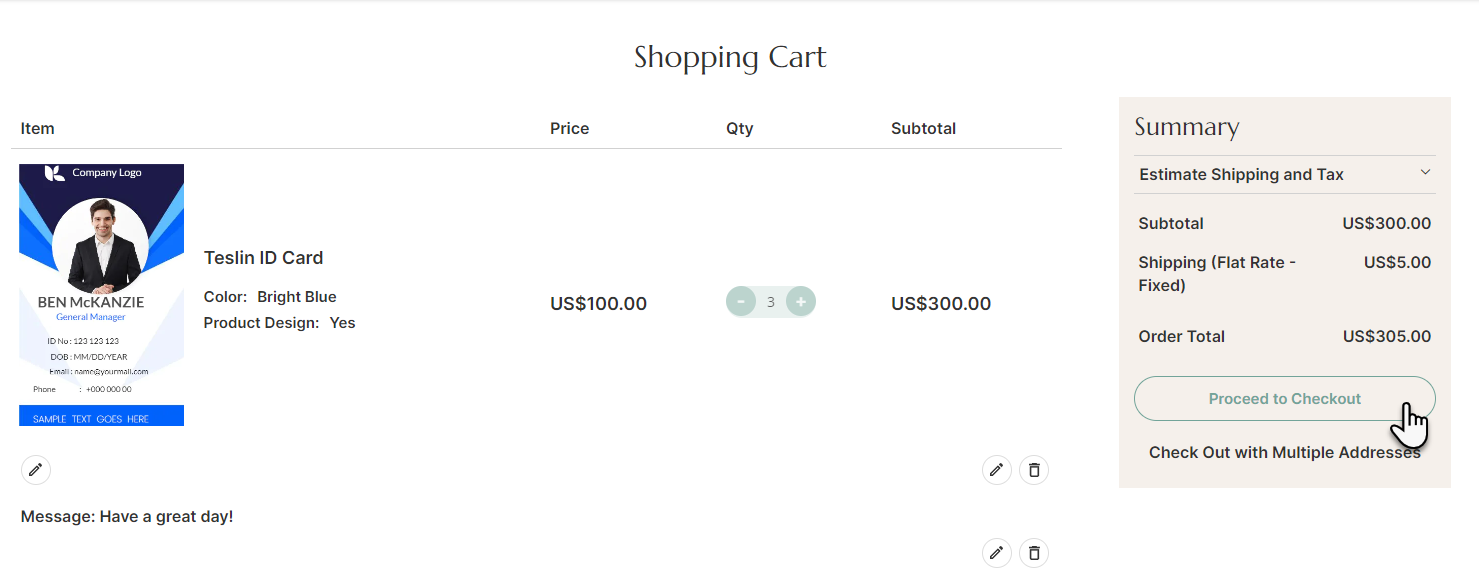
In the Shopping Cart page, a Price Summary of the order along with the Price, Quantity and Subtotal is displayed. [2]
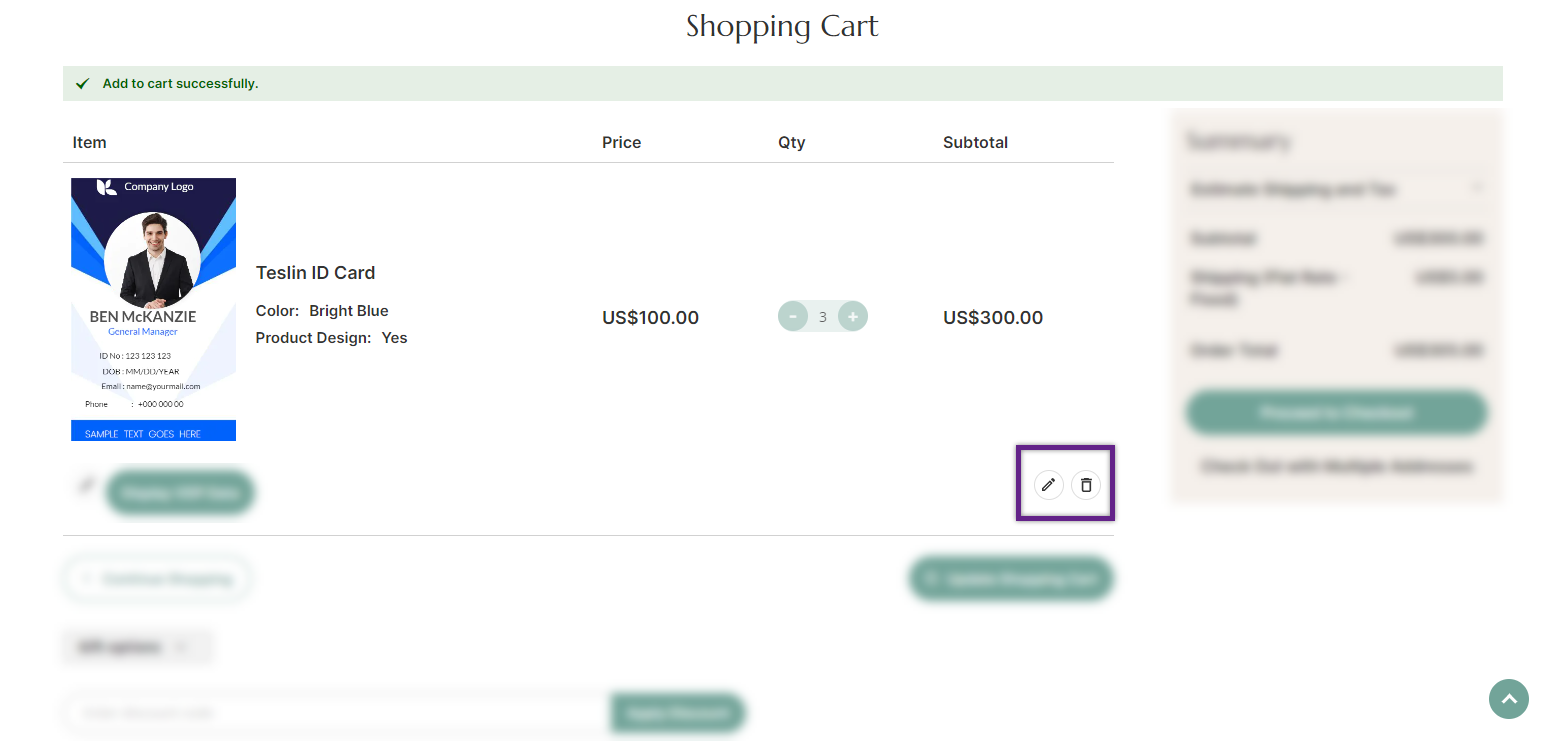
The Edit icon redirects your customers to the Designer Tool page and the Delete icon will remove the items. [3]
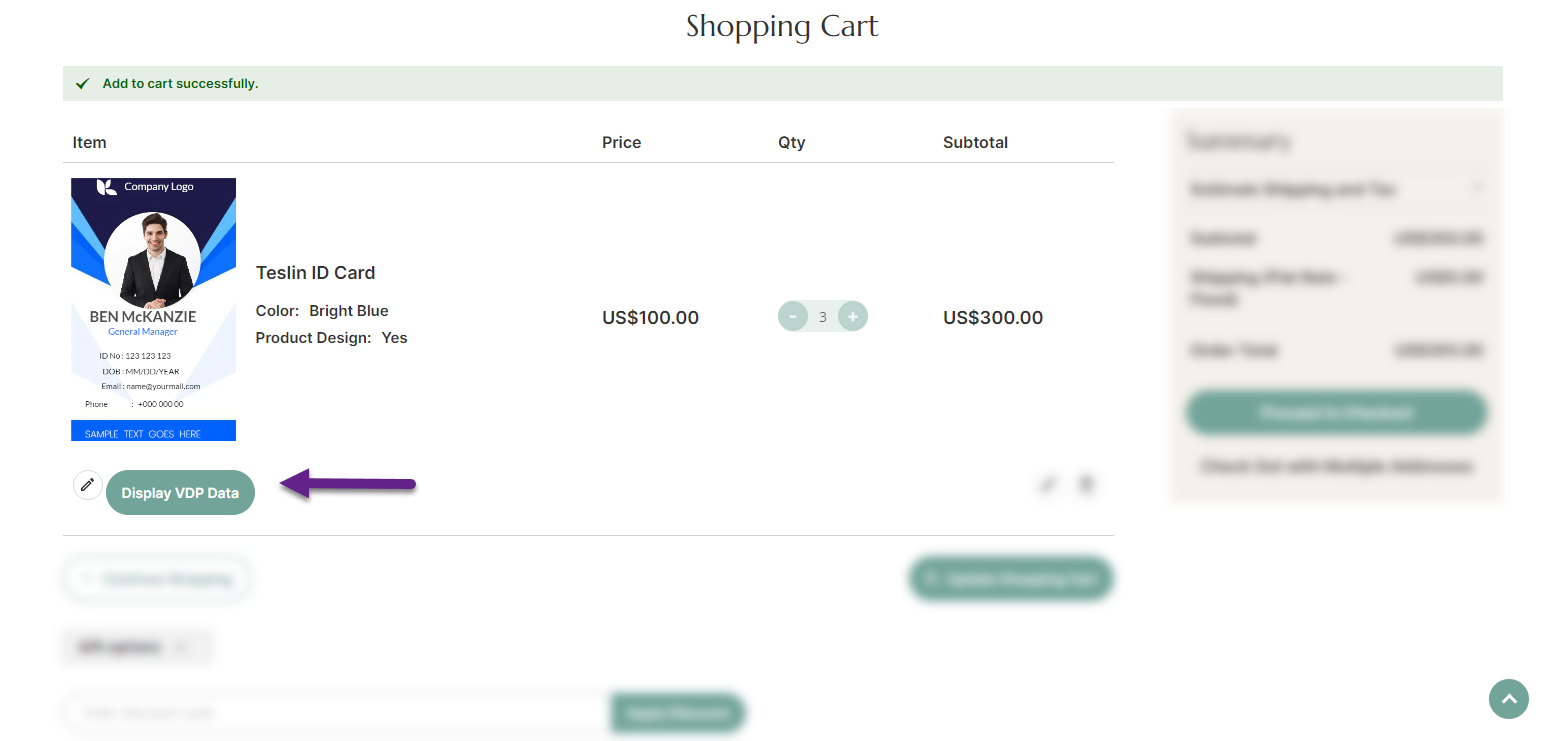
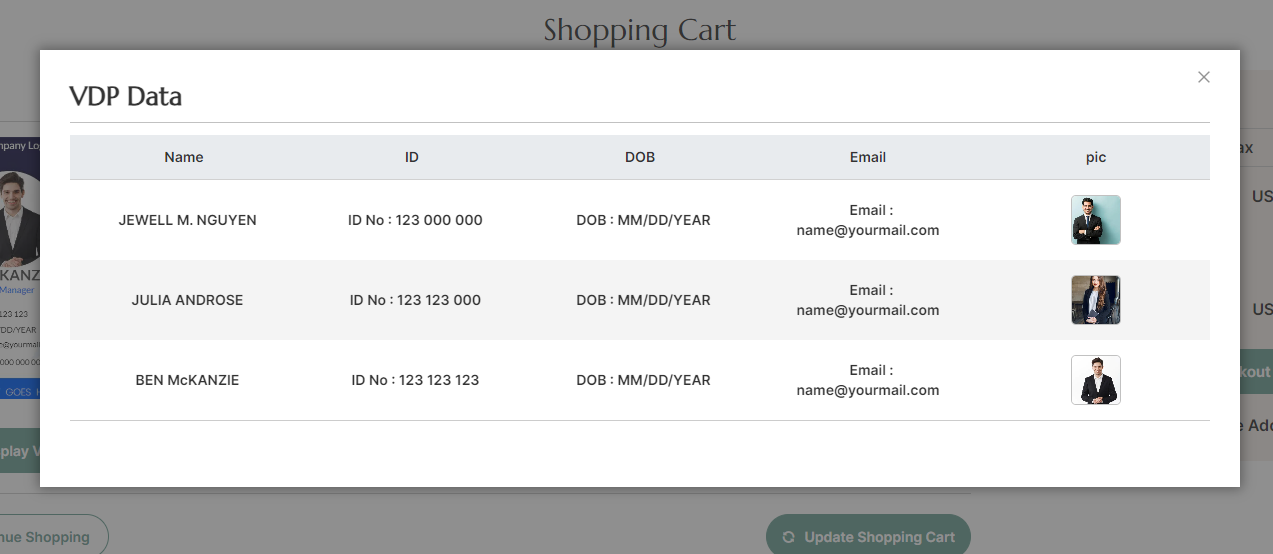
The Display VDP Data button opens a pop-up that displays the details of the entered records. [4] [5]
Now, to proceed with the checkout process click on the Proceed to Checkout button. [6]
Shipping Address
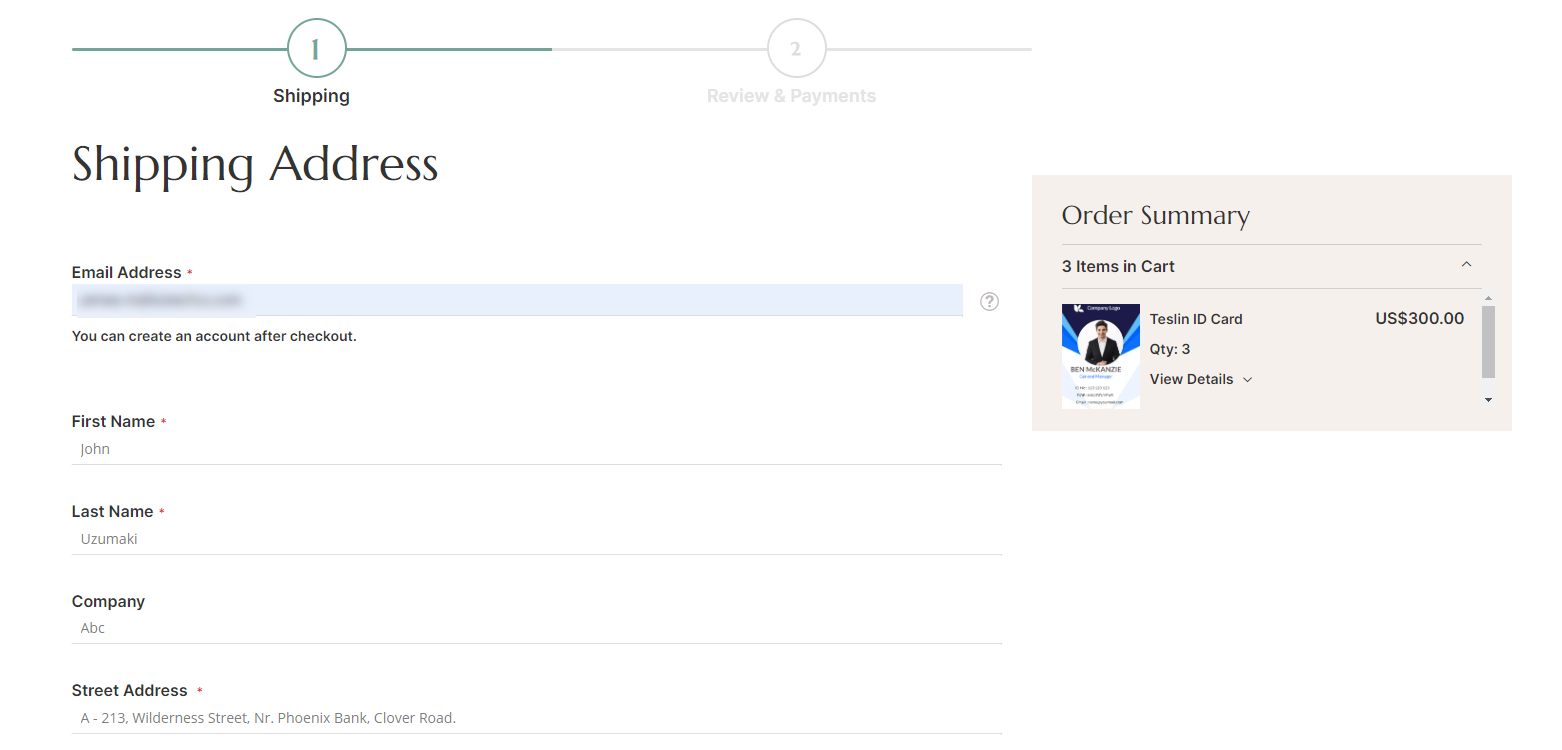
Your customers will now land on the Shipping Address page where your customers have to enter the name and address as to where the shipment has to be delivered. [7]
Shipping Method
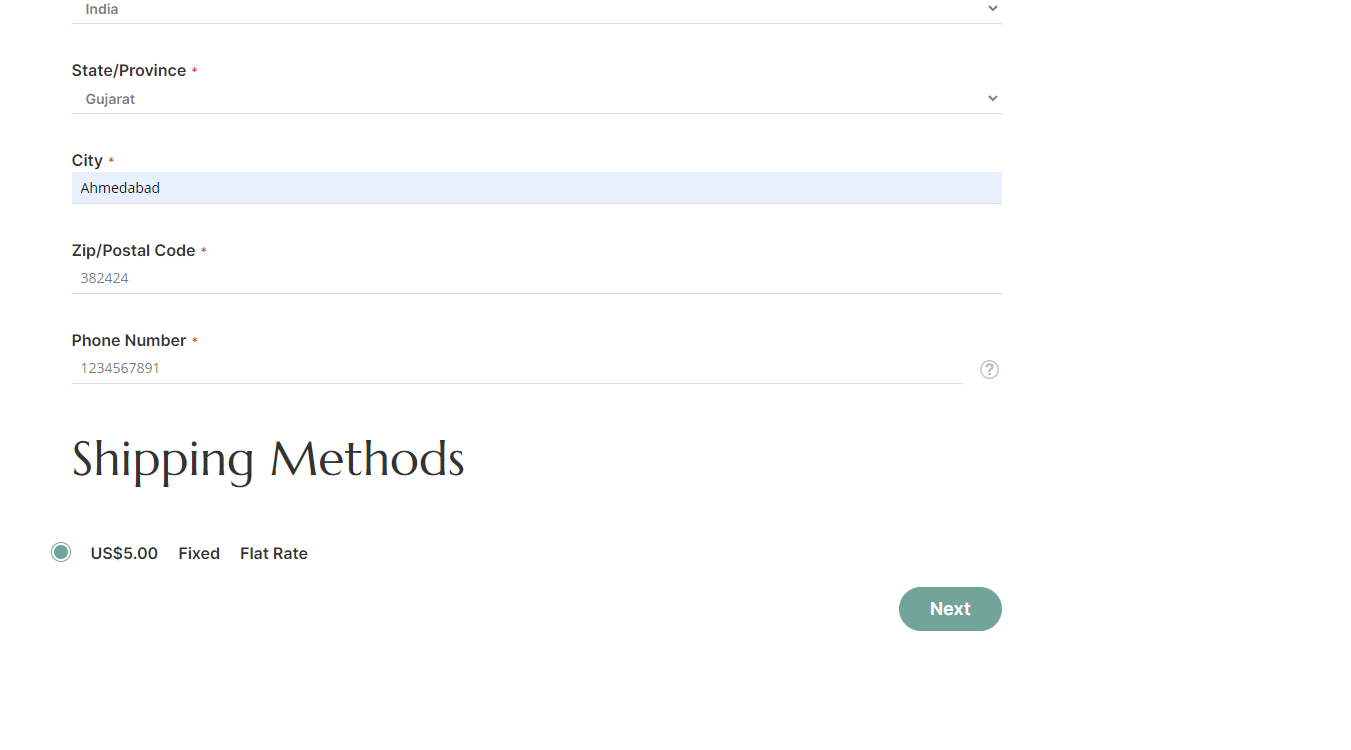
Once the shipping address is entered your customer has to select the shipping method and then click on Next in order to proceed further. [8]
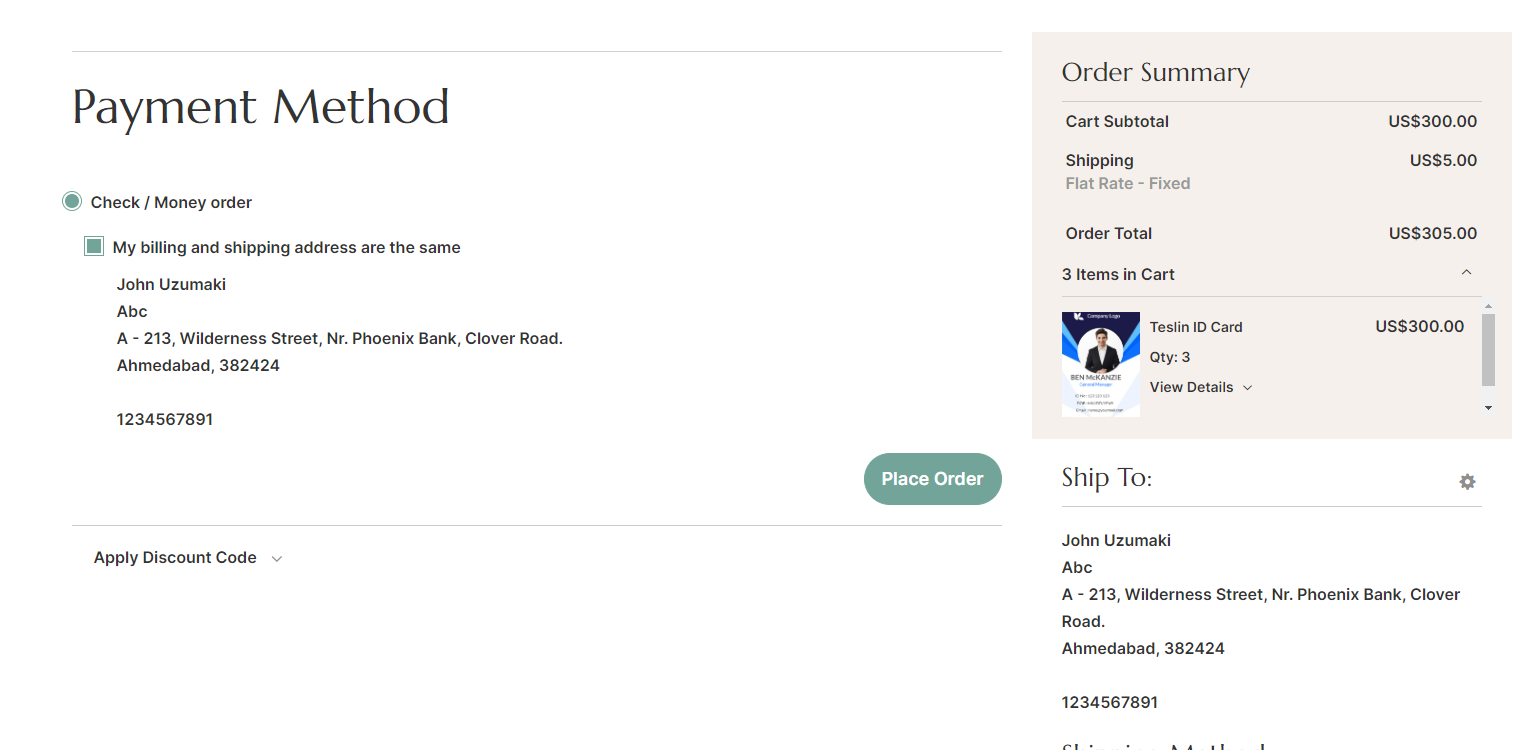
By clicking on Next your customer will land on the summary page where details like Shipping Address, Order Summary and Payment Method will be displayed. After confirming the information click on Place Order. [9]
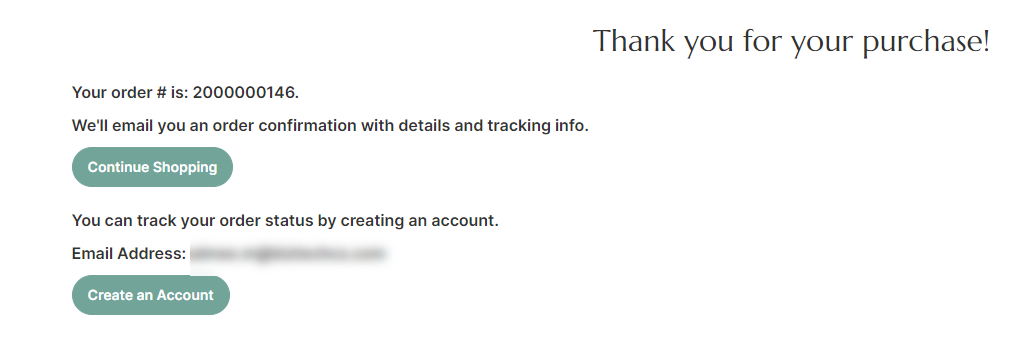
Once the order is placed a Thank You page message will be displayed along with the Order ID. [10]
Responsive
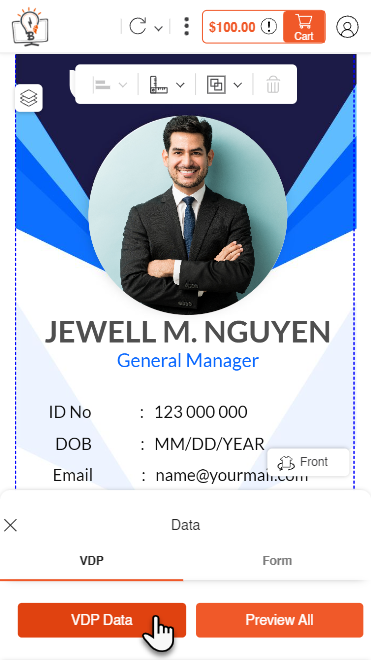
In Responsive, open the card product and navigate to the Data section. [1]
From the VDP Data button displayed in the VDP section in Data your customer will be able to add records. [2]
VDP Button
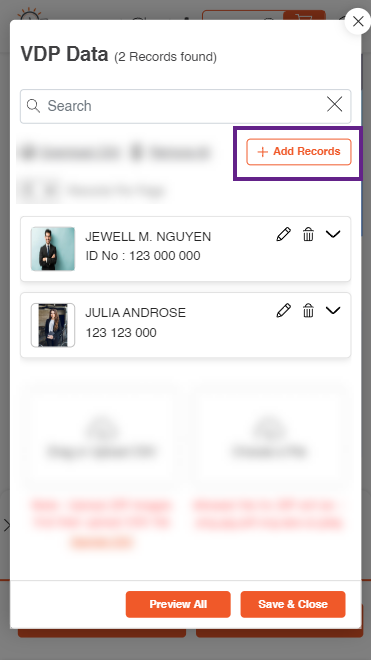
By clicking on the button a VDP Data pop up will appear.
ADD RECORDS
The Add Records button in the pop-up will let you add more records. [3]
DOWNLOAD CSV and REMOVE ALL
Once you enter all the details, you can even download these records by clicking on the Download CSV button. Also remove all the records by clicking on the Remove All button. [4]
EDIT and DELETE RECORDS
Your customers can edit the details of each entry by clicking on the Edit icon. Deletion of the entries can be done by clicking on the Delete icon. [5]
CSV and ZIP FILE
Now in order to upload a CSV file where all the details of the entries are present, click on the Drag or Upload CSV. If needed a sample CSV file can be downloaded by clicking on the Sample CSV. [6]
Note : Zip file should be uploaded before uploading CSV file.
Note : Those file types that are mentioned can only be uploaded.
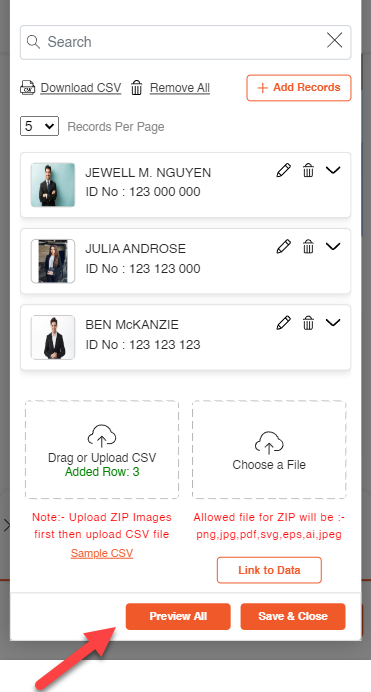
Once the CSV file is uploaded, the records will be entered as per the data in the CSV file along with the images in the ZIP file. You need to link the images once they are uploaded, you can do it by clicking on the Link to Data button. [7]
PREVIEW ALL
Preview All button provides your customer with the view of the way the ID Cards would look like with all the entered data. [8][9]
Now in order to save the records click on Save & Close. [10]
Your customers can also view the ID cards as per the records they have entered by clicking on the Preview All button beside the VDP data. [11]
Add To Cart
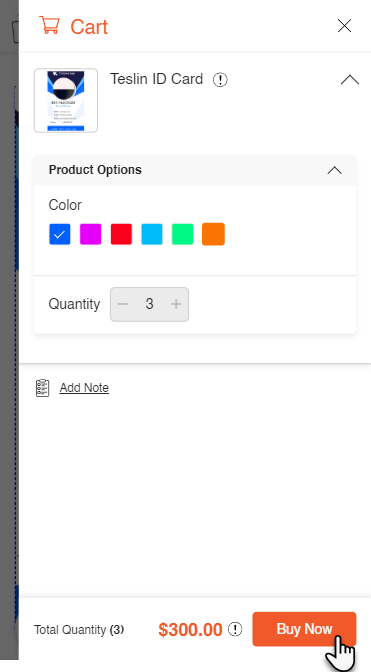
Once configurations are done, click on the Buy Now in Add To Cart to proceed further with the order. In the Add to Cart tab all the details of the product such as the Color and Quantity will be displayed. [1]
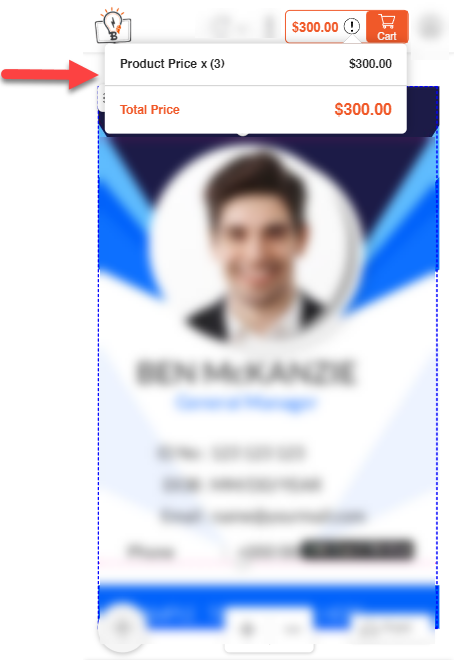
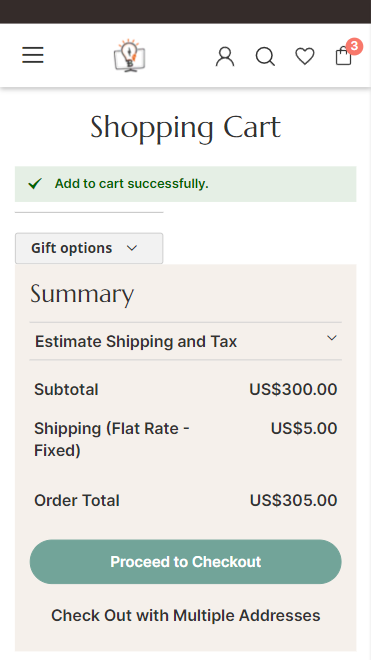
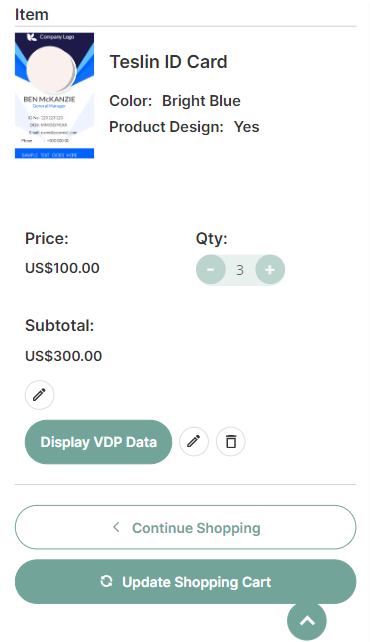
In the Shopping Cart page, a Price Summary of the order along with the Price, Quantity and Subtotal is displayed. [2][3]
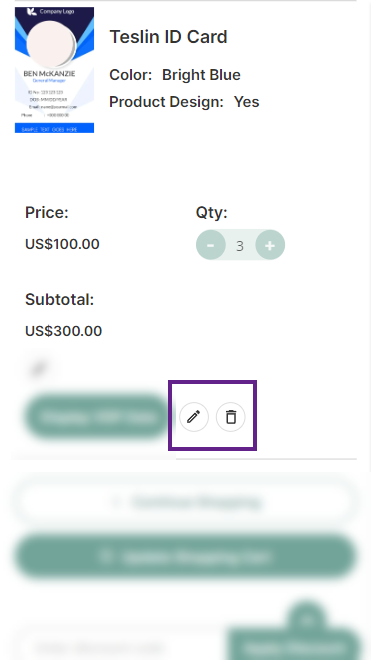
The Edit icon redirects your customers to the Designer Tool page and the Delete icon will remove the items. [4]
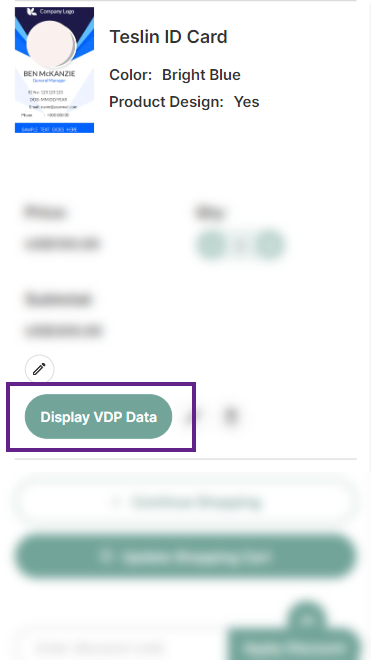
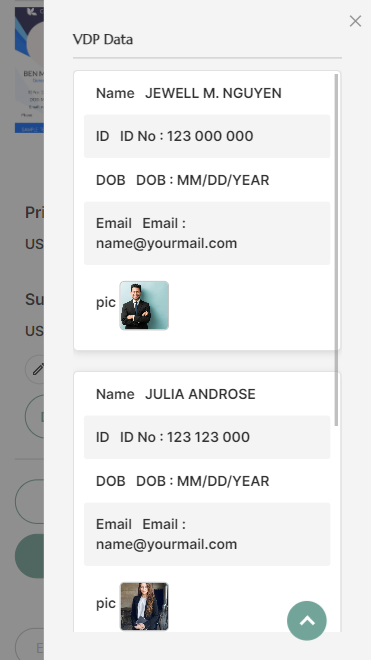
The Display VDP Data button opens a pop-up that displays the details of the entered records. [5][6]
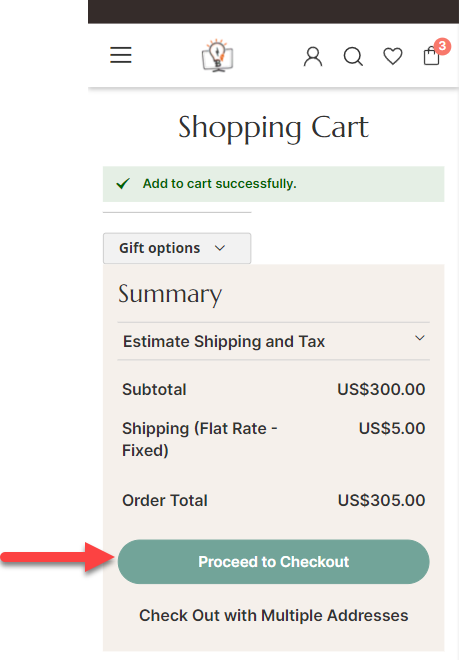
Now, to proceed with the checkout process click on the Proceed to Checkout button. [7]
Shipping Address
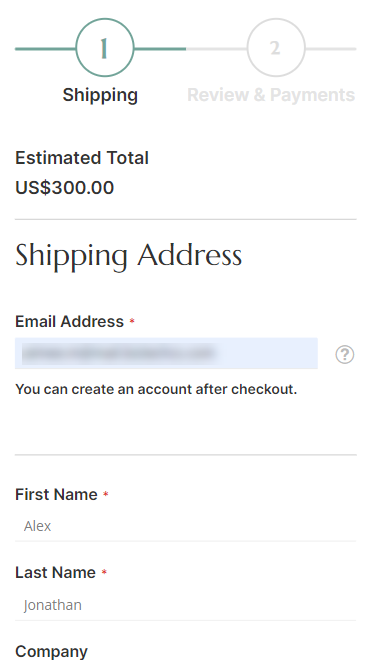
Your customers will now land on the Shipping Address page where they have to enter the name and address as to where the shipment has to be delivered. [8]
Shipping Method
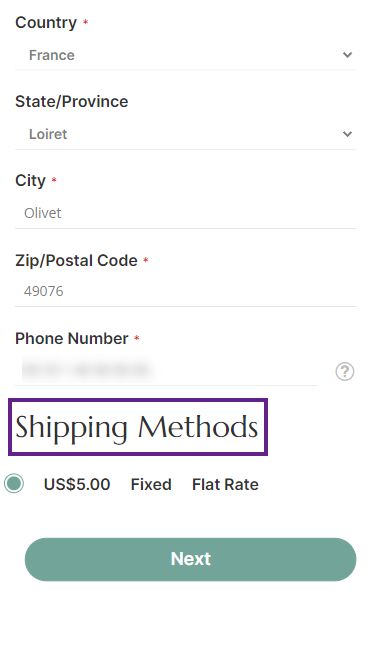
Once the shipping address is entered your customer has to select the shipping method and then click on Next in order to proceed further. [9]
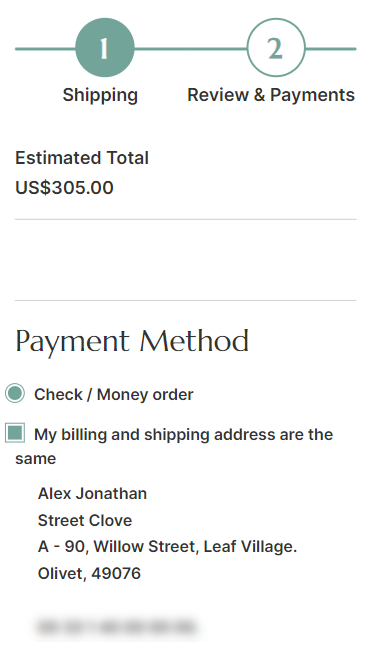
By clicking on Next your customer will land on the summary page where details like Shipping Address, Order Summary and Payment Method will be displayed. [10]
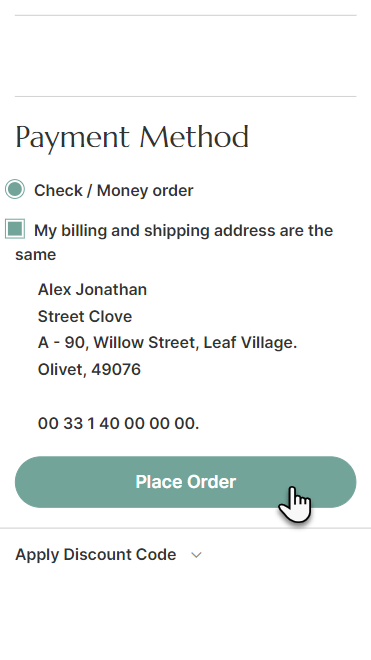
After confirming the information click on Place Order. [11]
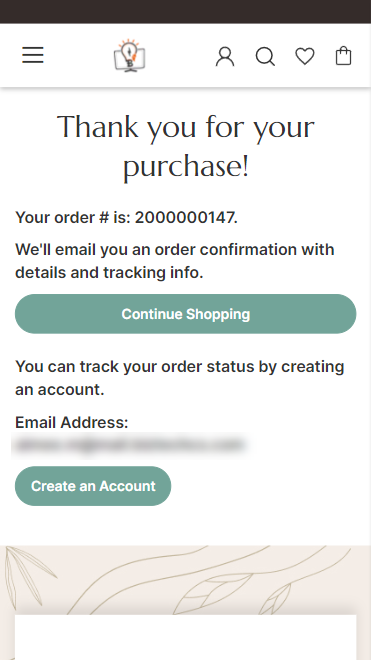
Once the order is placed a Thank You page message will be displayed along with the Order ID. [12]
Backend
To view the orders that have been placed you have to login to the Backend and then navigate to Sales -> Orders. [1]
A list of all the orders will be displayed on the page that you will land on. To view all the details of the order click on View in the Action column. [2]
Once you click on View, you will be directed to a page where you can Download Order, Cancel Order and perform such actions. Also you can view Information, Invoices, Credit Memos, Shipments and Comments History. [3]
VDP Feature With Different Locks
PrintXpand product designer tool also comes with various locks like Position, Edit, and Property Lock. Edit lock restricts the customer to edit and delete the element. Position lock restricts the customers to change the position of the element. Property Lock restricts your customers to change the properties of an element like color and opacity. [1]
With Edit Lock
If the edit lock has been applied on any element like company’s logo, then the respective filed will not be available as a VDP field. [2]
Before Edit Lock
Before Edit Lock Company Field is available in the VDP Fields panel. [3]
After Edit Lock
After Edit Lock Company Field is not available in the VDP Fields panel. [4]
With Position Lock
If the Position Lock has been applied on any element like the company’s logo [5], then your customers won’t be able to change the position of an element on the front end. [6]
With Property Lock
If the Property Lock has been applied on any element like the company’s logo, then your customers won’t be able to change the property of an element on the front end. [7]
Other Element
An element without the Property Lock will have the properties panel above. [8]
Element With Property Lock
An element with the Property Lock won’t have the properties panel above. [9]
Now, Save the product template.
![[1] Manage Layouts](https://docs.printxpand.com/wp-content/uploads/2022/01/image001.png)
![[2] Enable VDP Feature](https://docs.printxpand.com/wp-content/uploads/2022/01/image003.png)
![[1] Design Template](https://docs.printxpand.com/wp-content/uploads/2022/01/image005.png)
![[2] Assign VDP Fields](https://docs.printxpand.com/wp-content/uploads/2022/01/image007.png)





![[1] Multiple Locks](https://docs.printxpand.com/wp-content/uploads/2022/01/image011.png)
![[2] Edit Lock](https://docs.printxpand.com/wp-content/uploads/2022/01/image013.png)
![[3] Before Edit Lock](https://docs.printxpand.com/wp-content/uploads/2022/01/image015.png)
![[4] After Edit Lock](https://docs.printxpand.com/wp-content/uploads/2022/01/image017.png)
![[5] Position Lock](https://docs.printxpand.com/wp-content/uploads/2022/01/image019.png)
![[6] Position Lock Applied](https://docs.printxpand.com/wp-content/uploads/2022/01/image021.png)
![[7] Property Lock](https://docs.printxpand.com/wp-content/uploads/2022/01/image023.png)
![[8] Properties Panel](https://docs.printxpand.com/wp-content/uploads/2022/01/image025.png)
![[9] Element With Property Lock](https://docs.printxpand.com/wp-content/uploads/2022/01/image027.png)